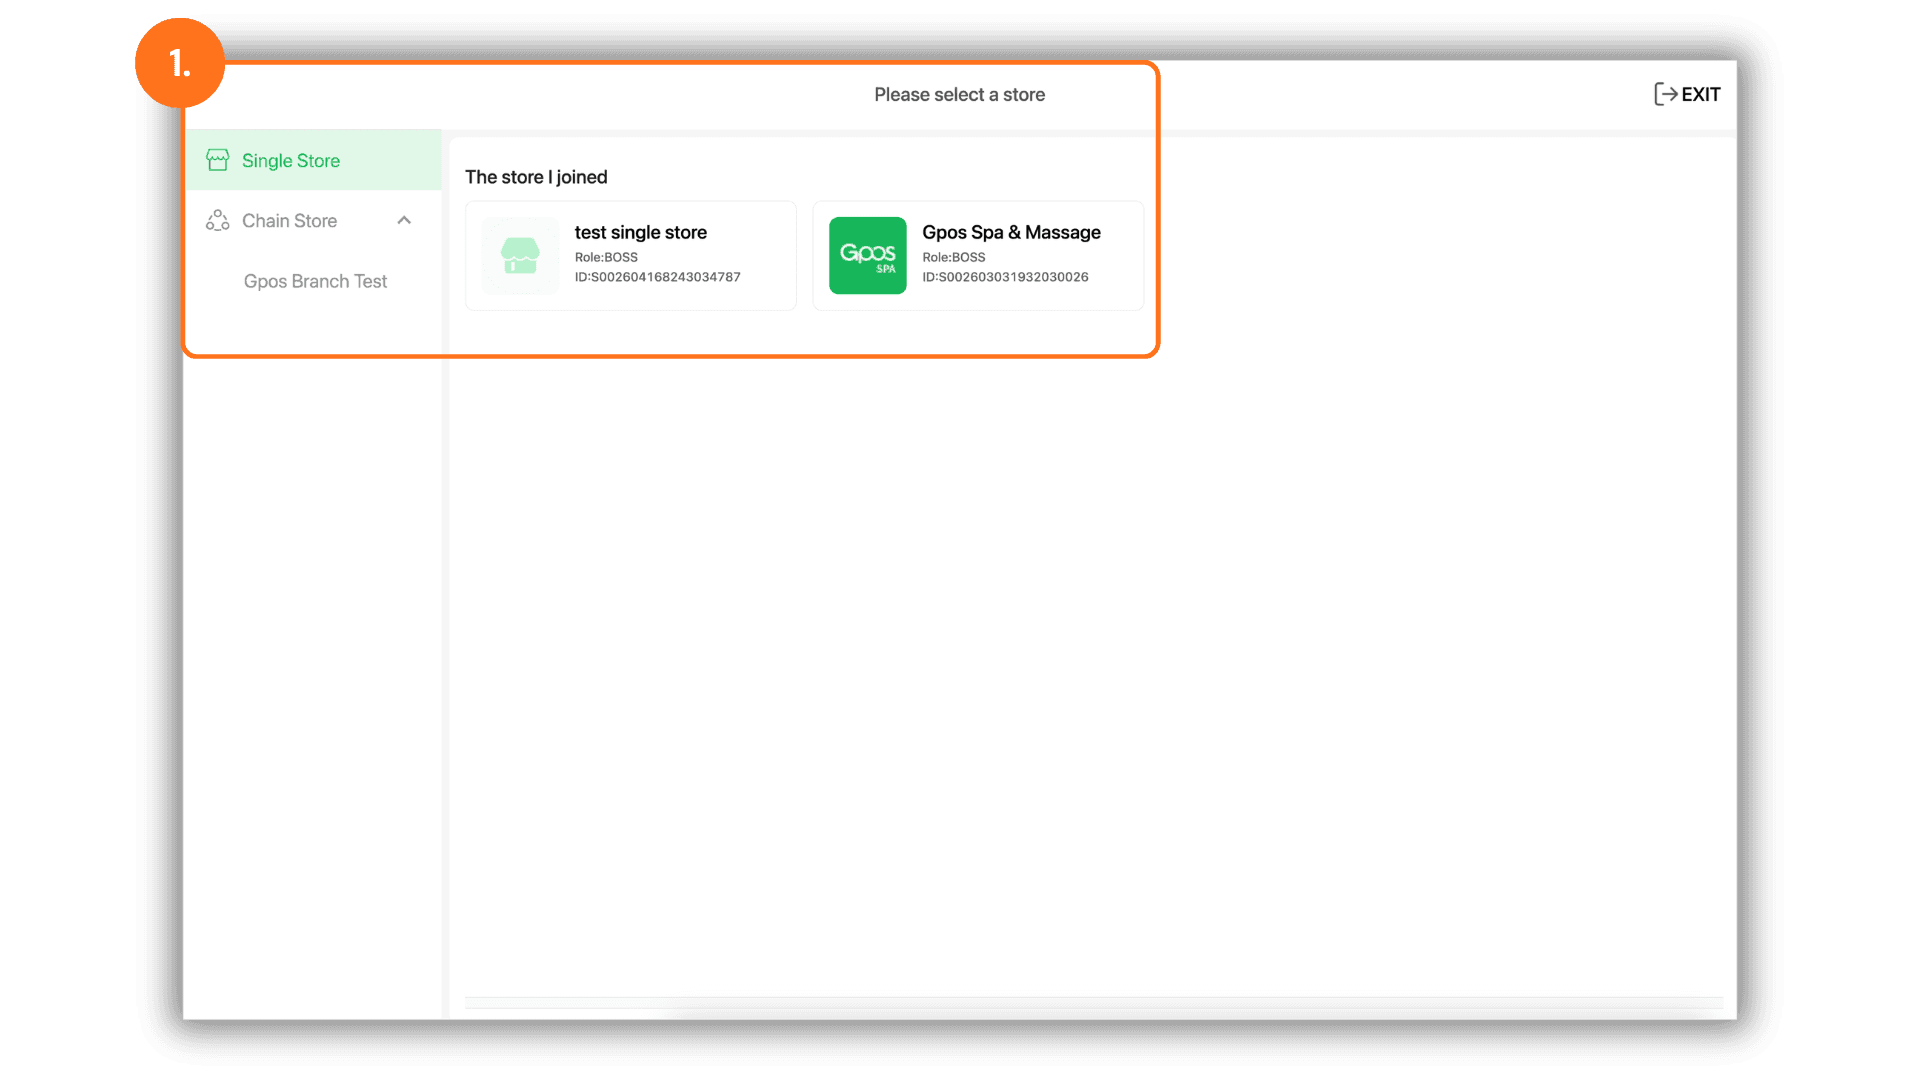
1. Select the store you want to manage
Start by choosing the store or branch you wish to configure under "Please select a store" to access the management interface and device settings for that specific branch.
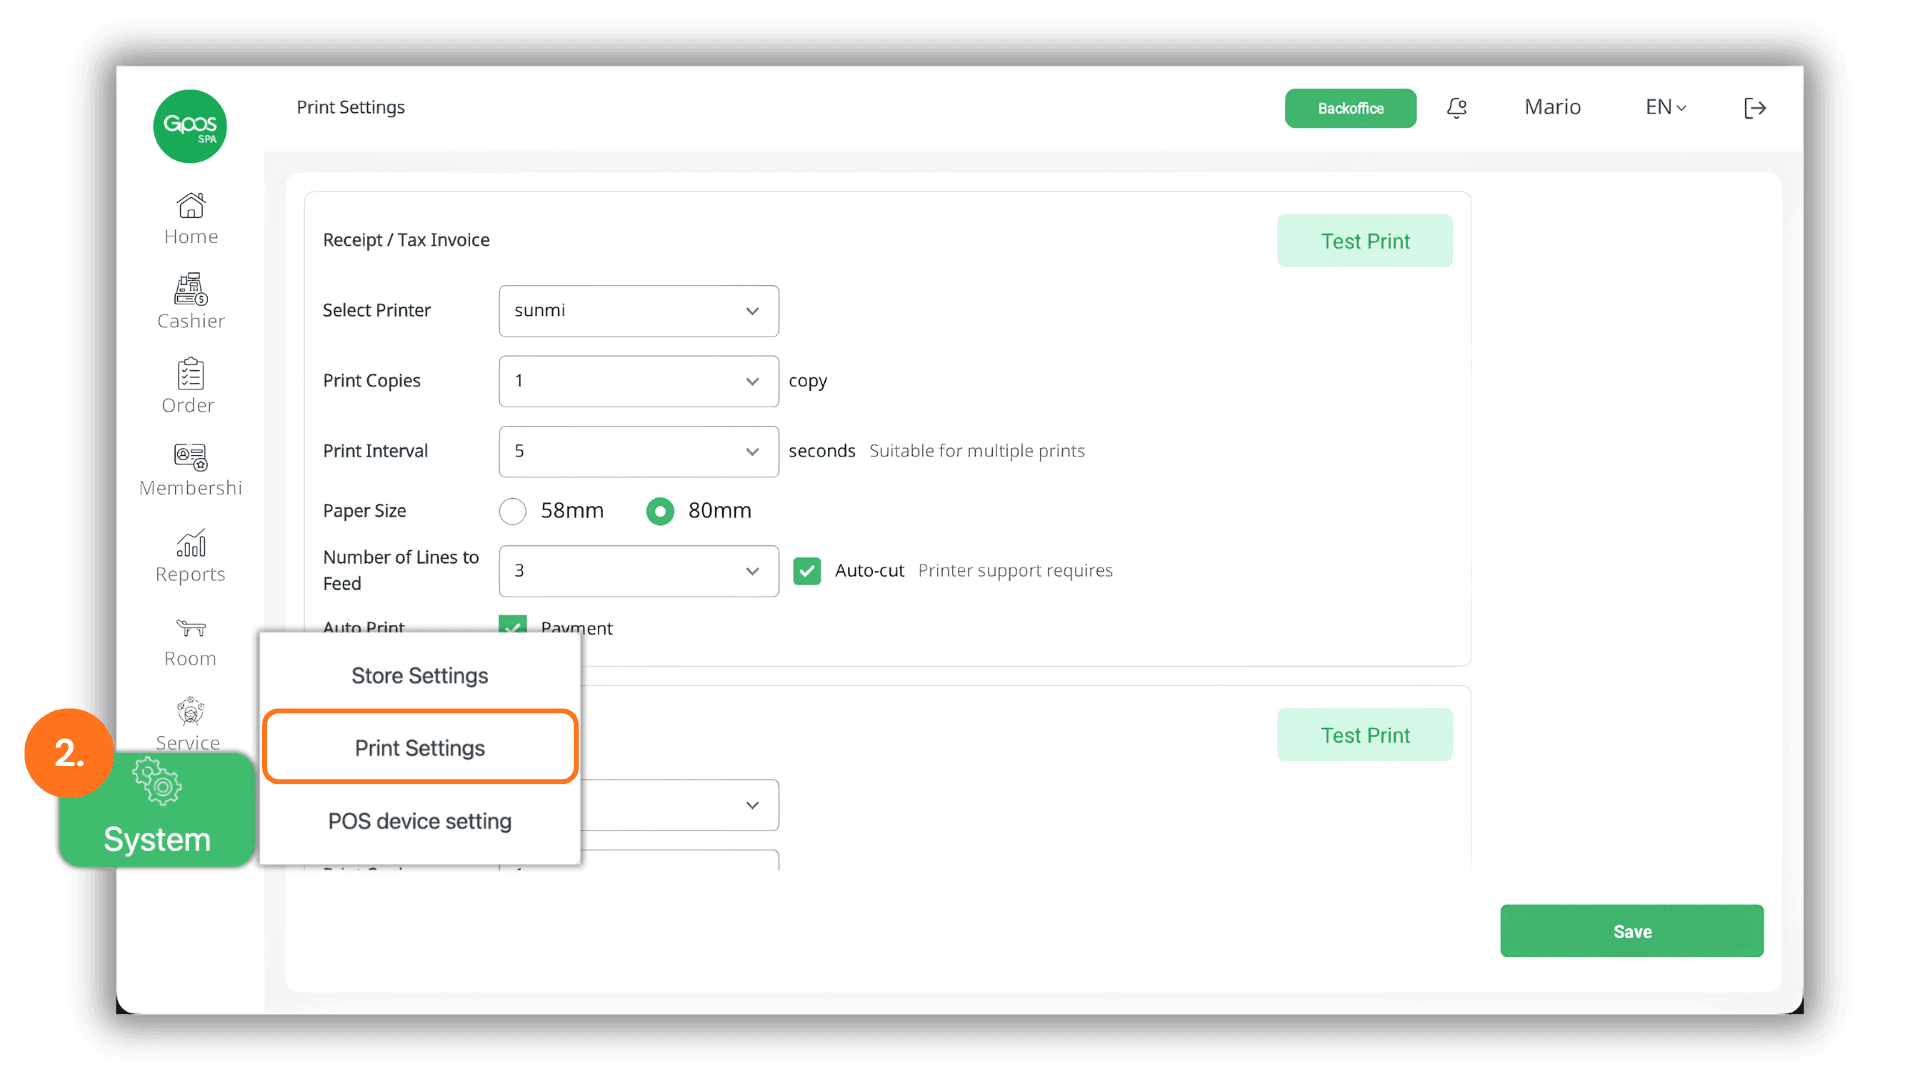
2. Access the Print Settings menu
From the left side navigation menu, click "System", then select the submenu "Print Settings" to enter the printer configuration page.
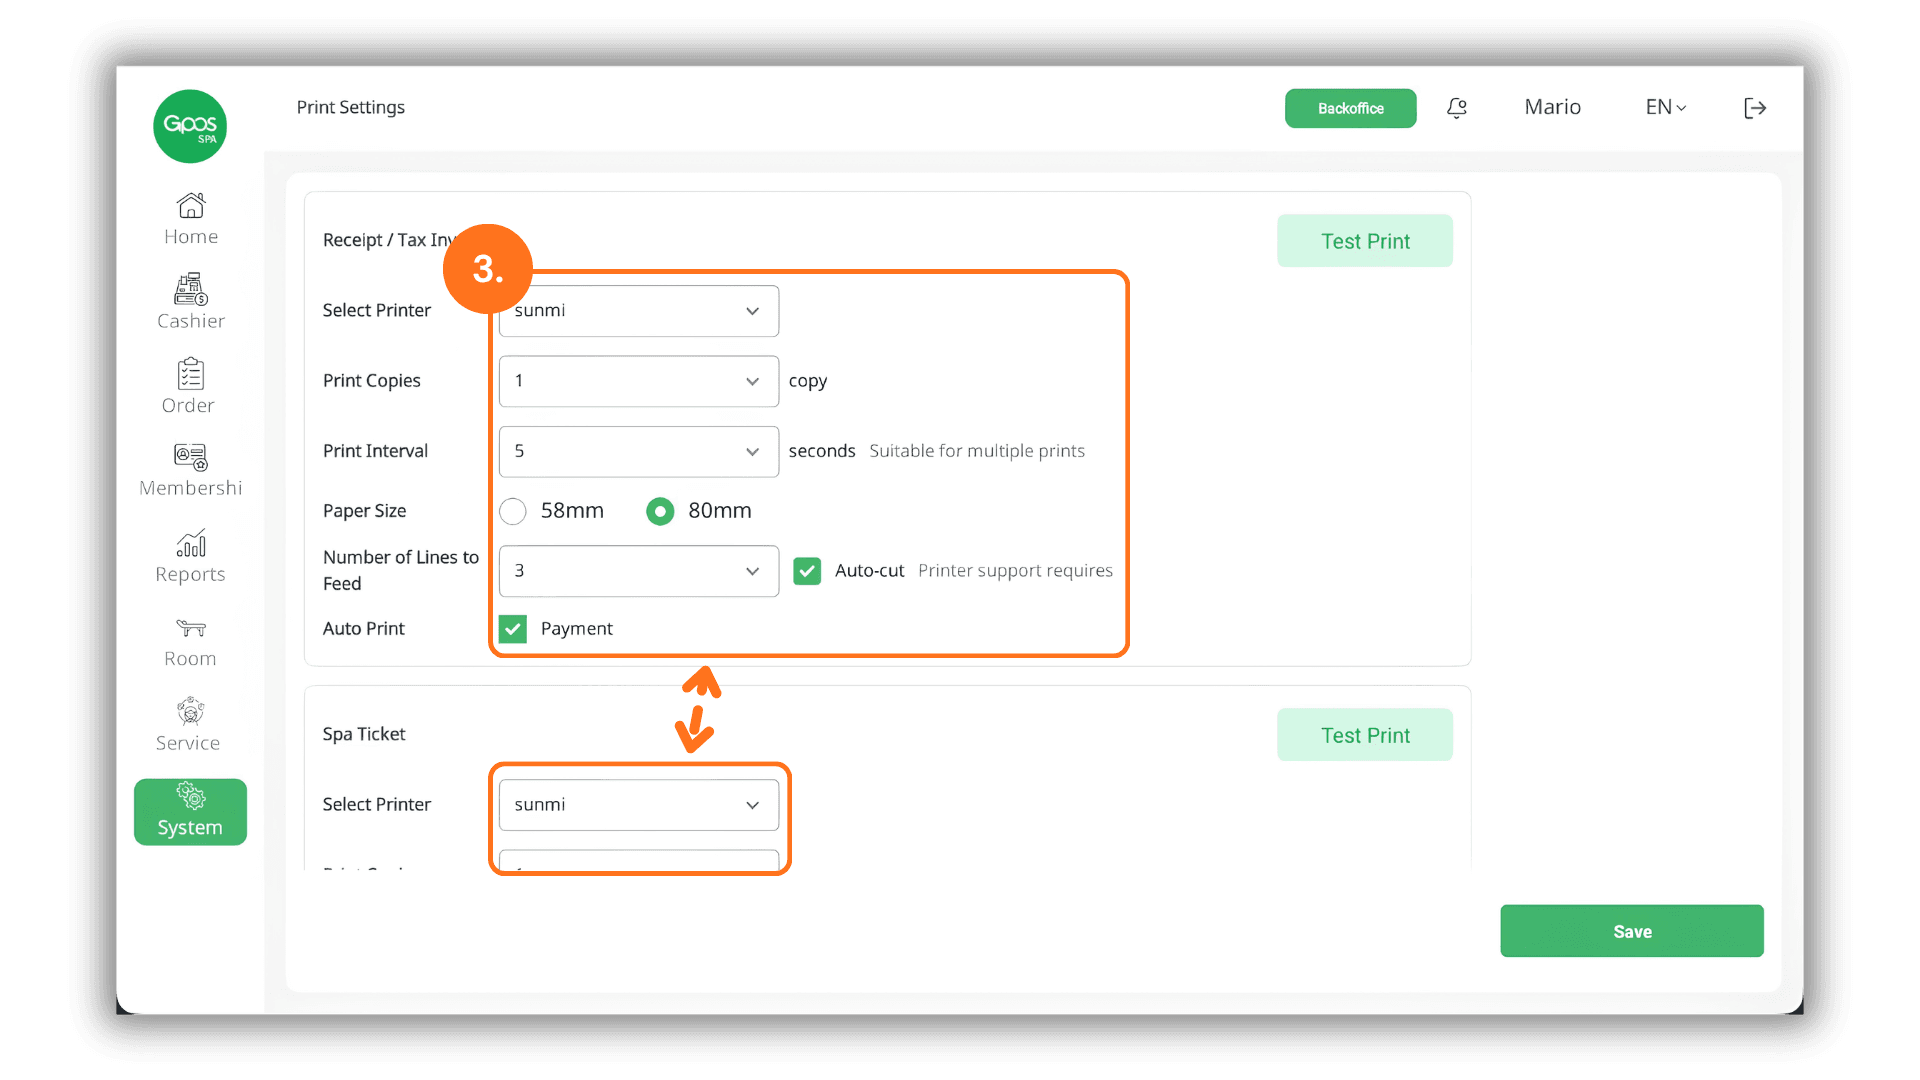
3. Fill out all required printing fields
Configure all printer settings completely for both Receipt / Tax Invoice and Spa Ticket, including:
- Select Printer
- Print Copies
- Print Interval
- Paper Size
- Number of Lines to Feed
- Enable or disable Auto Print
- Enable or disable Auto-cut (Printer support required)
Note: Please ensure all fields are filled out completely, and do not forget to configure the "Spa Ticket" section as well.
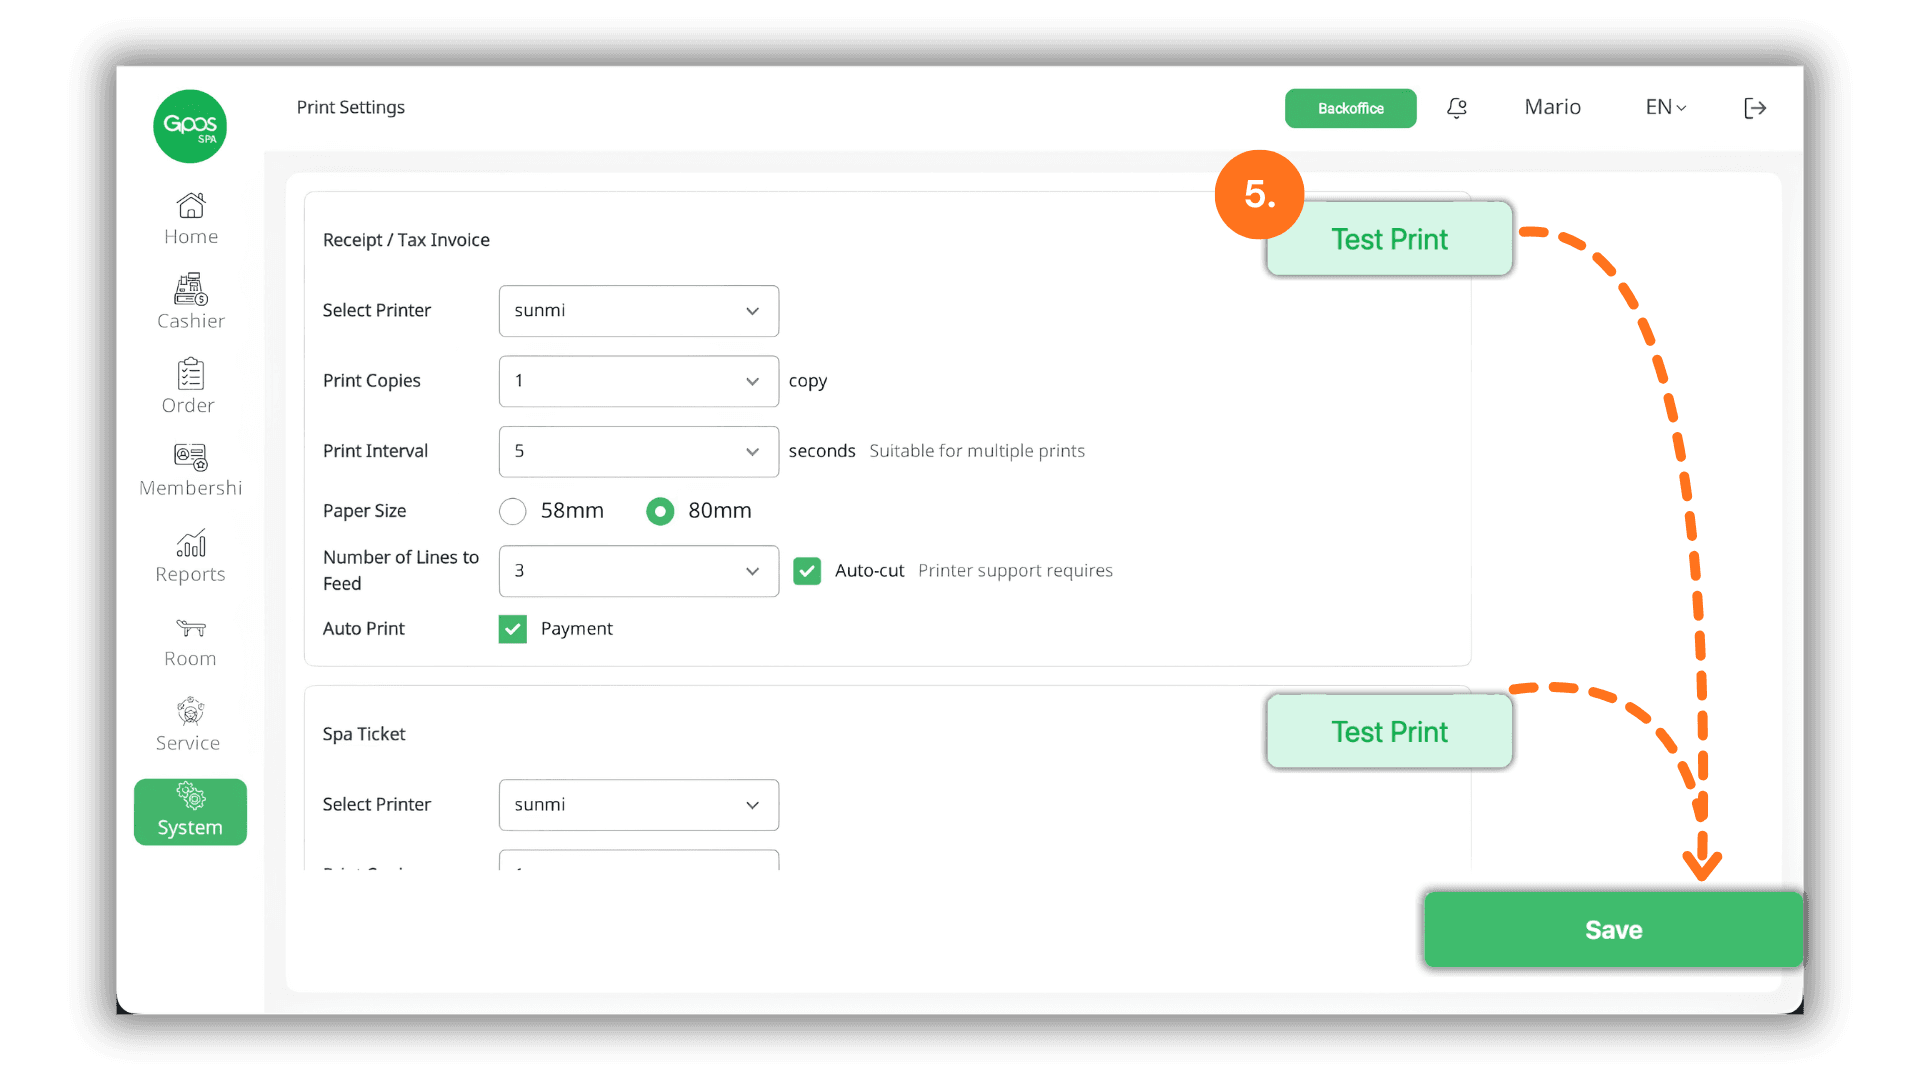
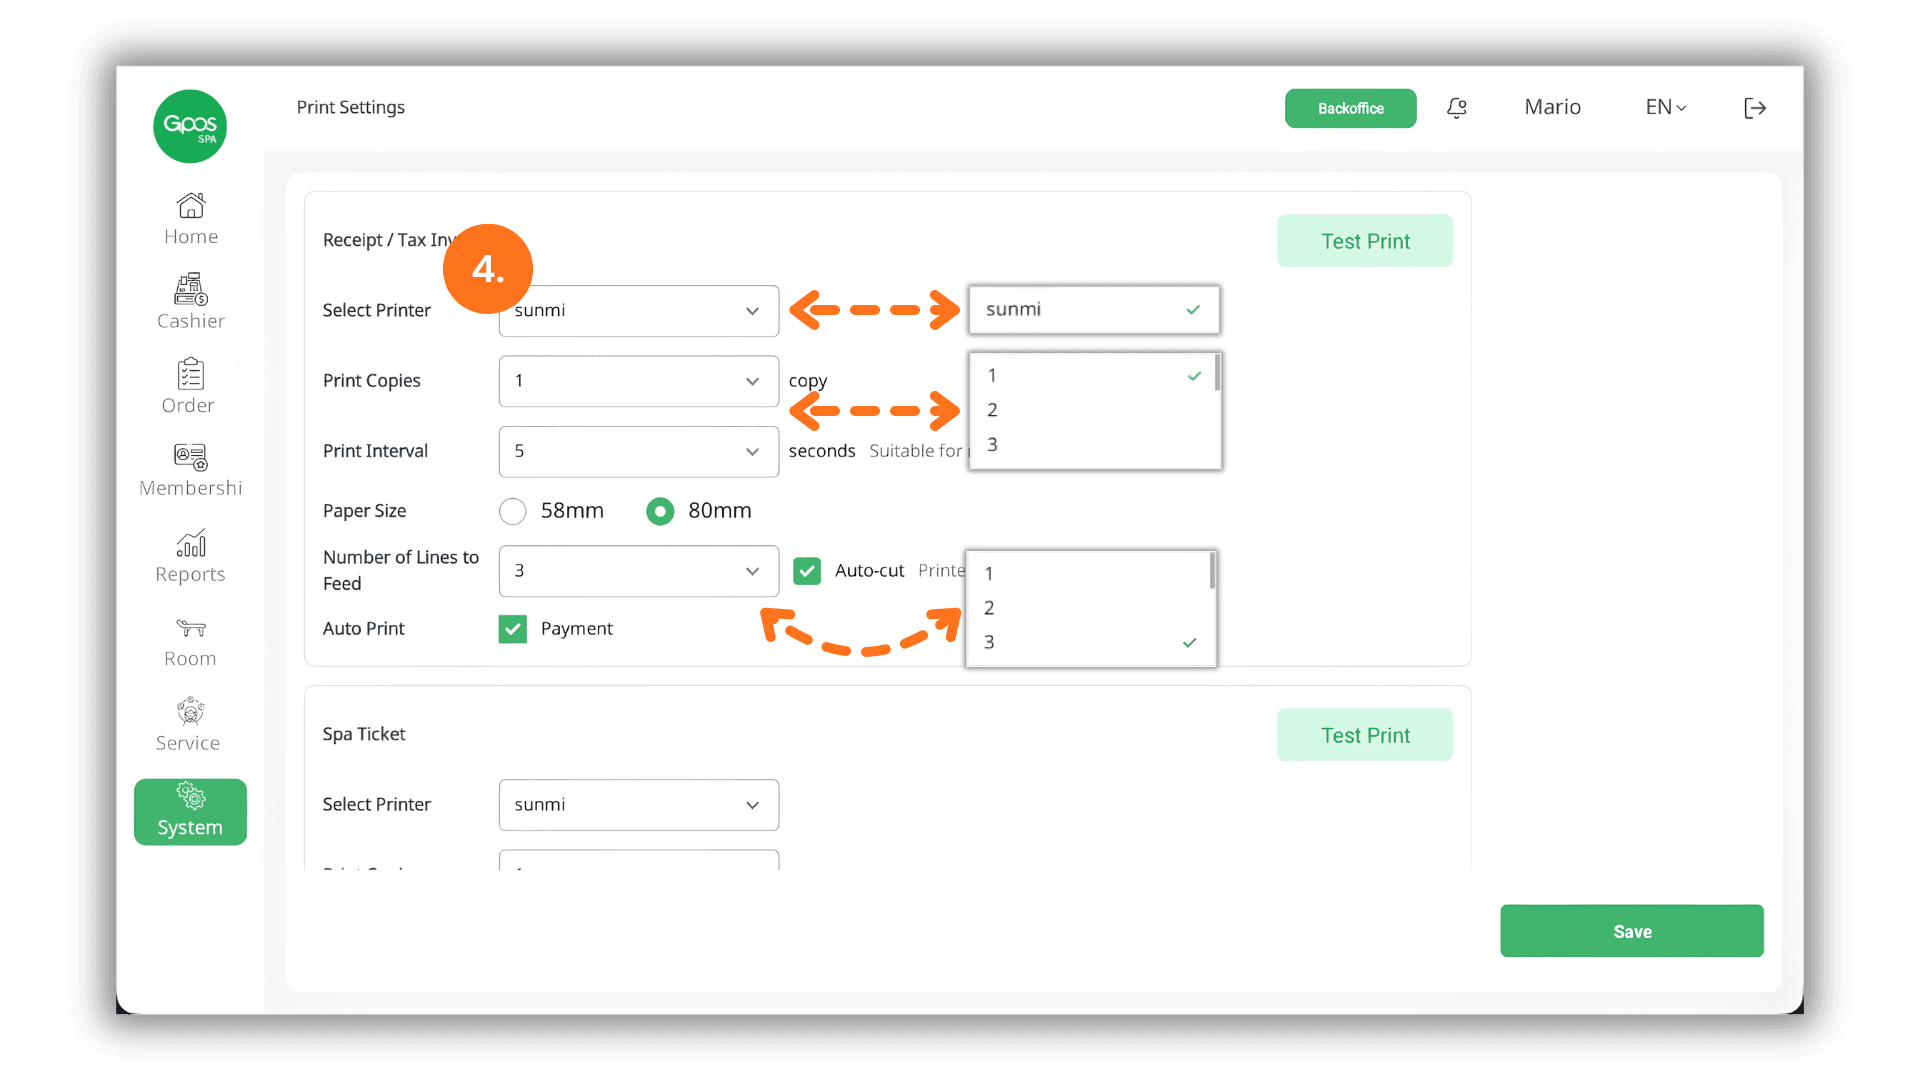
4. Select option values and save initial settings
Choose the desired options from each dropdown list provided by the system. Once selected, click "Save" to store your initial settings.
Note: For POS devices without a built-in printer, the system will display the printer name as Xprinter.
5. Test printing and confirm settings
Click the "Test Print" button to print a sample receipt and verify that the printer is working properly. Once verified and adjusted, click "Save" again to apply the configuration for immediate live use.