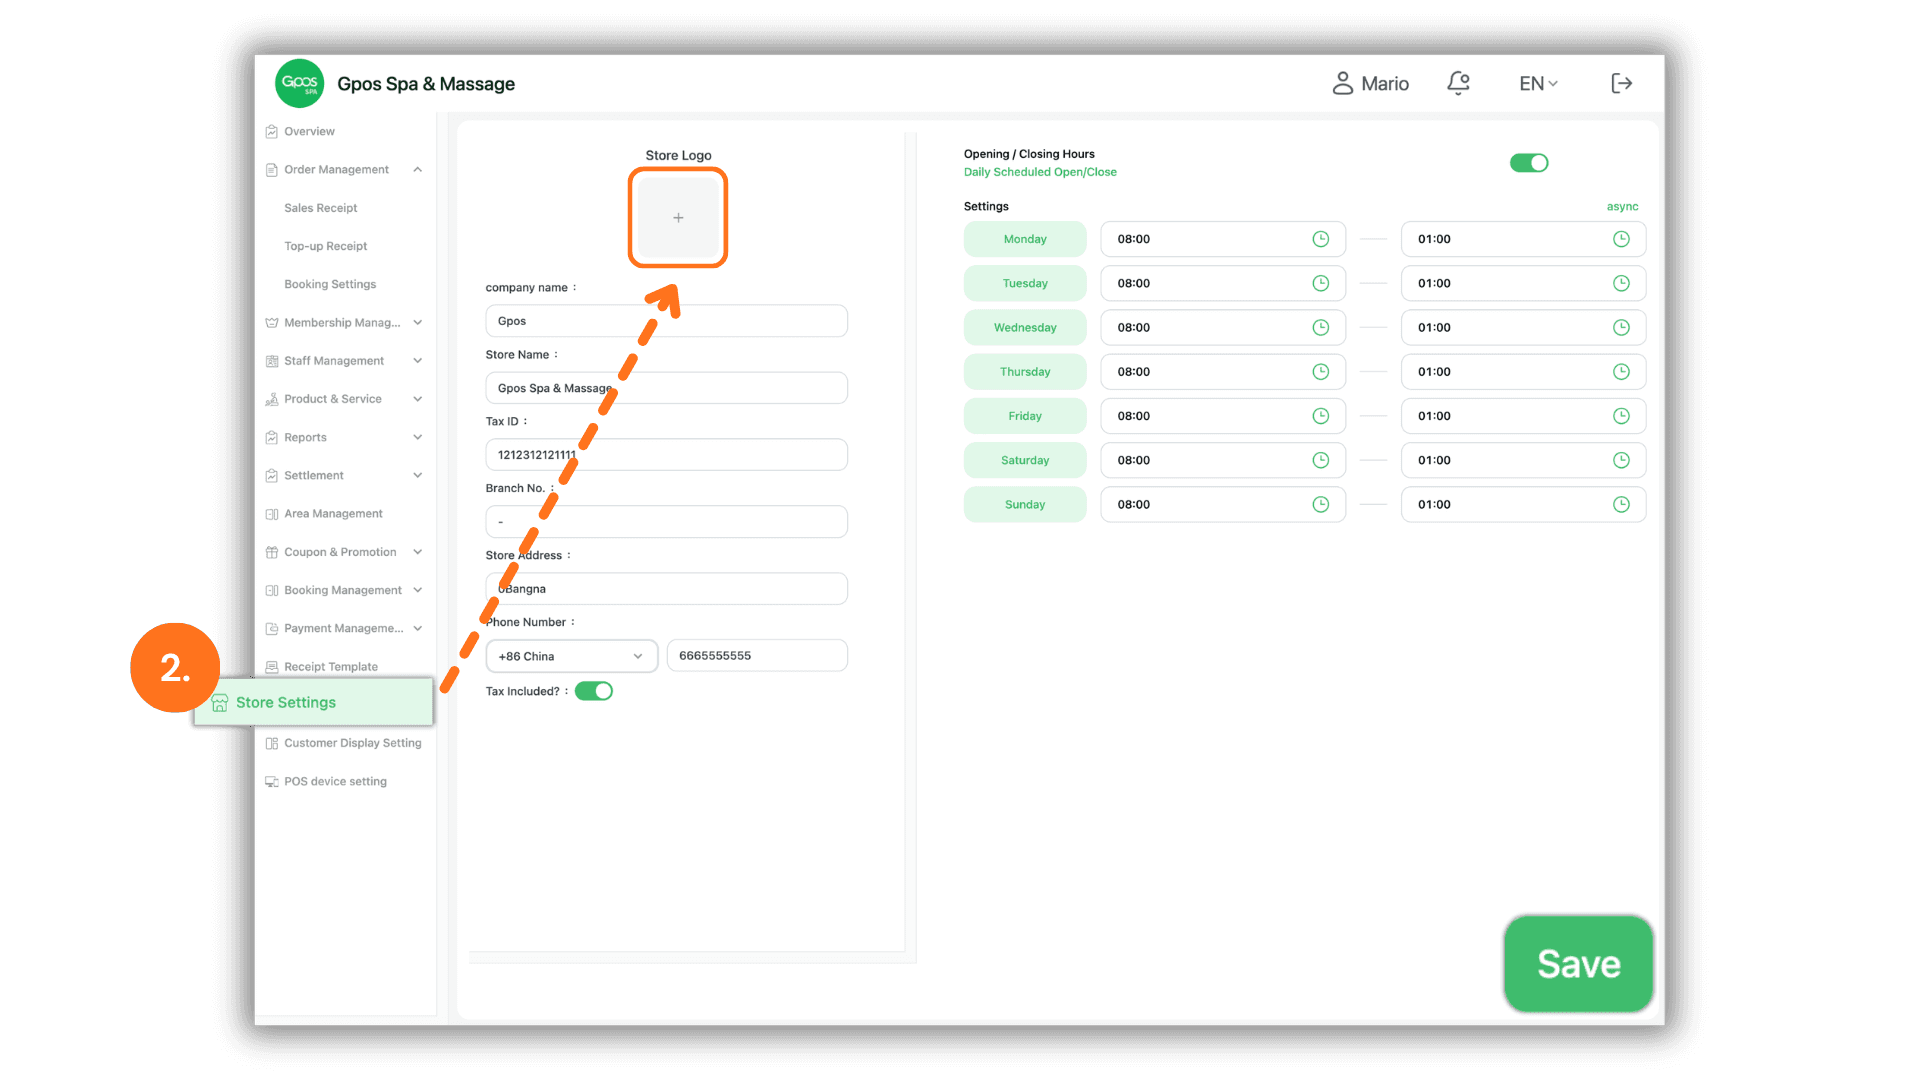
1. Select the Store or Branch for Service
Start by clicking to select the store or branch you wish to manage from the Please select a store page to enter the system for that specific store.
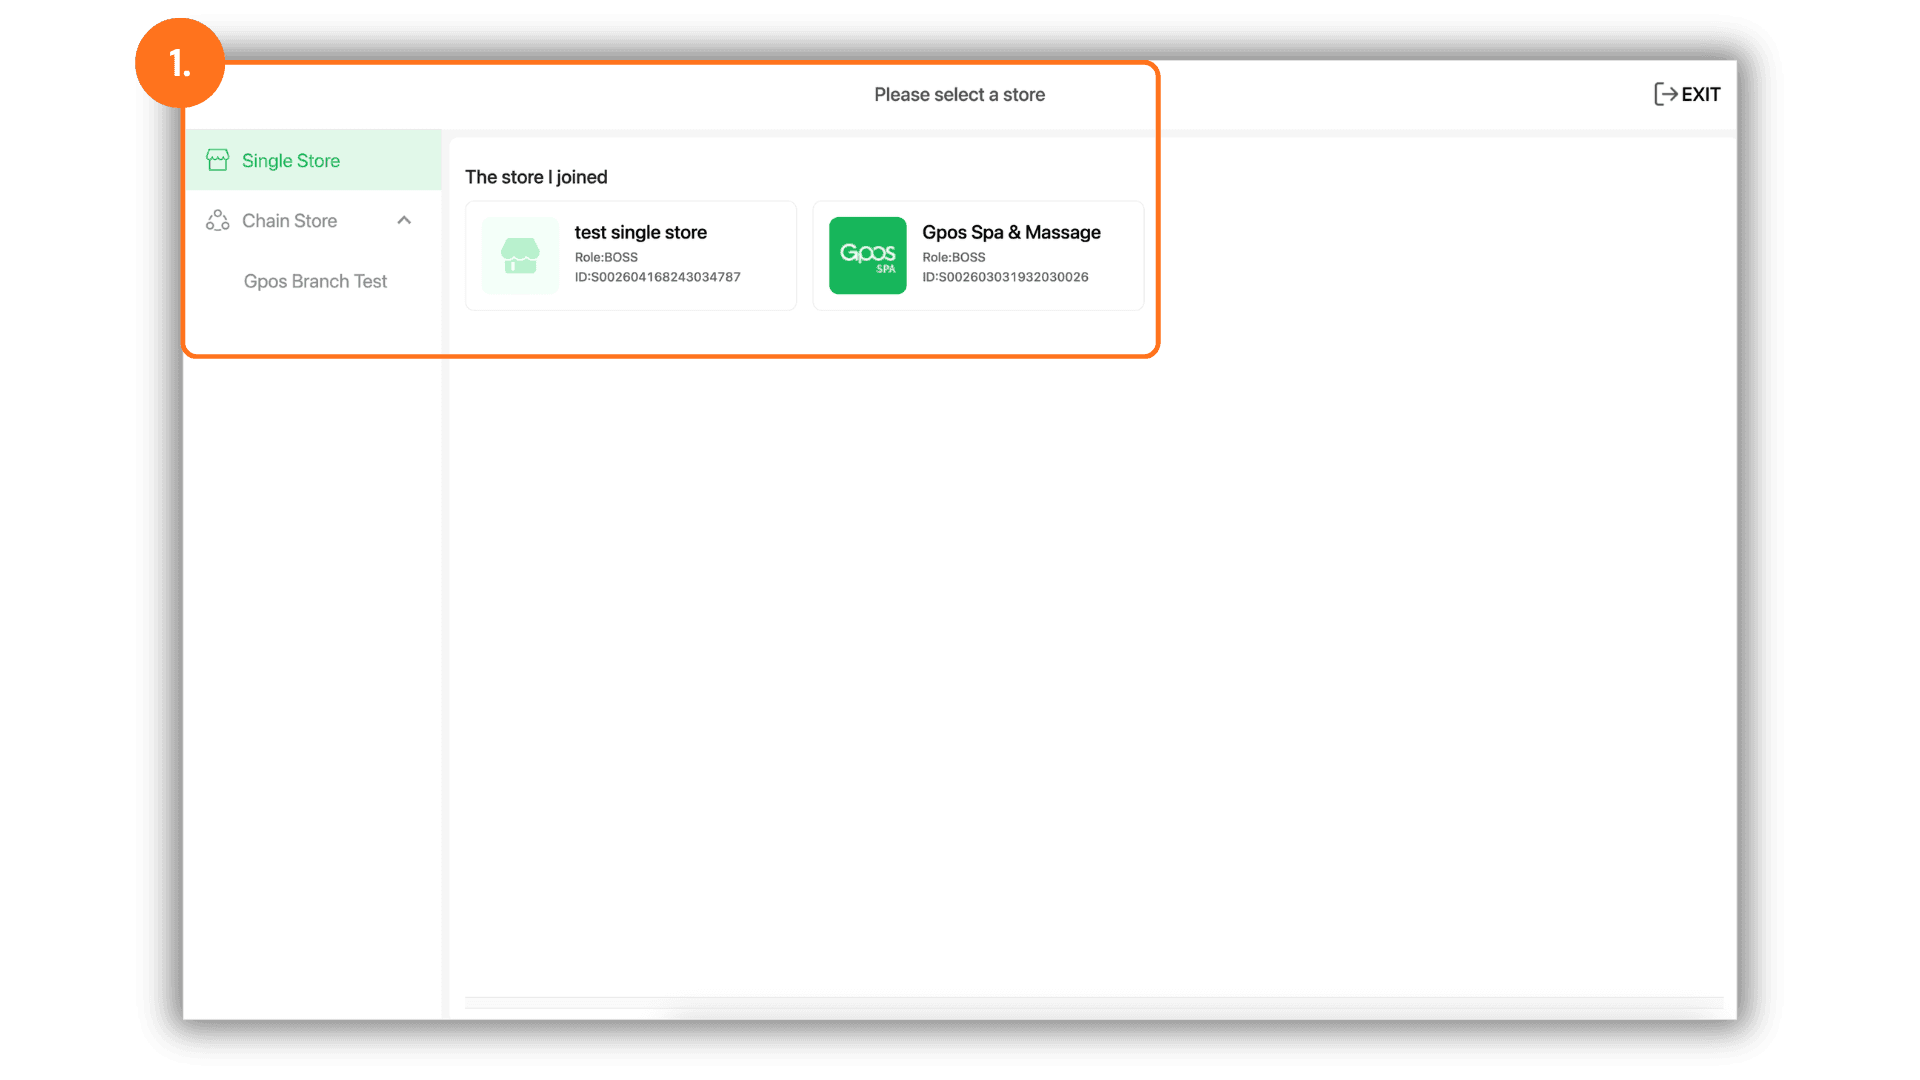
2. Access Store Settings and Upload Logo
Go to the left-hand menu, select Store Settings, and upload your logo image as follows:
- Upload Store Logo: Click the + icon in the Store Logo section to select and upload a logo image with a 1:1 aspect ratio.
- Save Settings: Once the logo image is uploaded, click the green Save button in the bottom right corner to confirm and save your settings immediately.
Receipt Printing Tip: It is recommended to use a black and white image so that the logo prints clearly and crisp on thermal receipts.