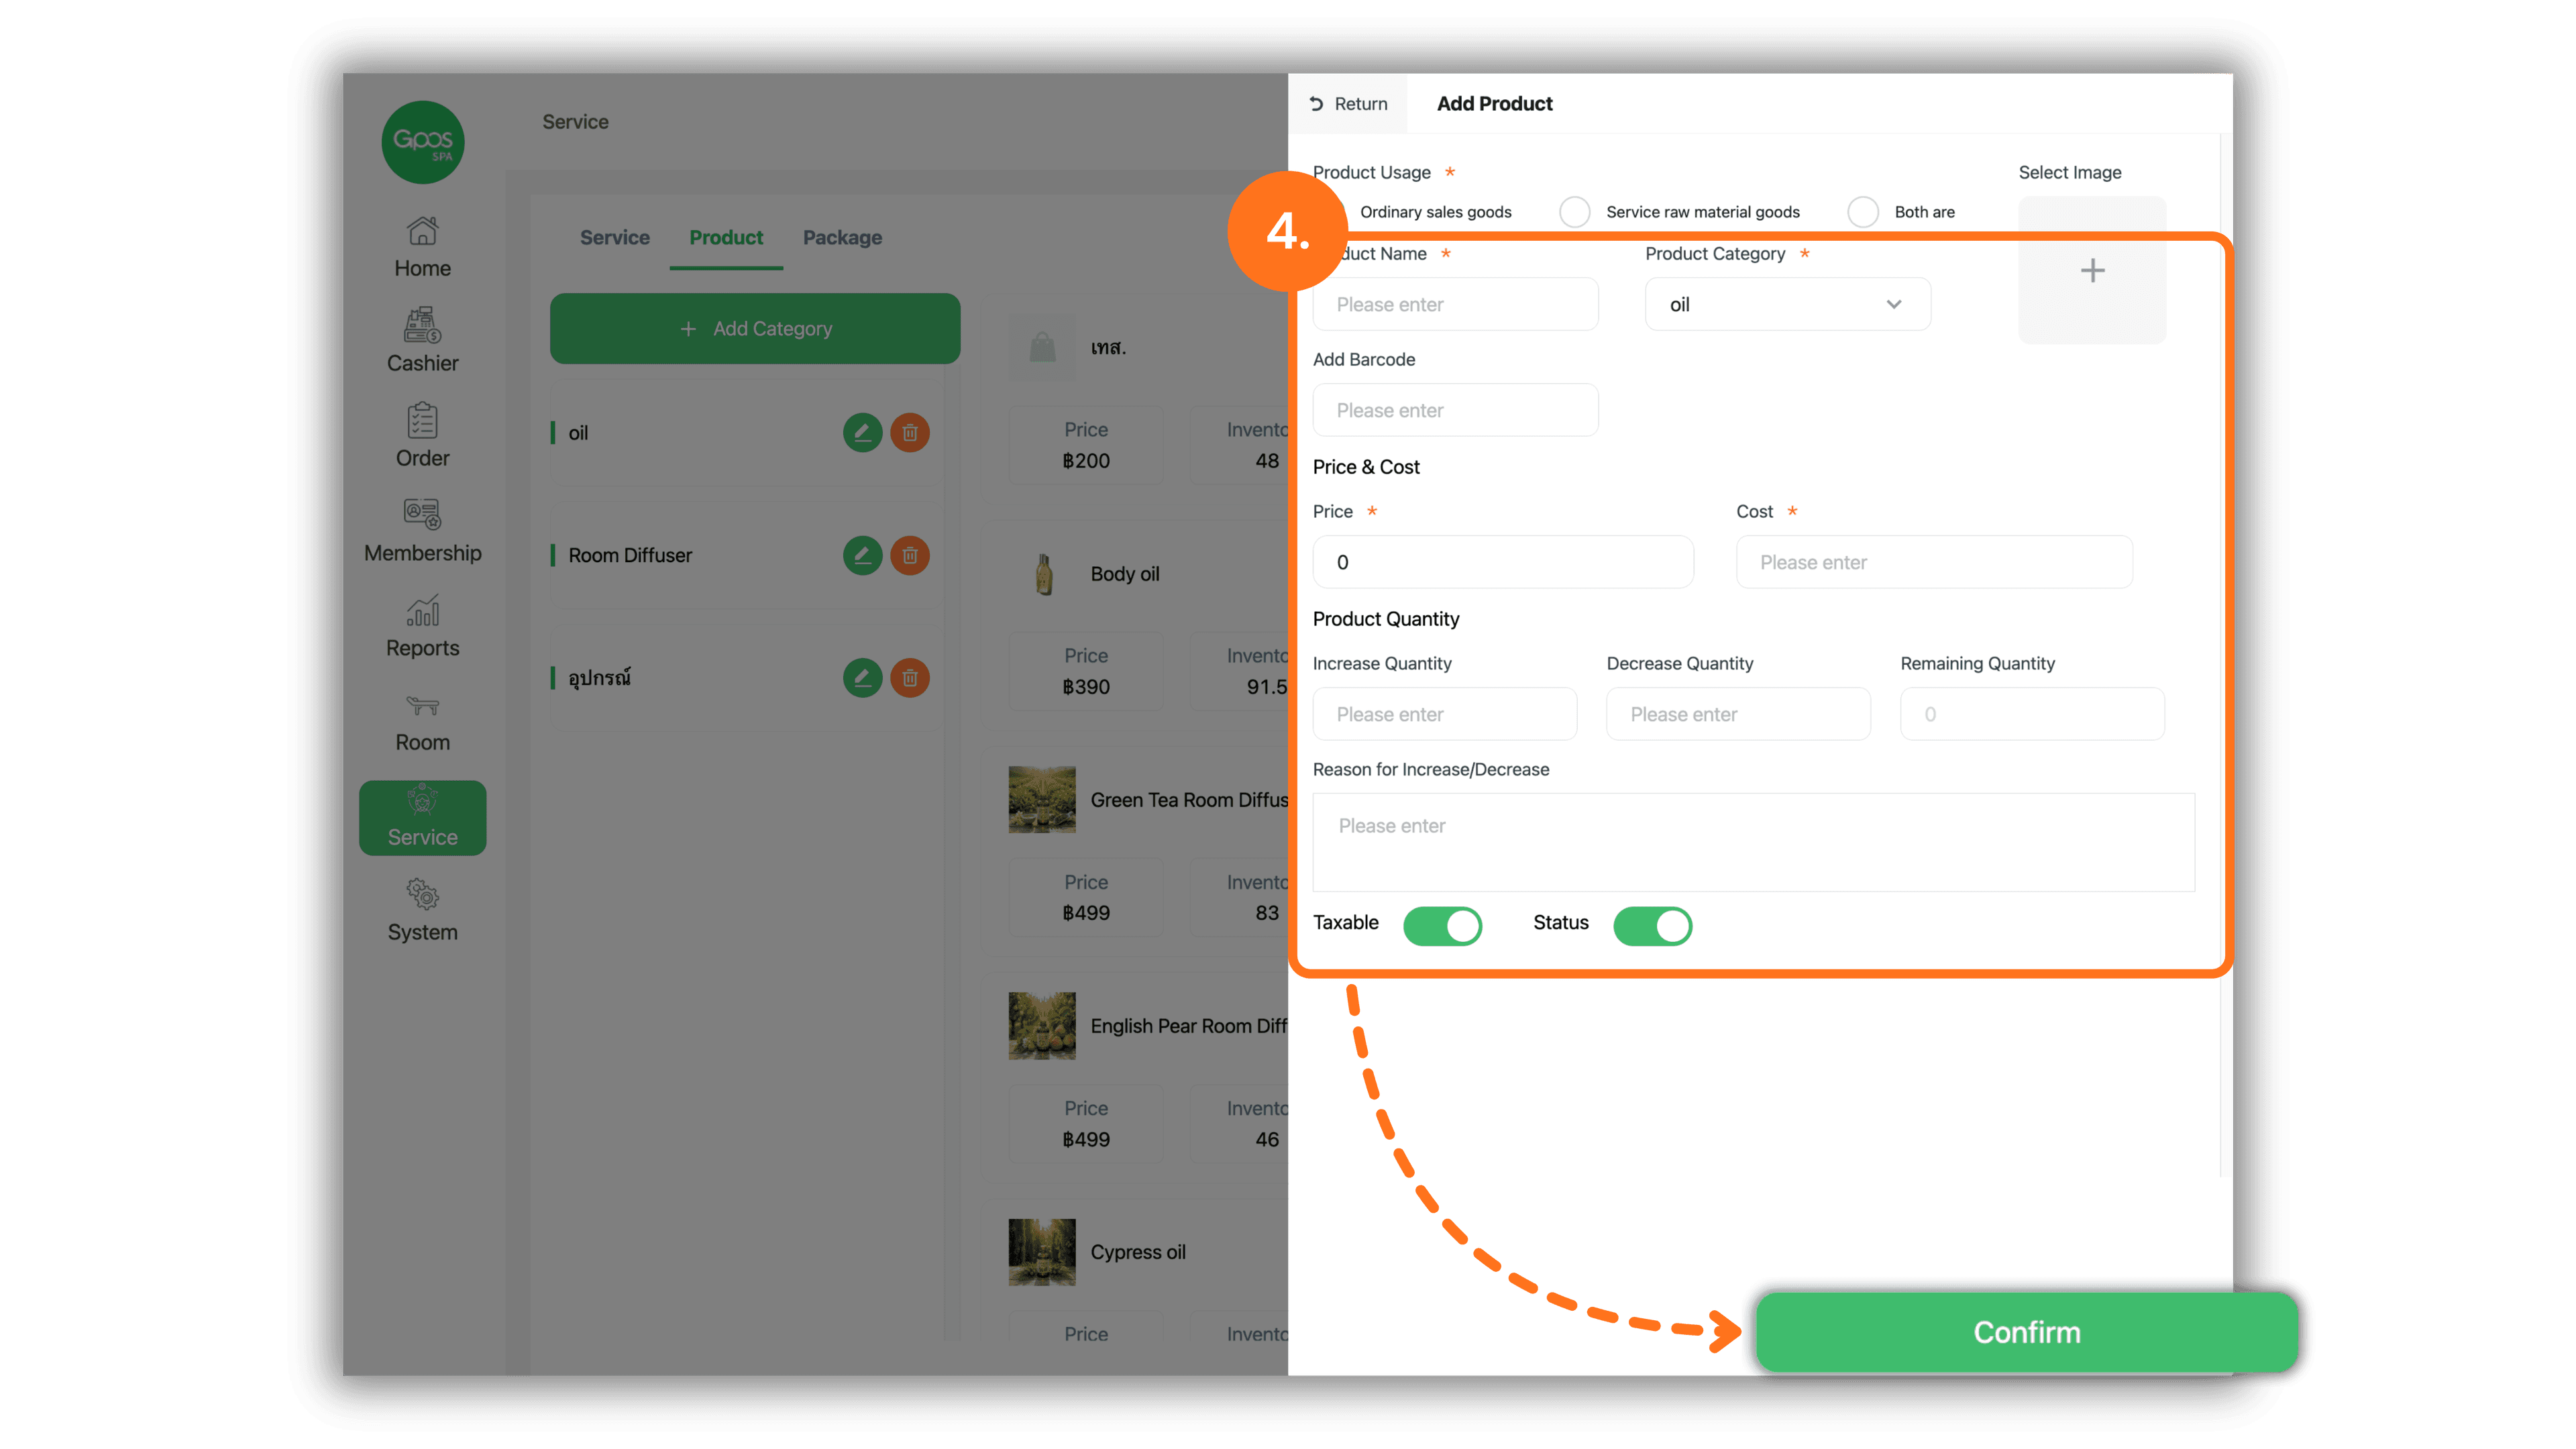
1. Select Store Branch
Select the desired store or branch from the Please select a store page under The store I joined section to enter the management system.
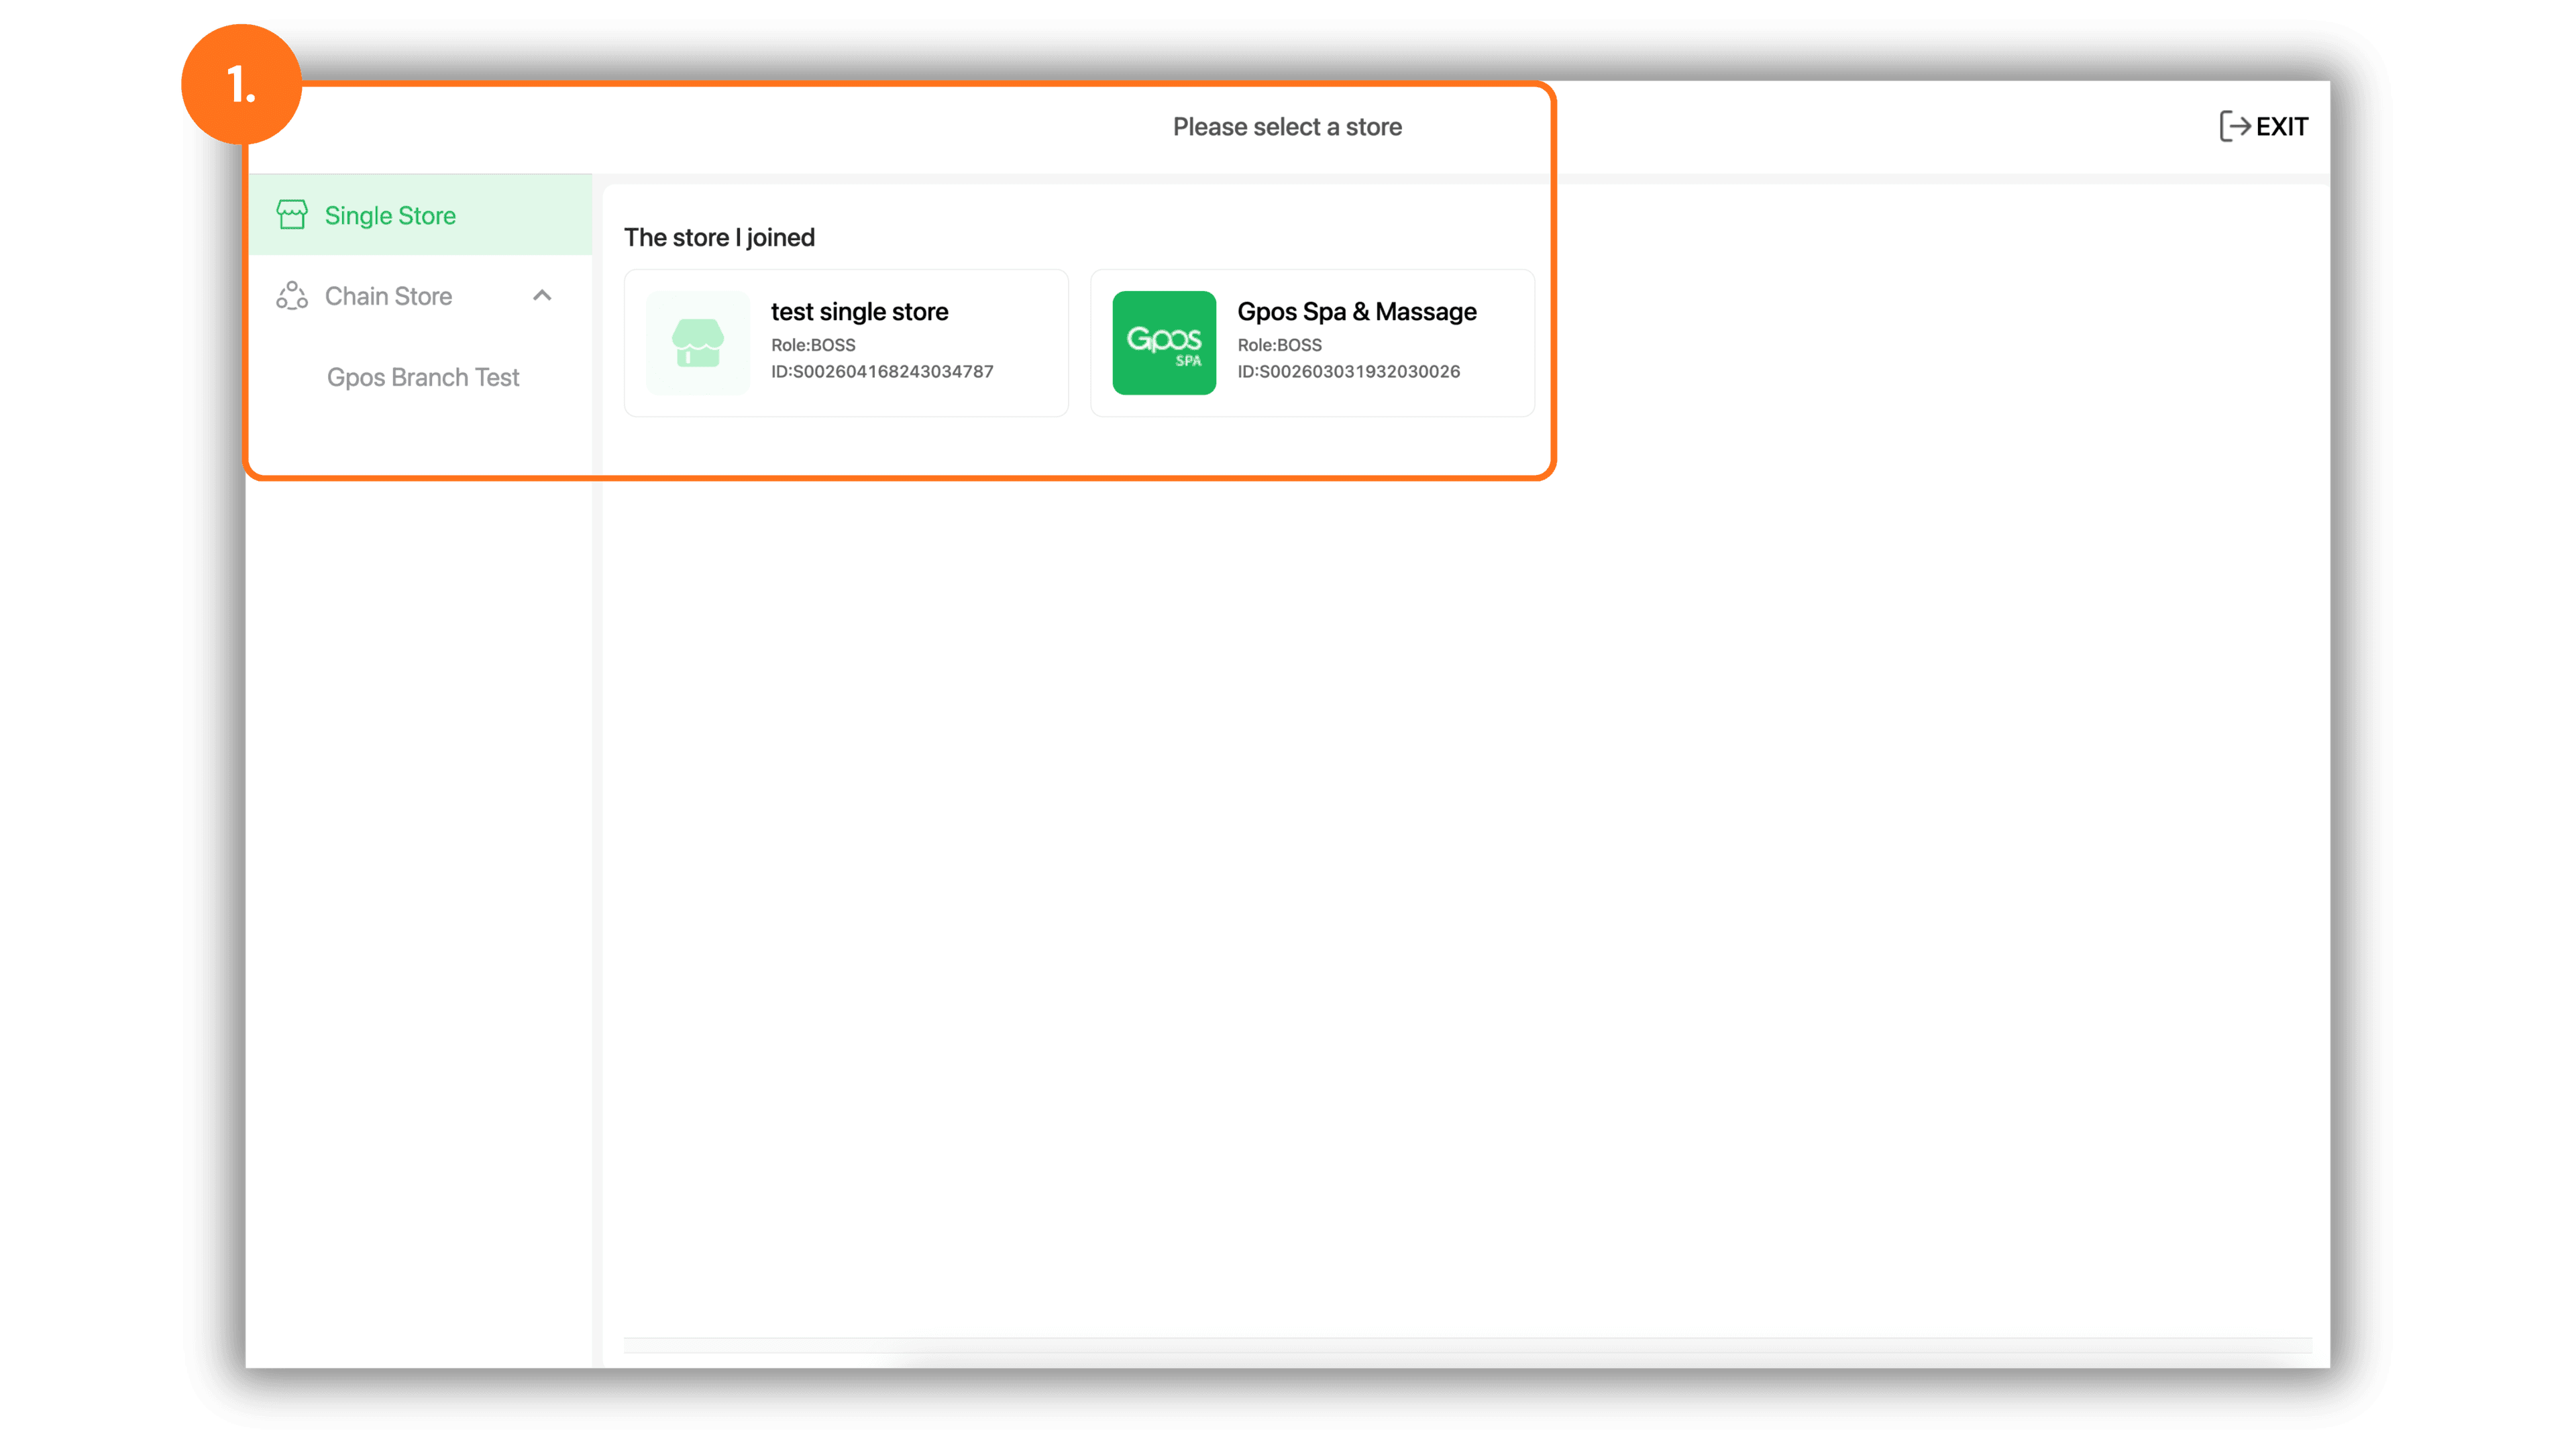
2. Navigate to Product Tab and Click Add or Edit Product
In the left menu, click Service, then switch to the Product tab at the top and choose one of the following actions:
- Click the green + Add Product button at the top right to create a new product or raw material.
- Click the pencil icon on any item card to edit existing product details.
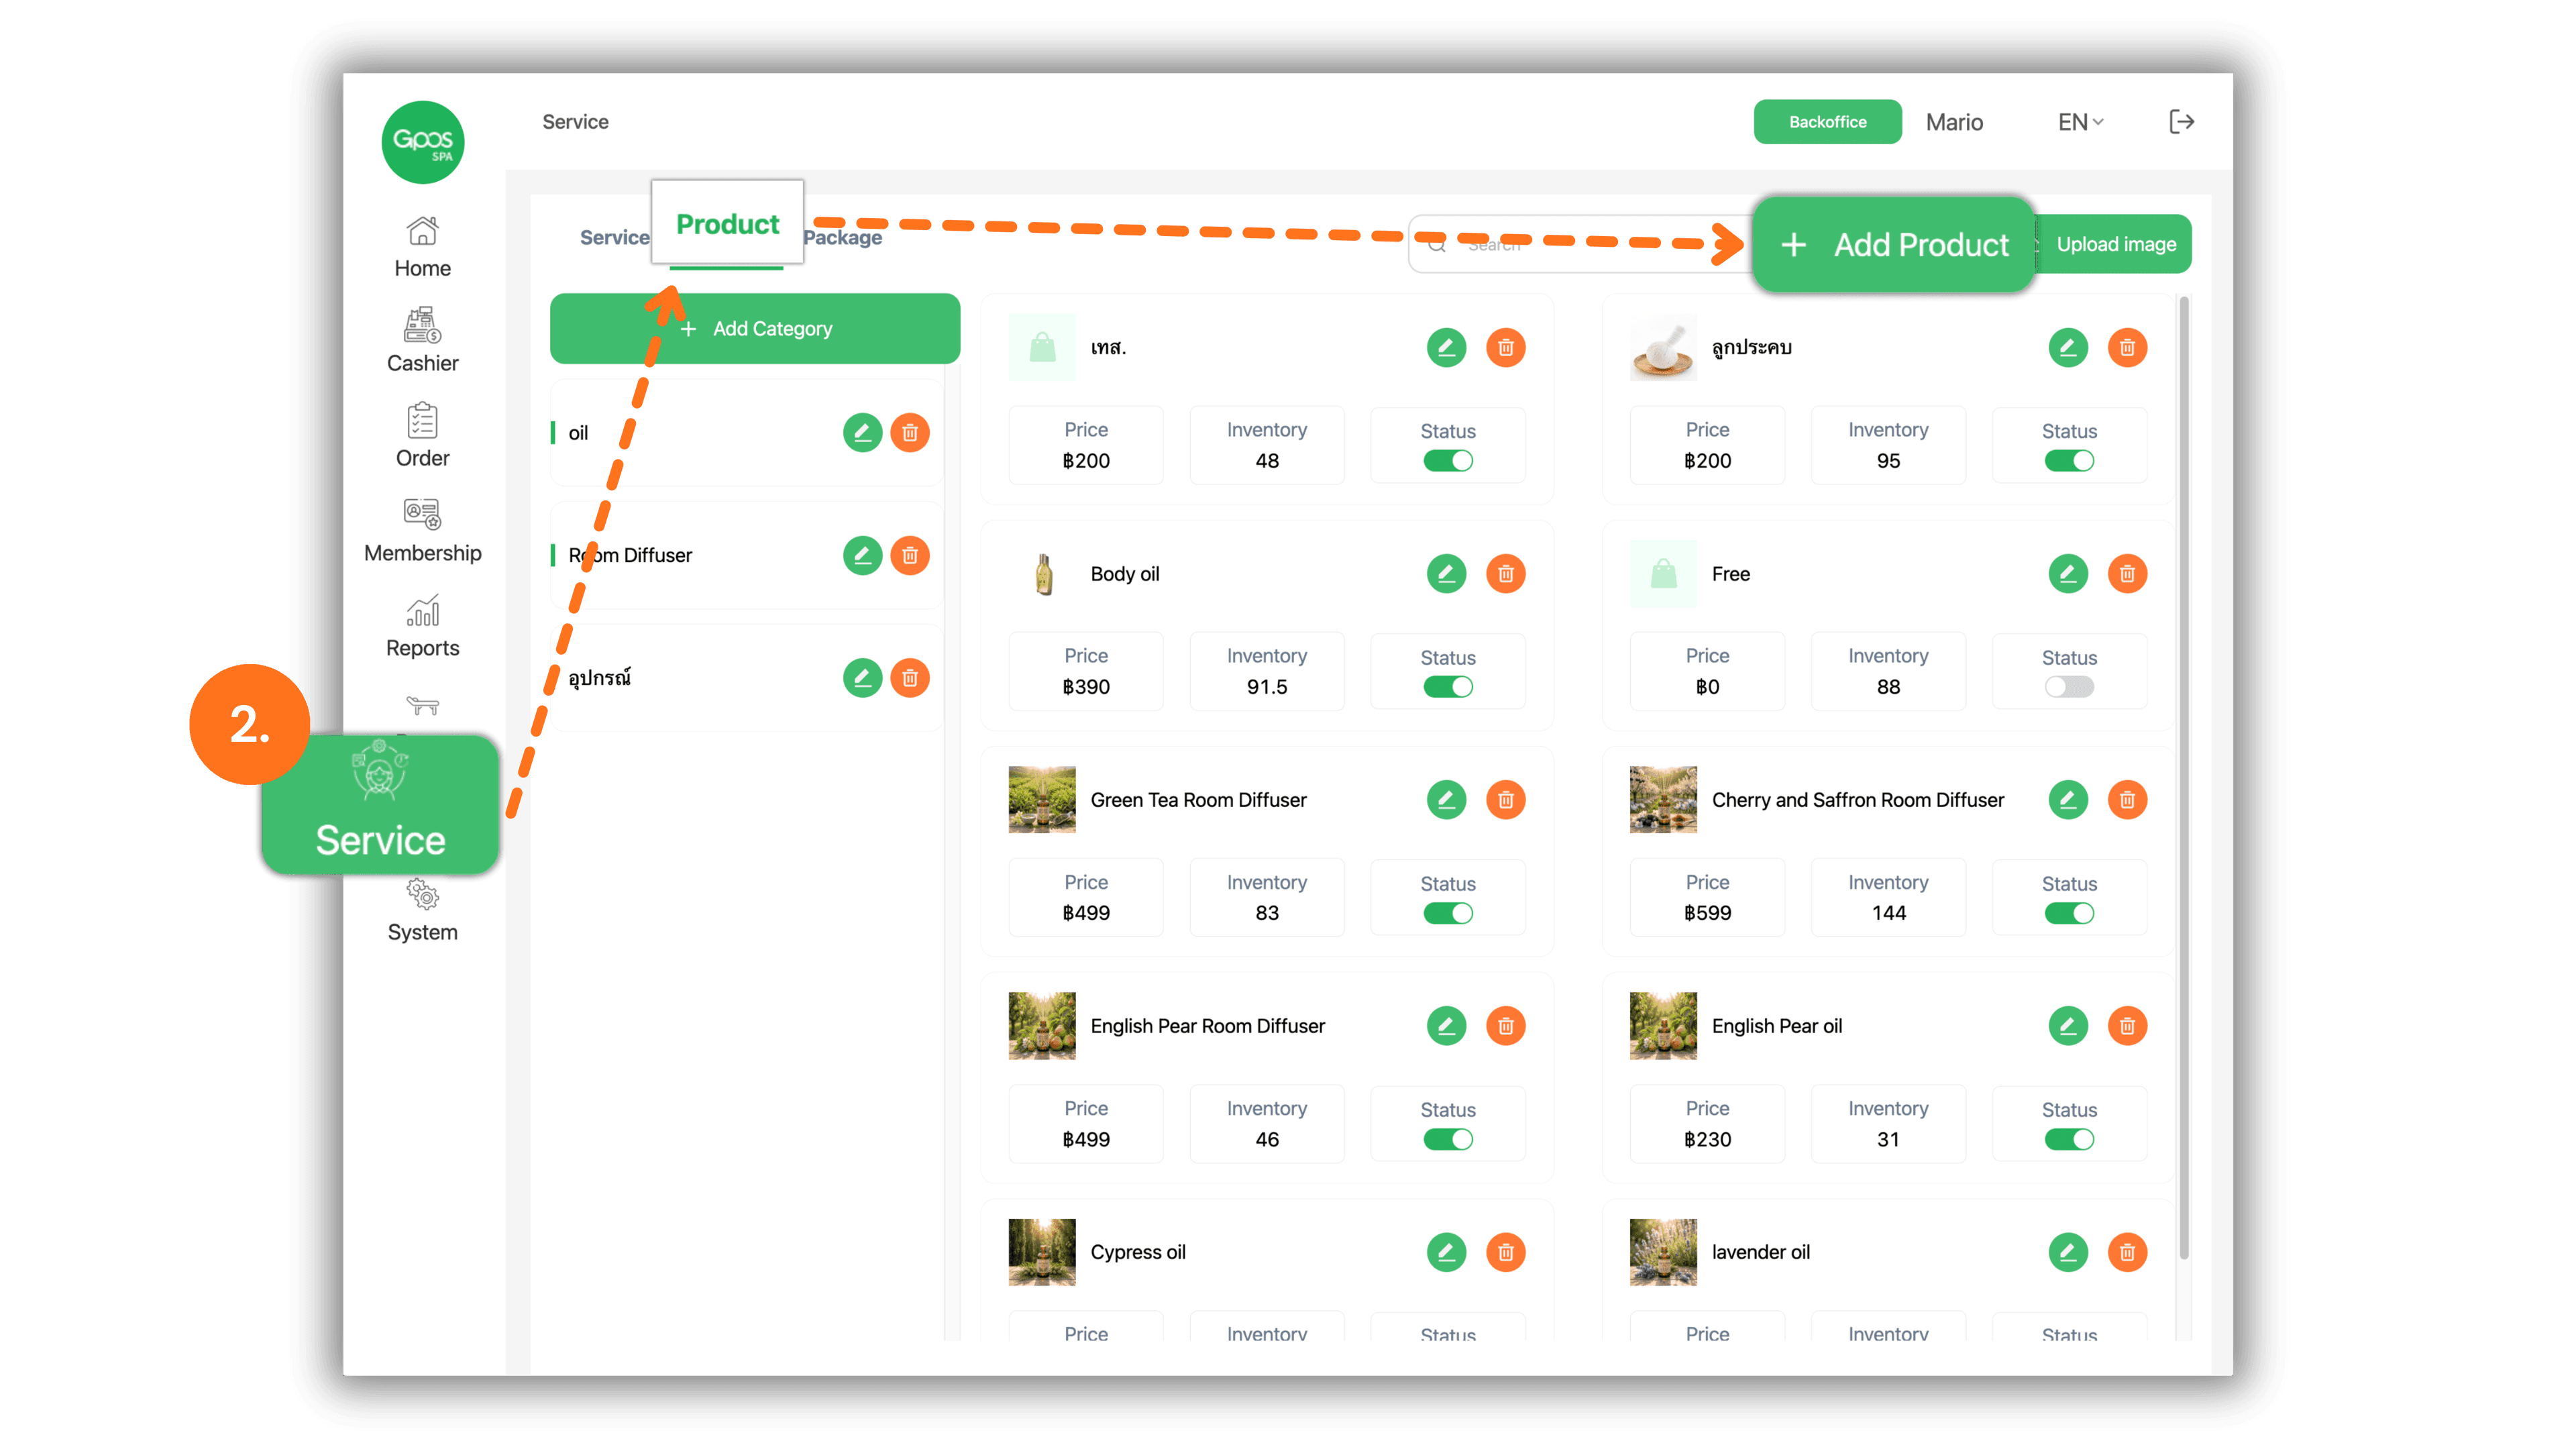
3. Select Product Usage Type and Set Usage Percentage
In the Add Product panel, select the appropriate option under Product Usage:
- Ordinary sales goods: For retail items sold strictly at the storefront cashier.
- Service raw material goods: For items used exclusively as raw materials consumed during services.
- Both are: For items that can be sold at retail and used as service raw materials.
Note: Specify the percentage used per service under Single estimated usage (where 100% represents 1 full item unit).
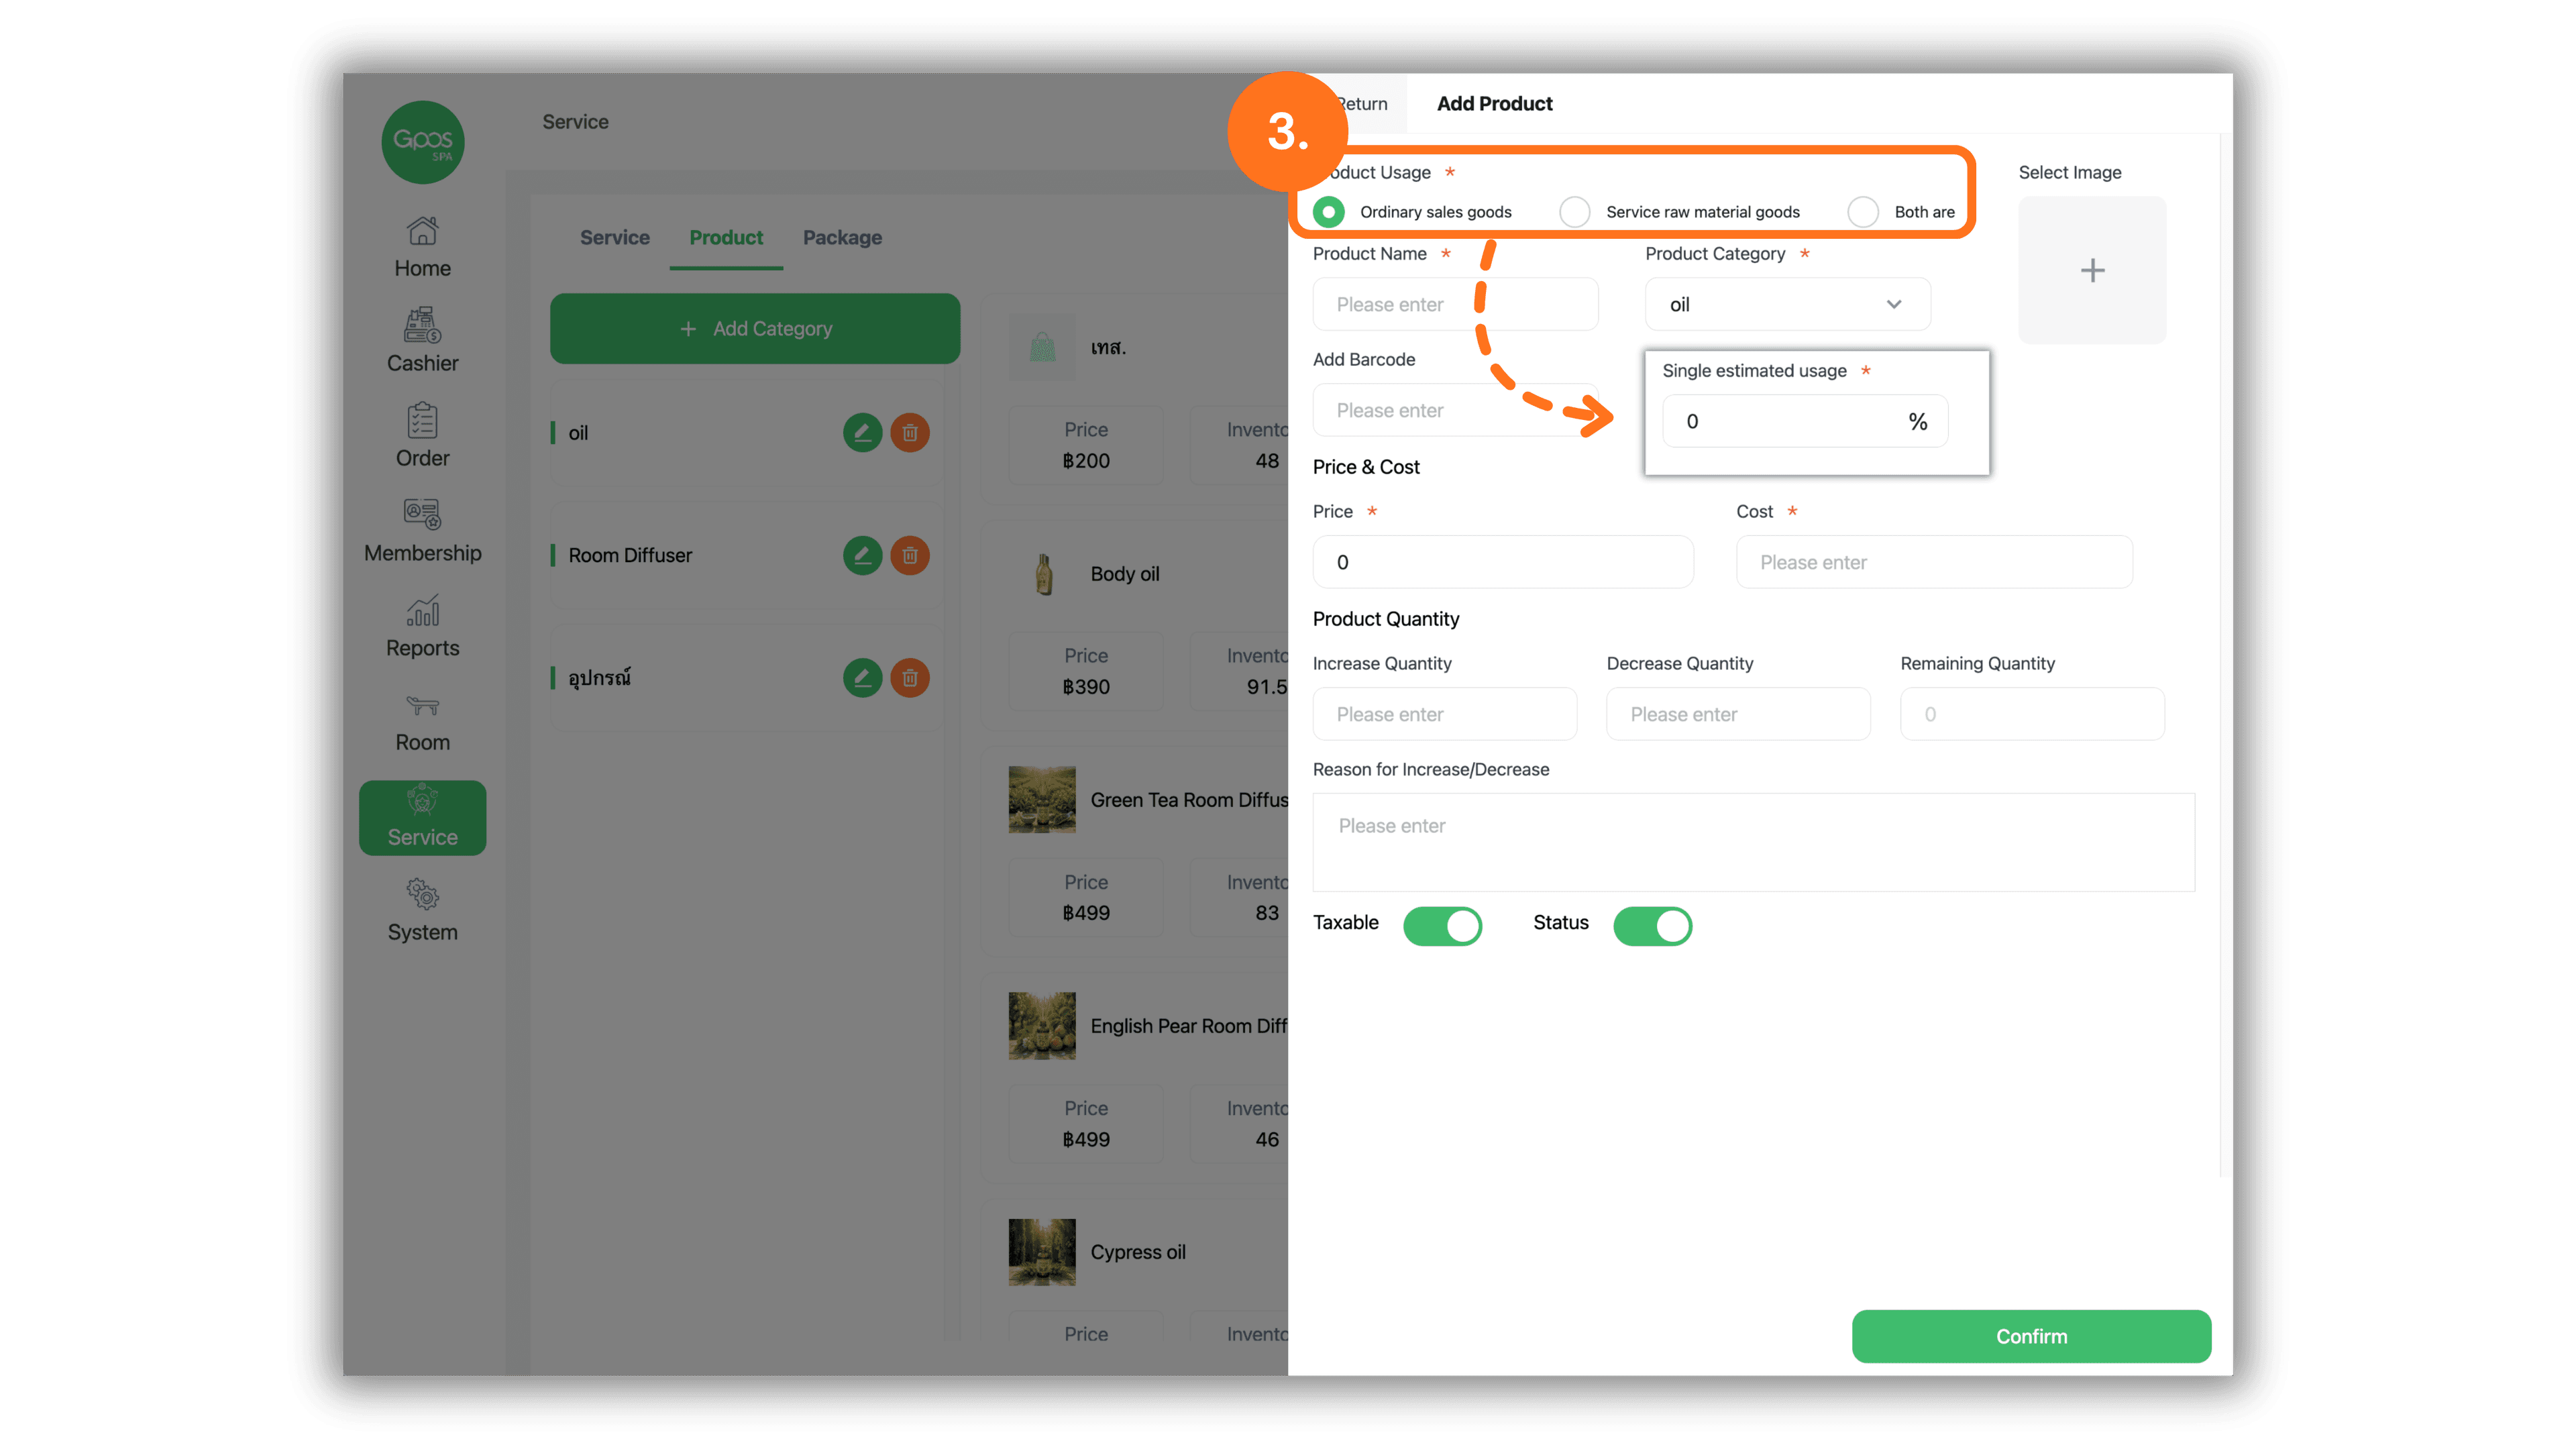
4. Fill in Product Details, Update Inventory, and Save
Complete the product information fields:
- Product Name: Enter the name of the product or raw material.
- Product Category: Select the relevant category from the dropdown menu.
- Add Barcode: Enter the product barcode (optional).
- Price & Cost: Enter the selling Price and item Cost.
- Product Quantity: Enter the quantity in the Increase Quantity field to add stock to the system.
- Select Image: Click the + icon to upload a product photo (optional).
- Click the green Confirm button at the bottom of the page to save all changes.