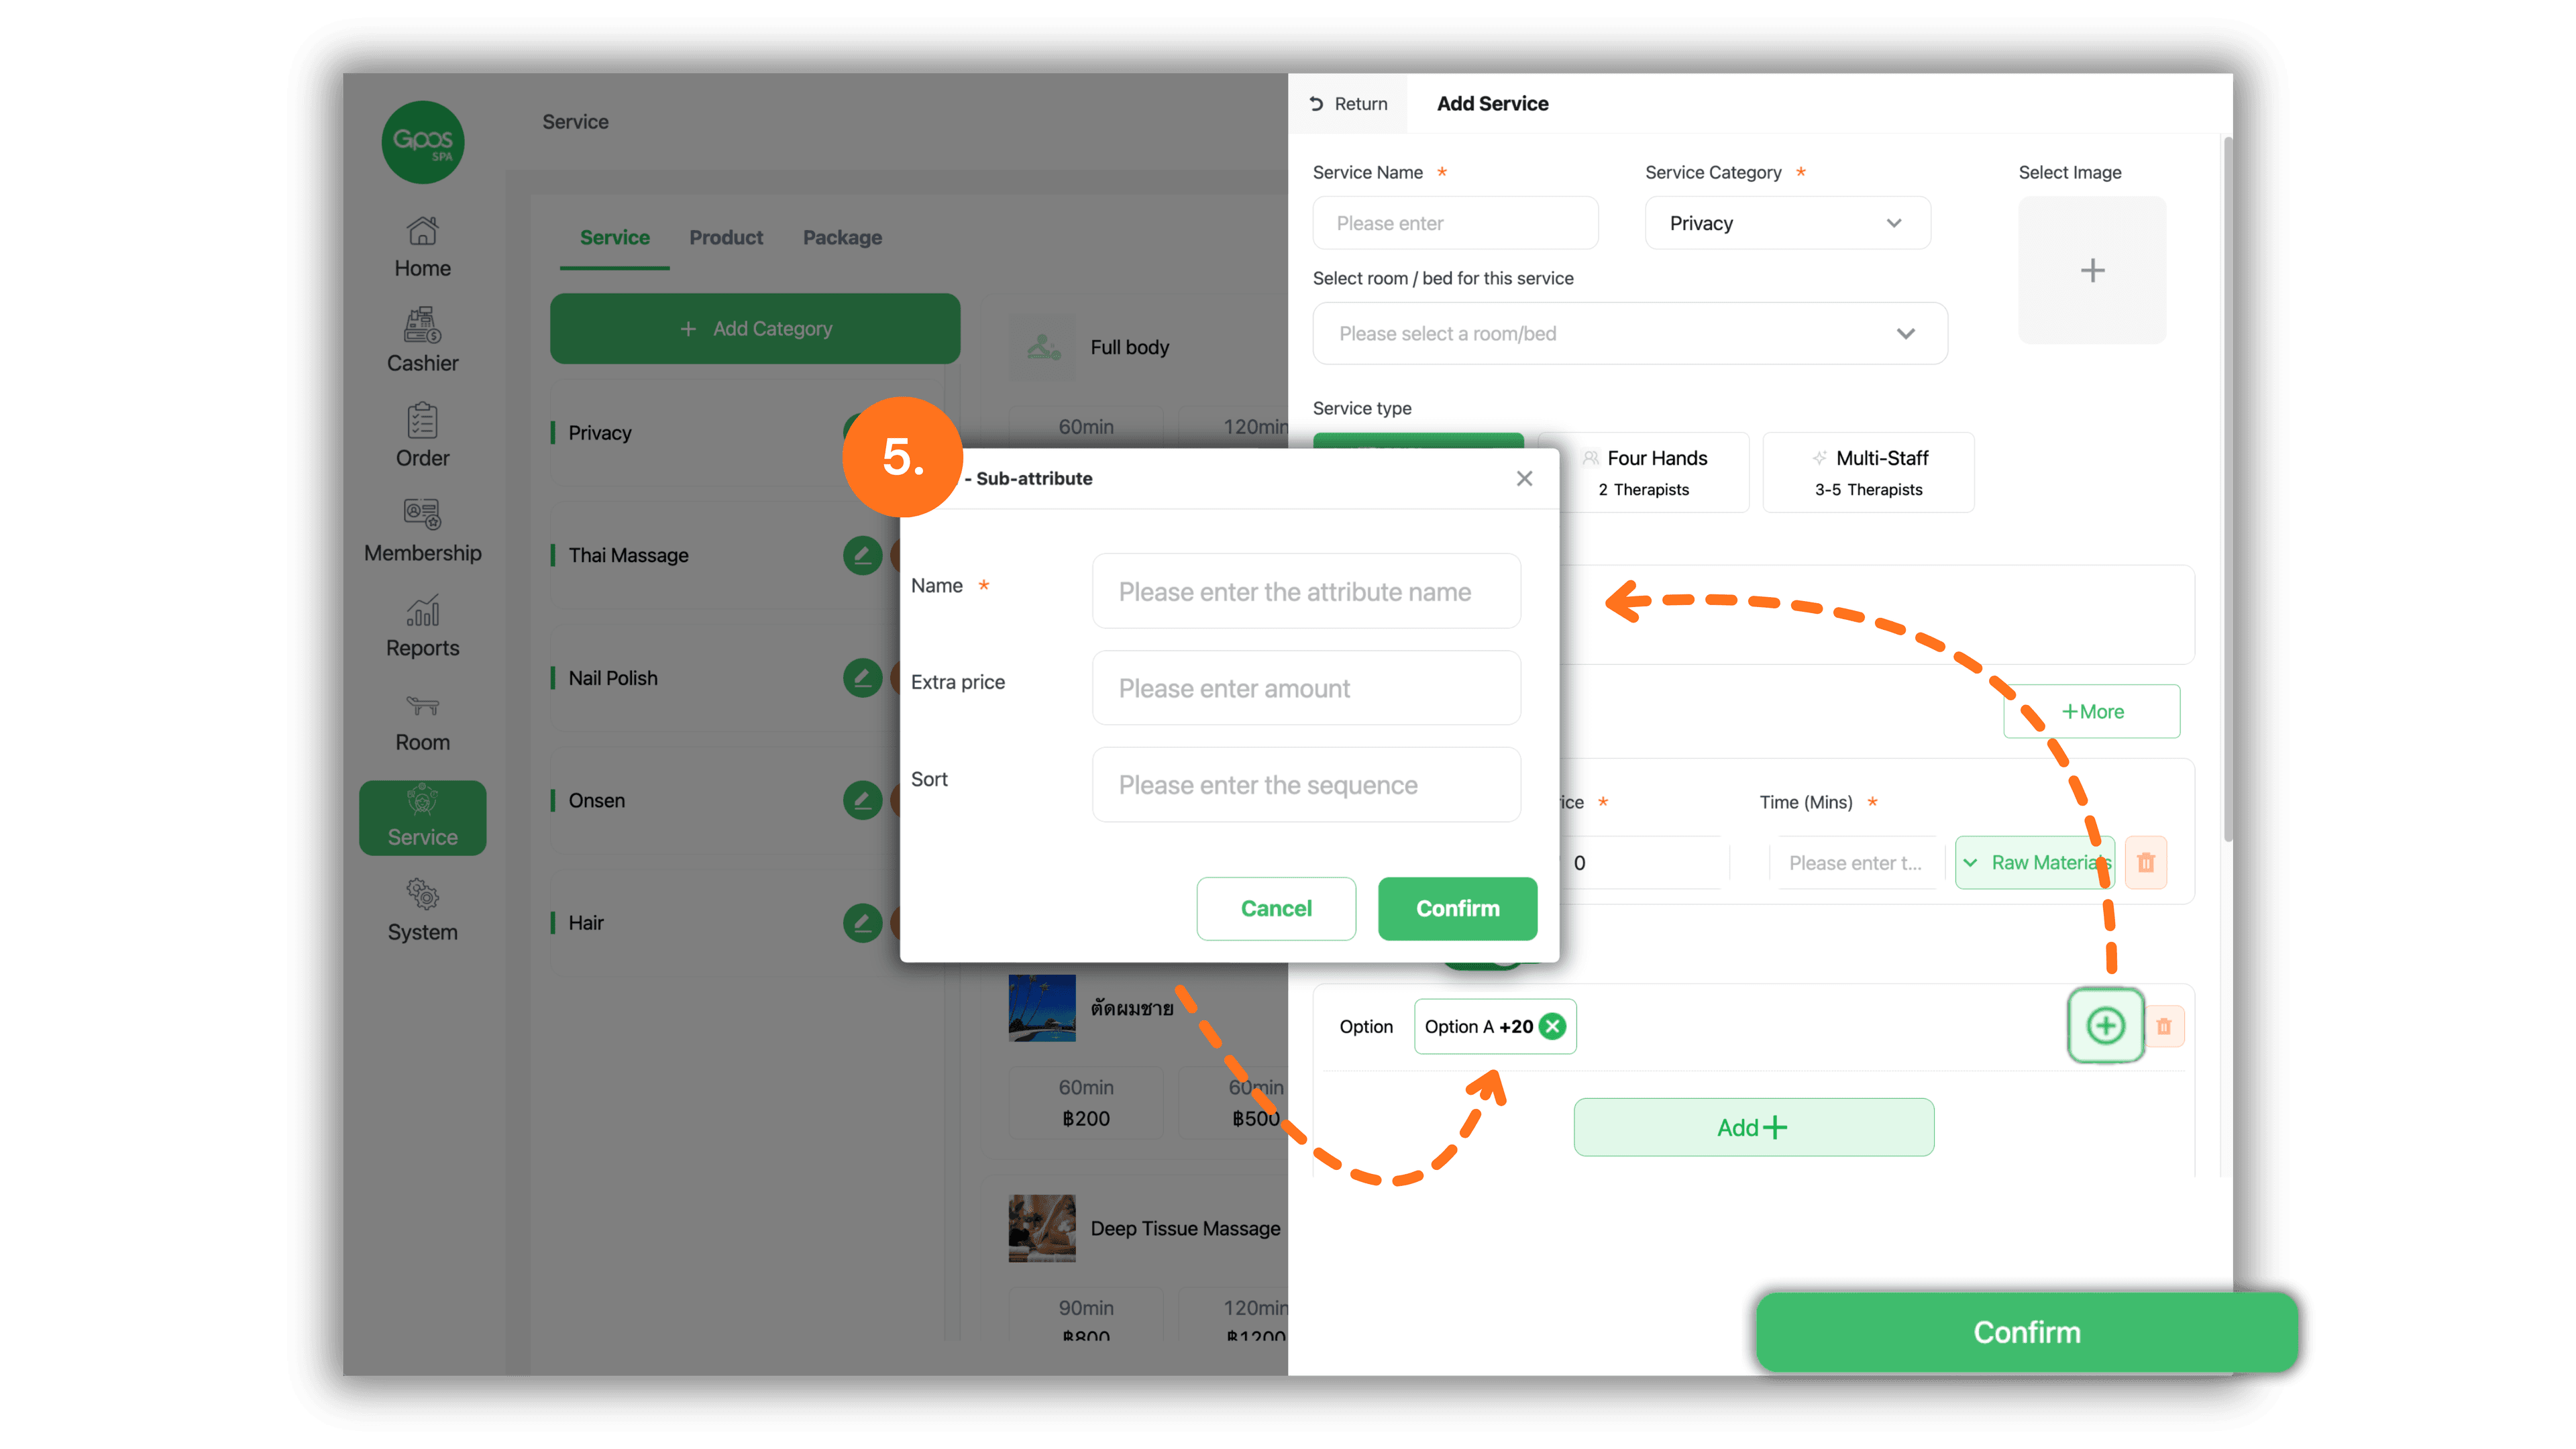
1. Select Store Branch
Select the desired store branch from the Please select a store page under The store I joined section to enter the management dashboard.
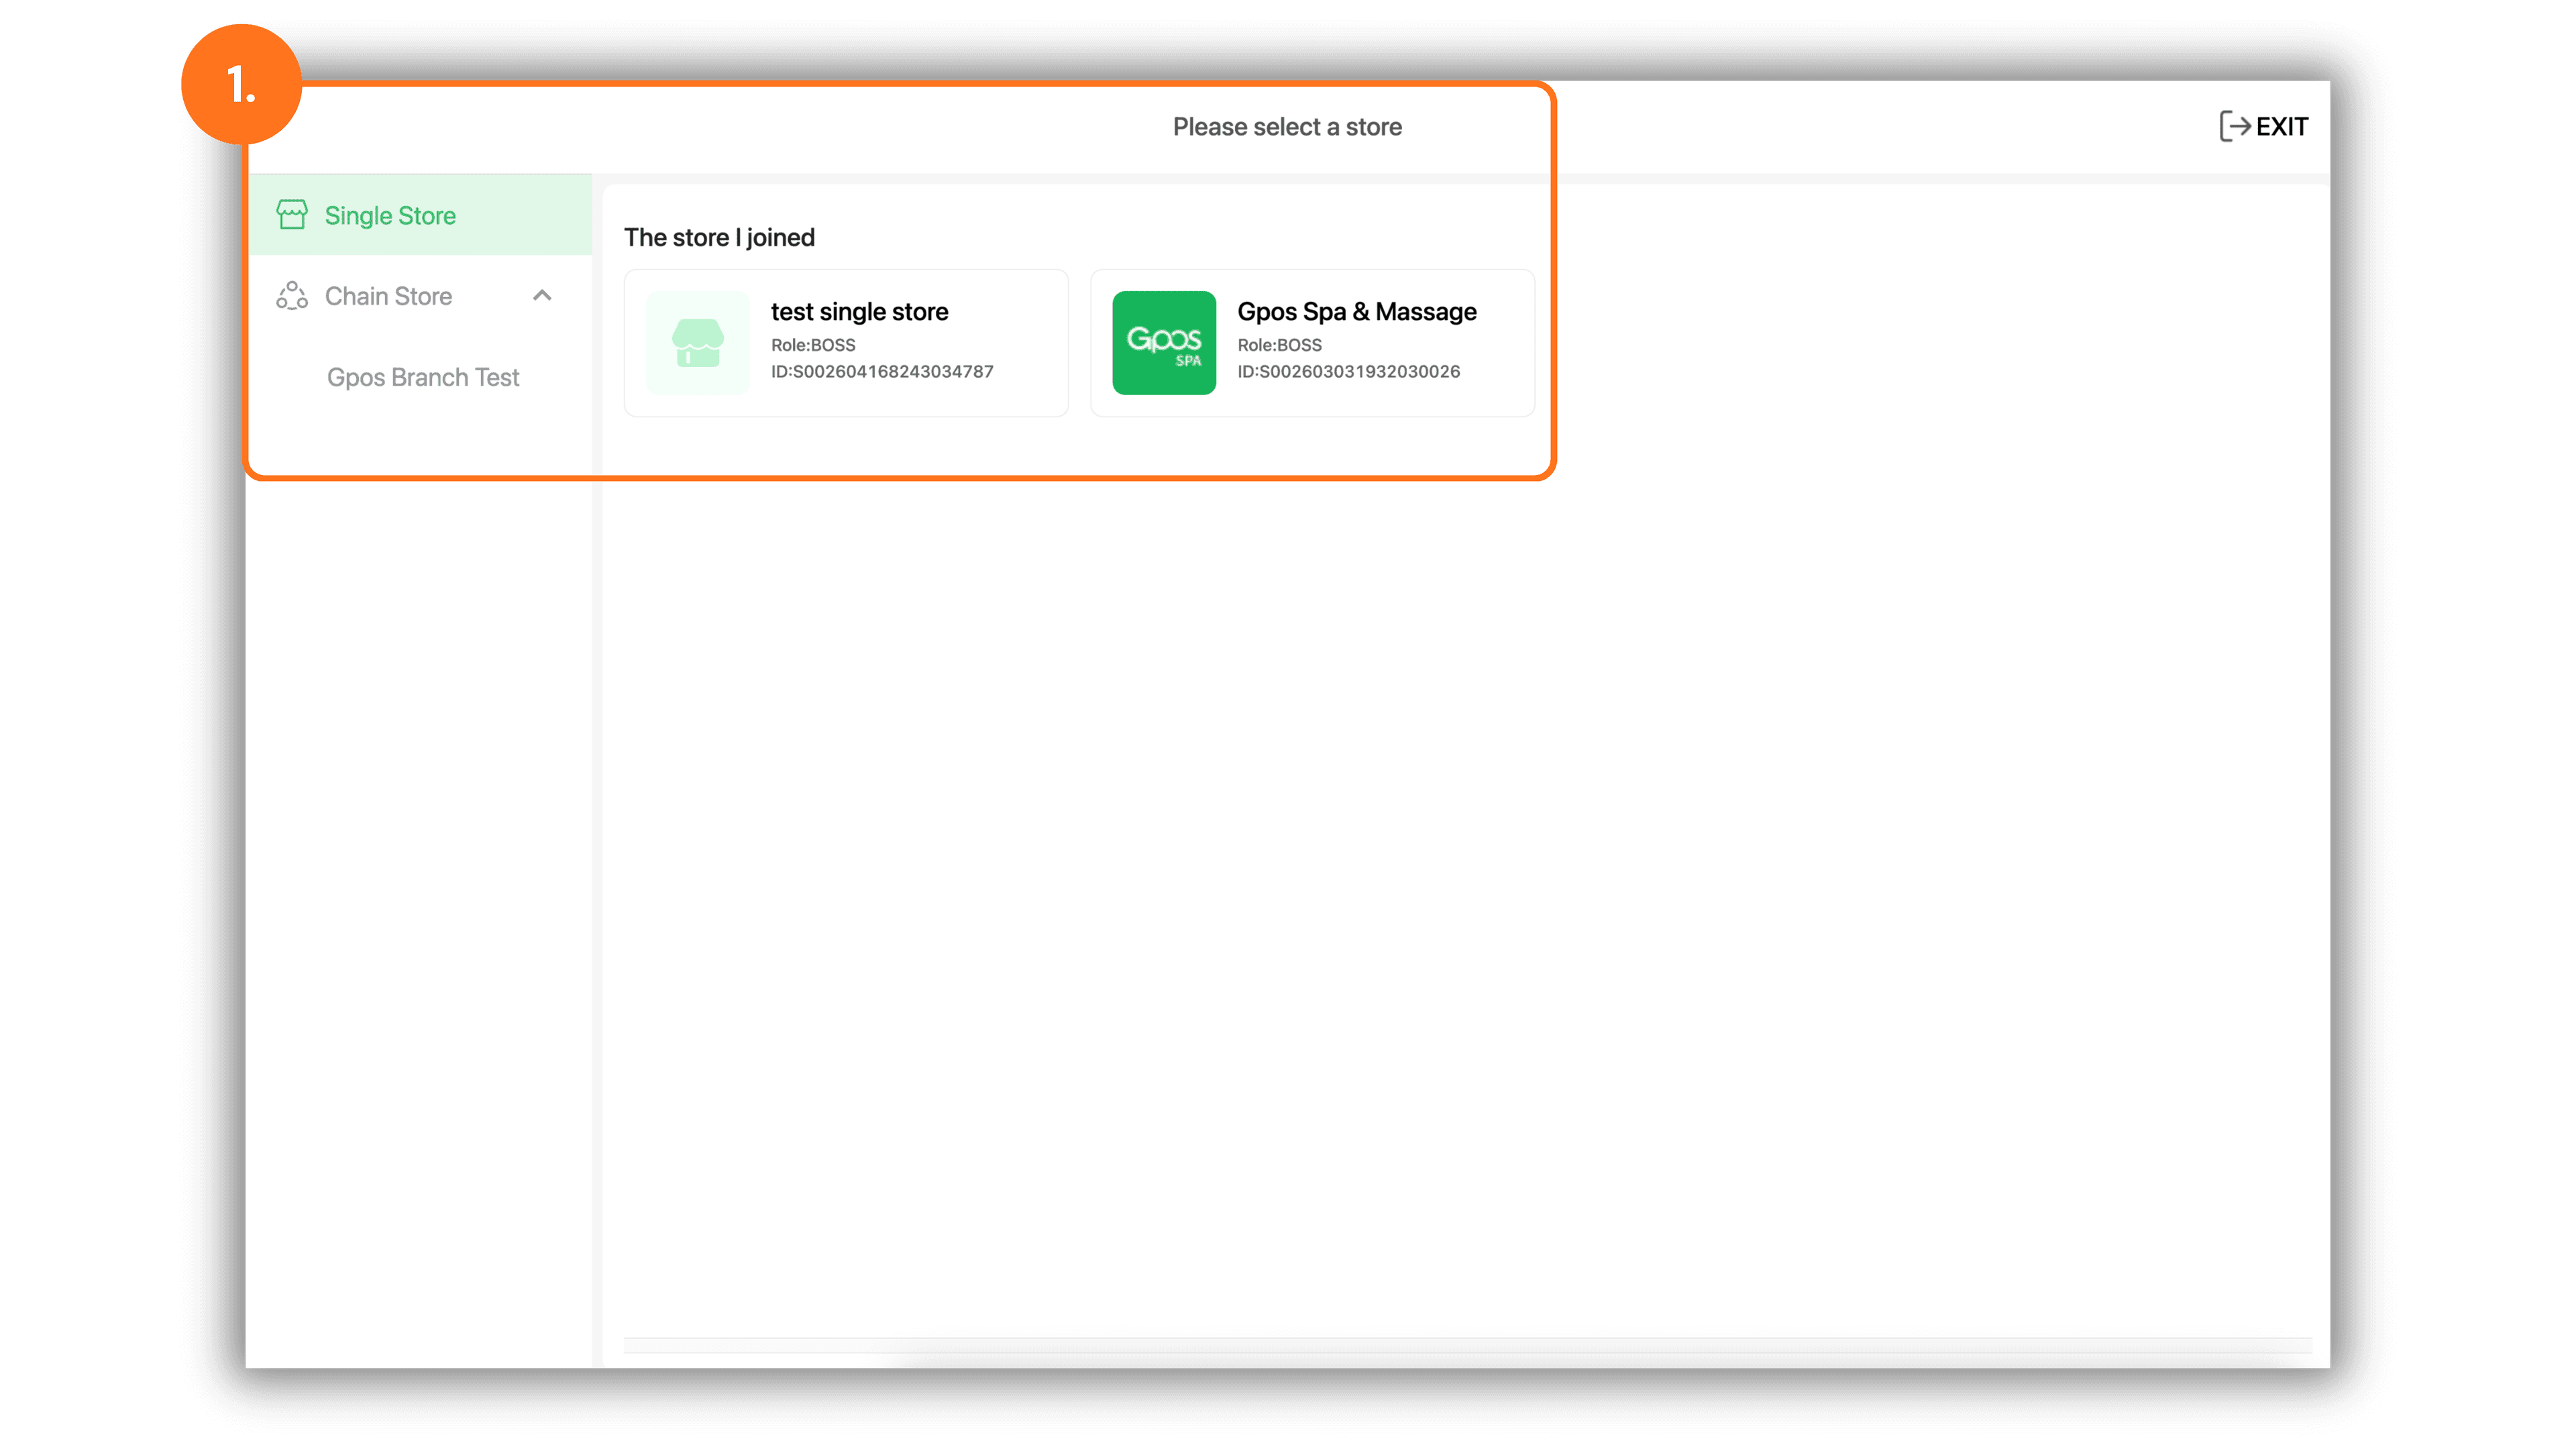
2. Navigate to Service Menu and Click Add or Edit Service
In the left menu, click Service, then choose one of the following actions:
- Click the green + Add Service button at the top right to create a new service.
- Click the pencil icon on any existing service card to edit its details.
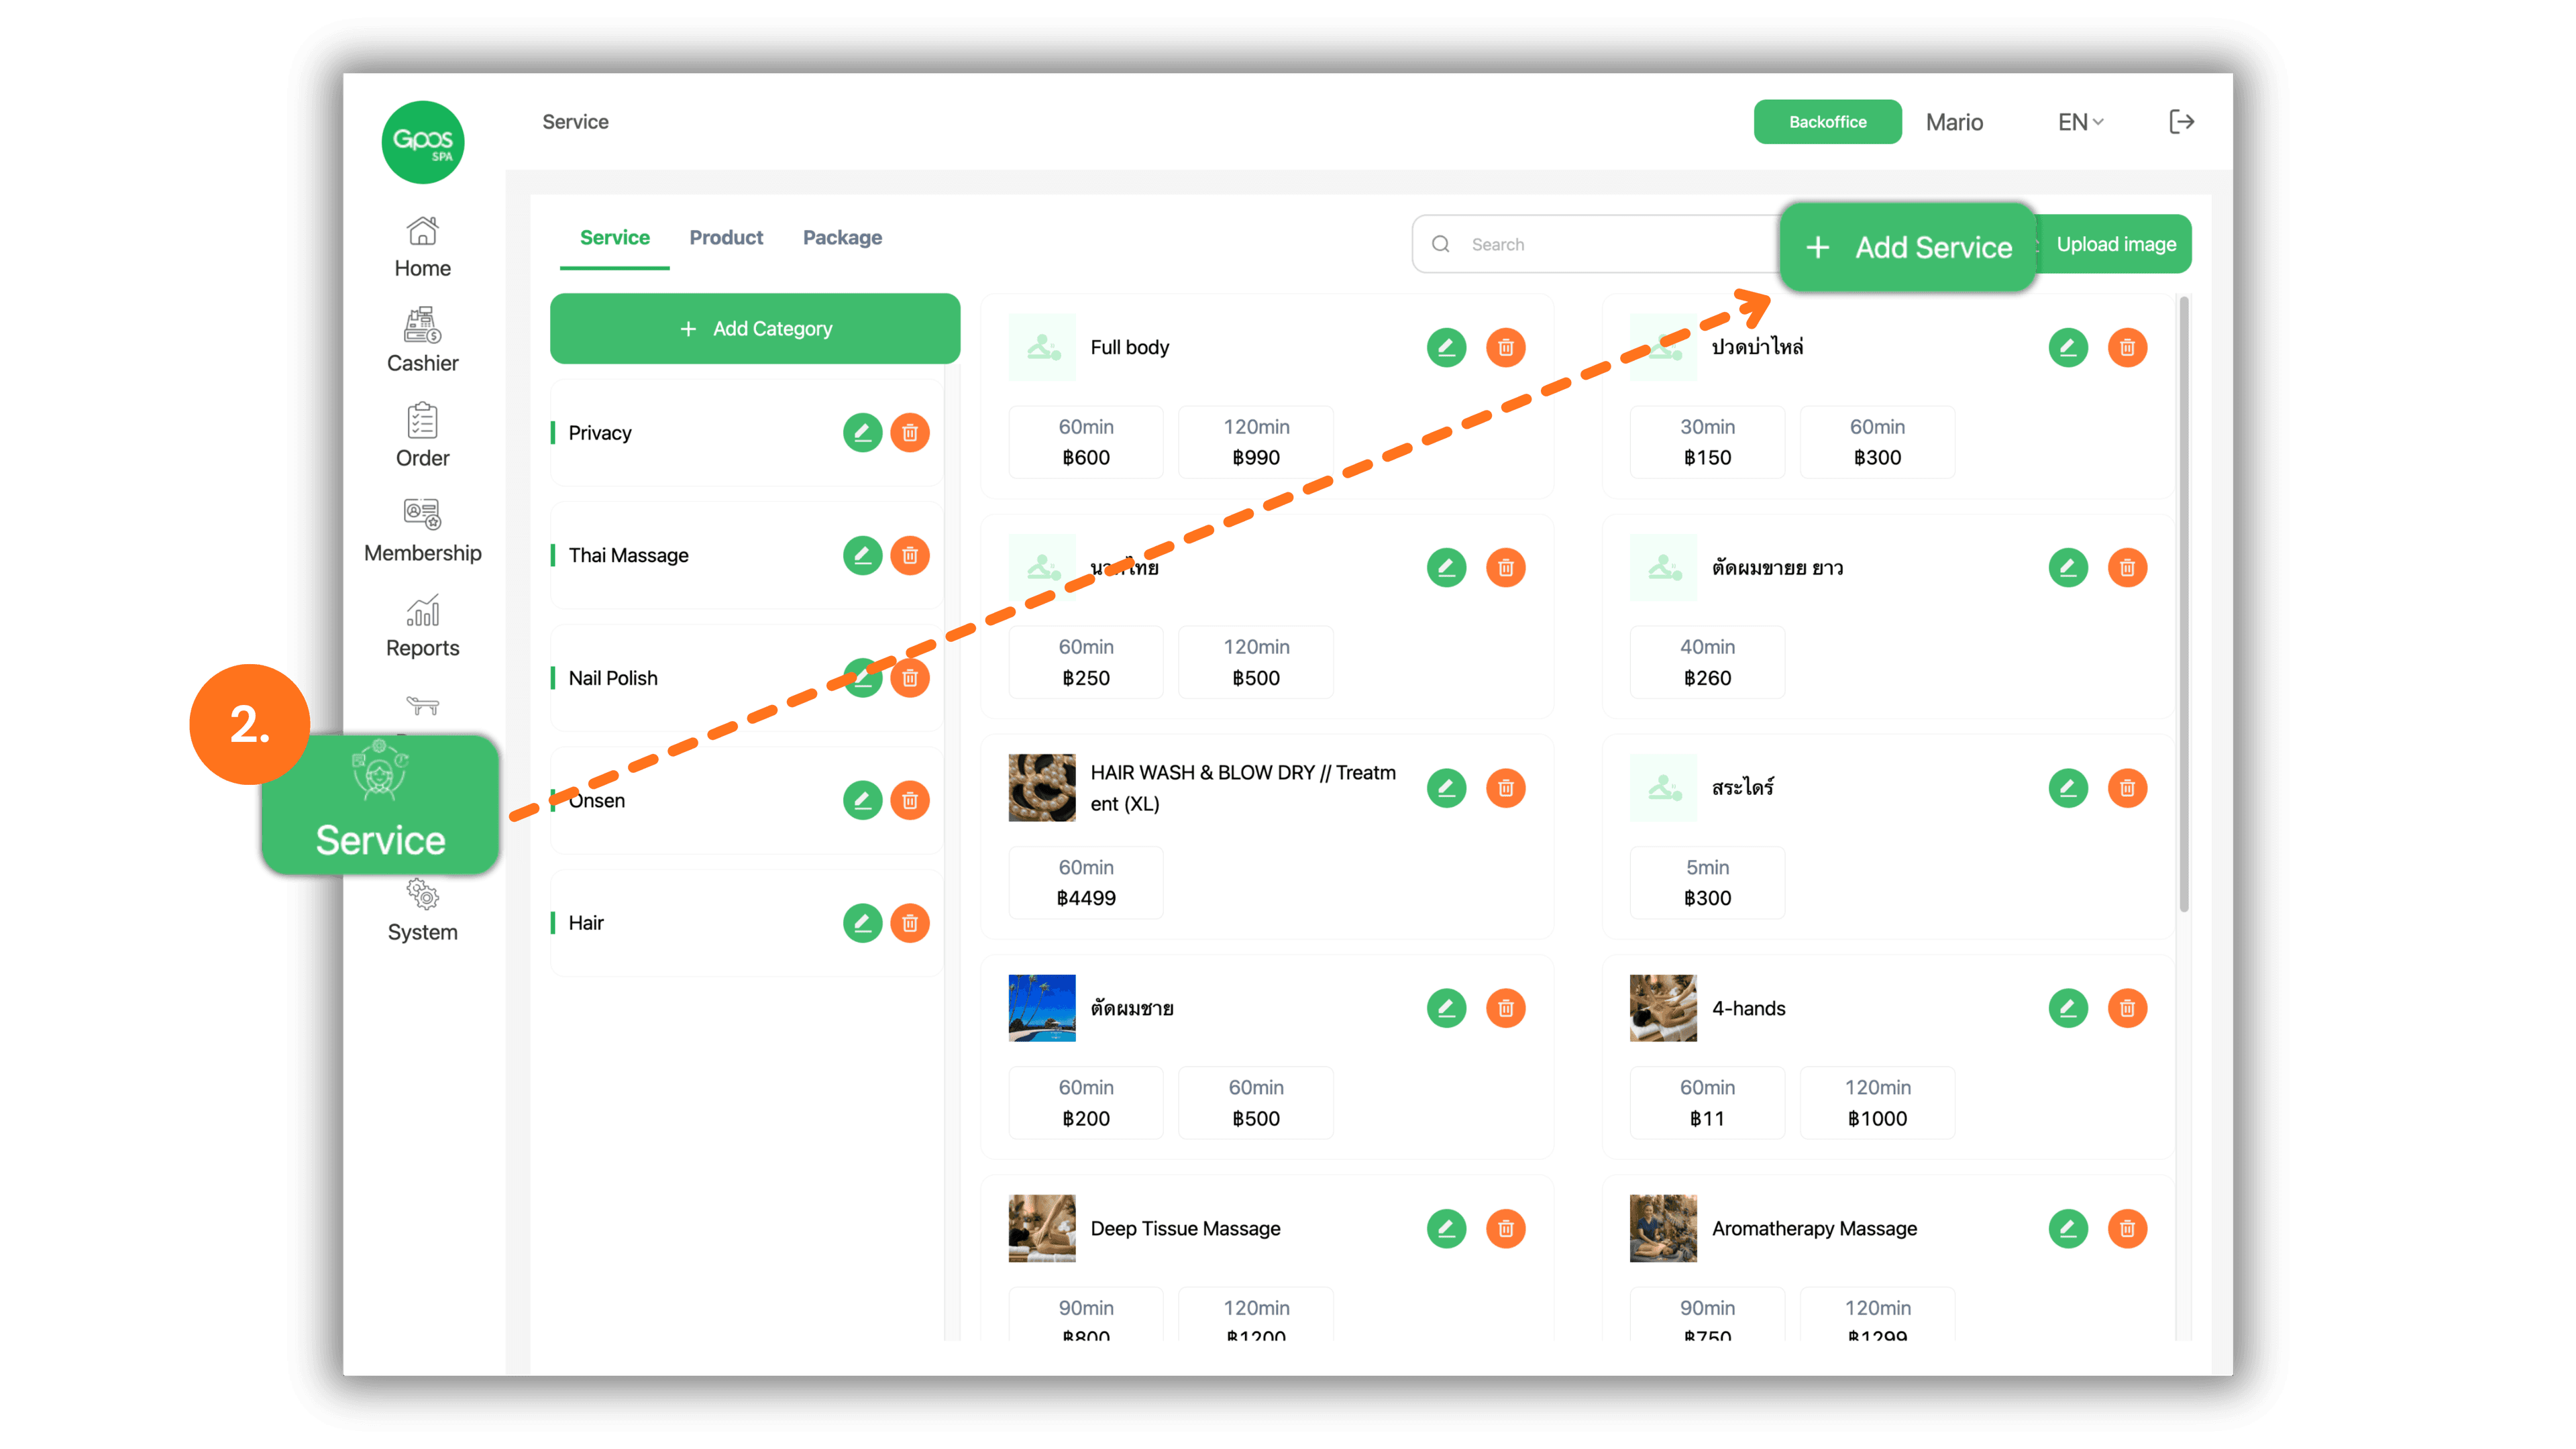
3. Fill in Service Information and Base Pricing
In the Add Service panel, complete the service details:
- Service Name: Enter the name of the service.
- Service Category: Select the relevant category from the dropdown.
- Select Image: Upload a representative image for the service (optional).
- Service type: Choose the staff configuration (e.g., Single staff, Four Hands, or Multi-Staff).
- Service Details: Provide additional service description (optional).
- Service Duration & Price: Enter the Specification name, Price, Time (Mins), and link Raw Materials if applicable (optional).
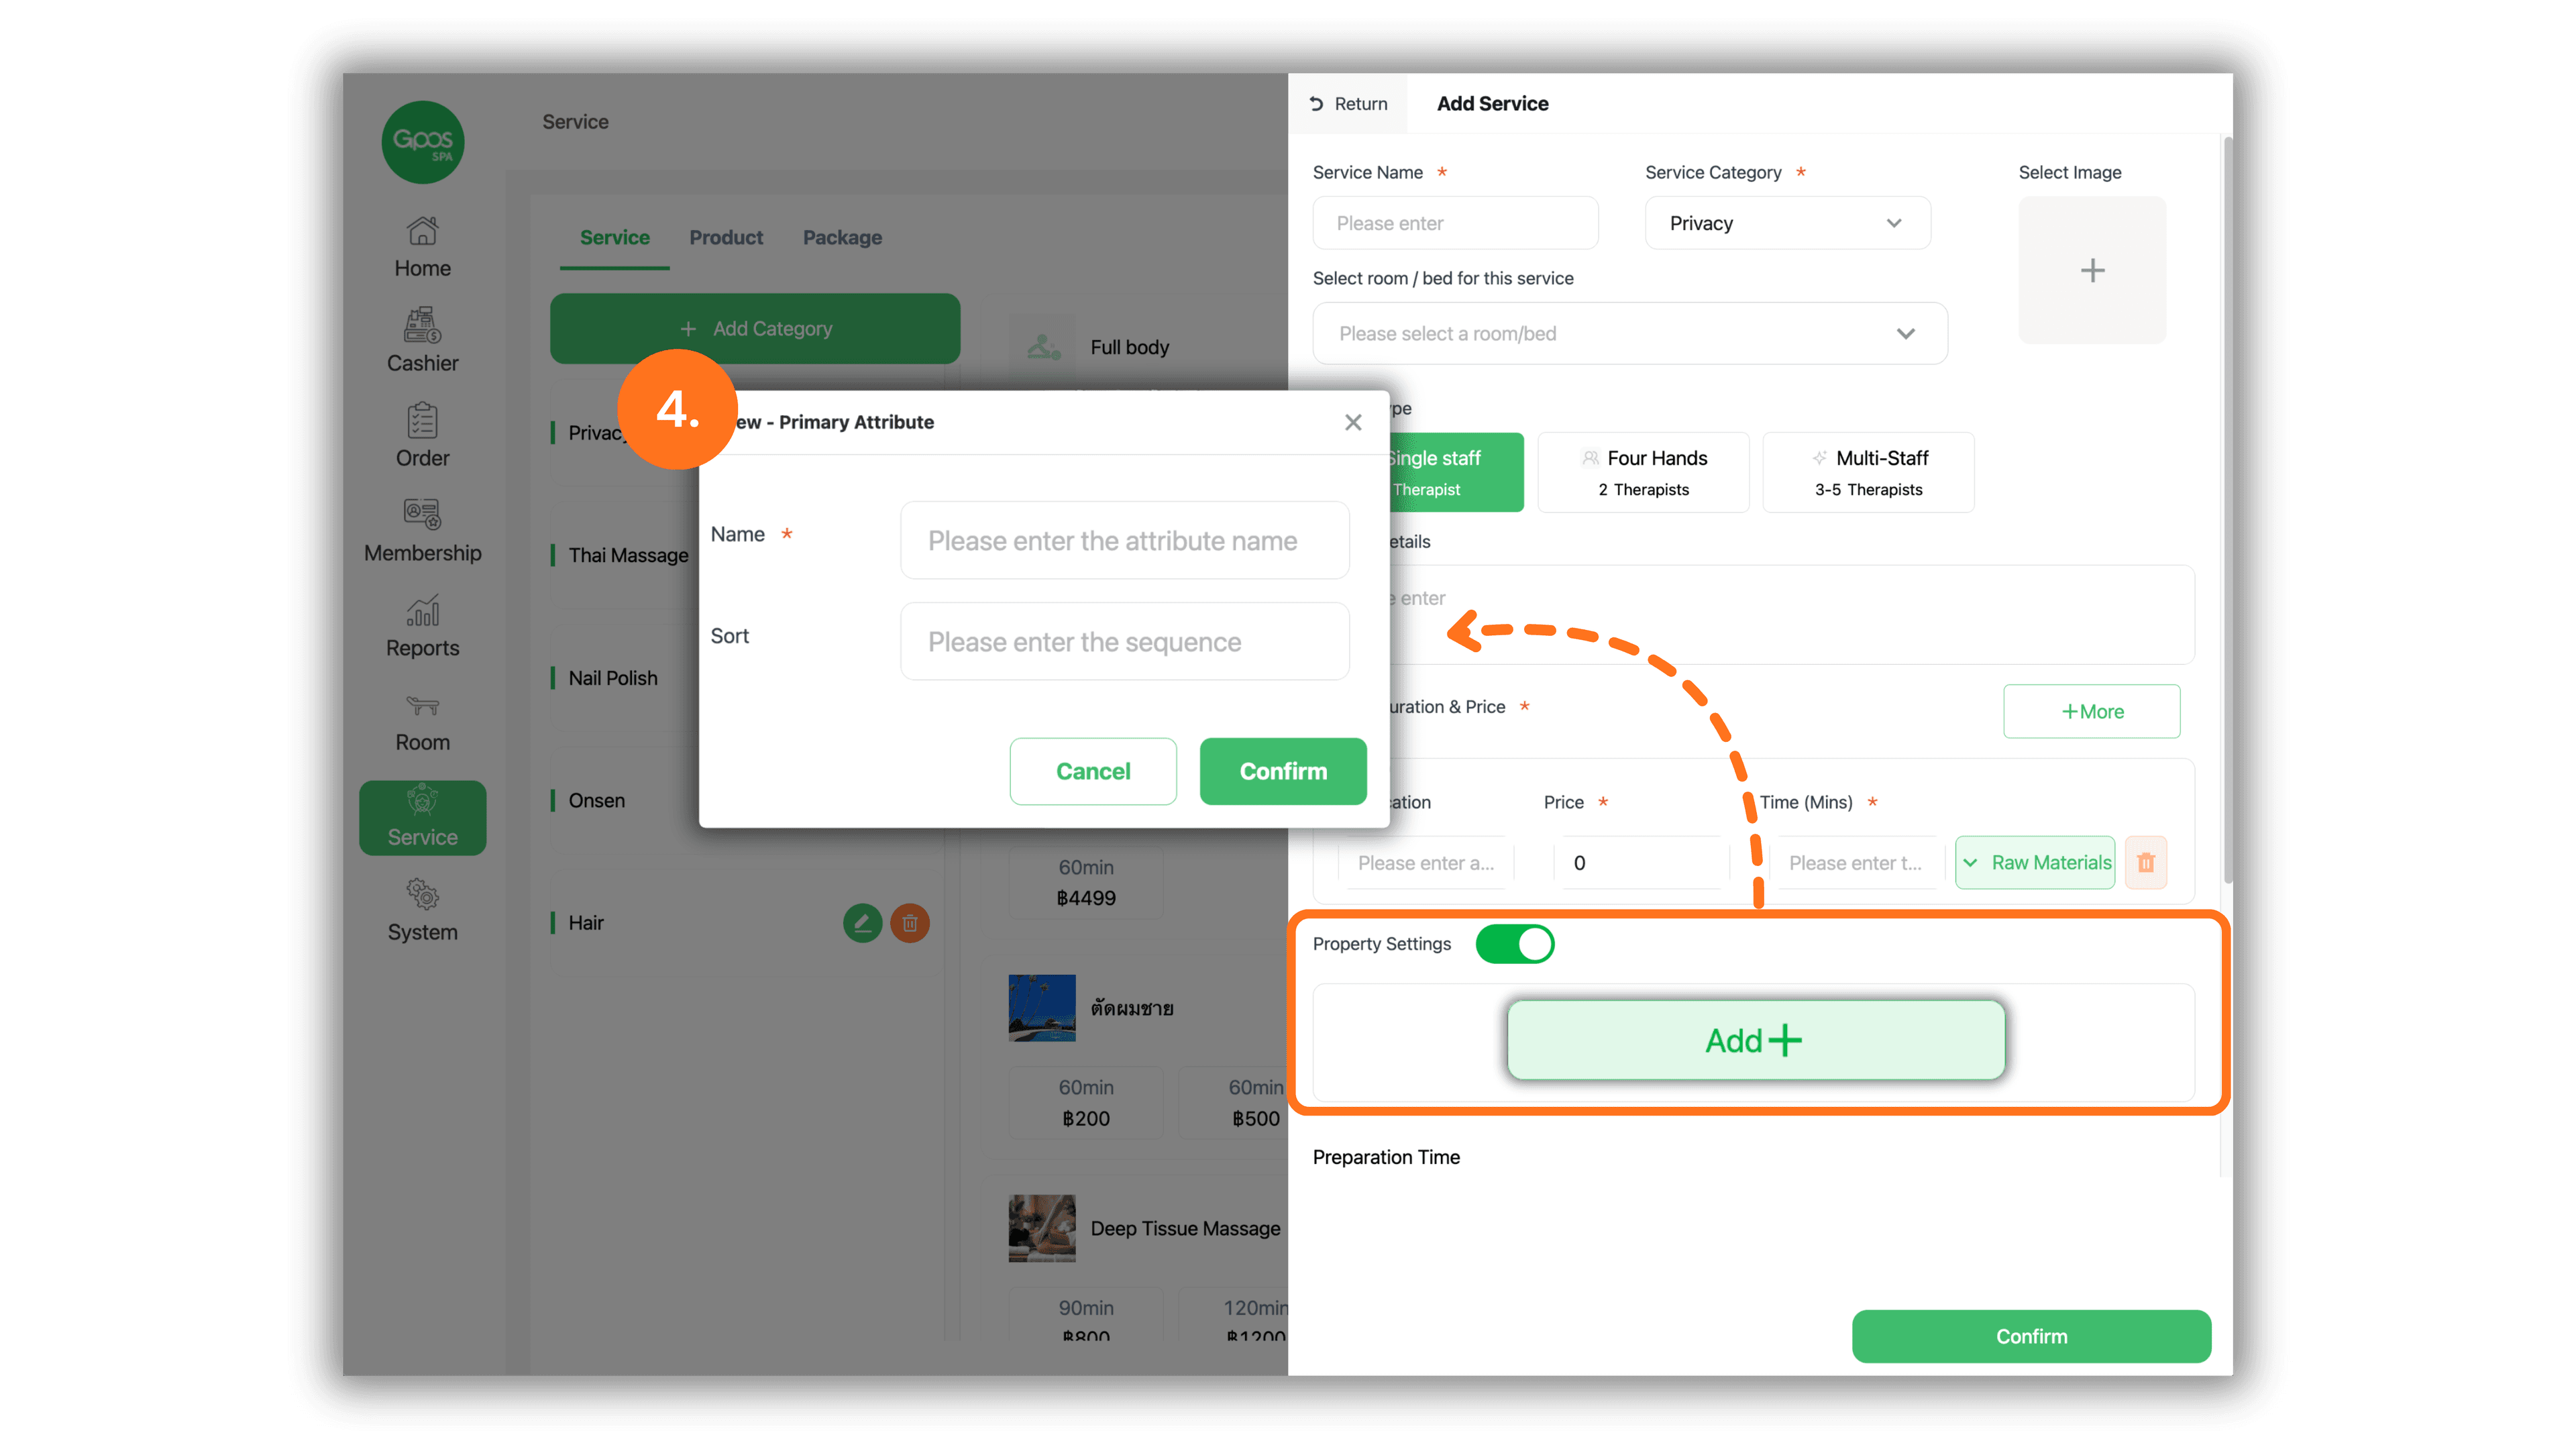
4. Enable Property Settings and Add Primary Attribute Group
Scroll down to the Property Settings section:
- Toggle the Property Settings switch to enable options.
- Click the Add + button to create a primary attribute group.
- In the New - Primary Attribute pop-up, enter the group Name (e.g., Hair Length or Oil Type) and set the Sort sequence (optional), then click Confirm.
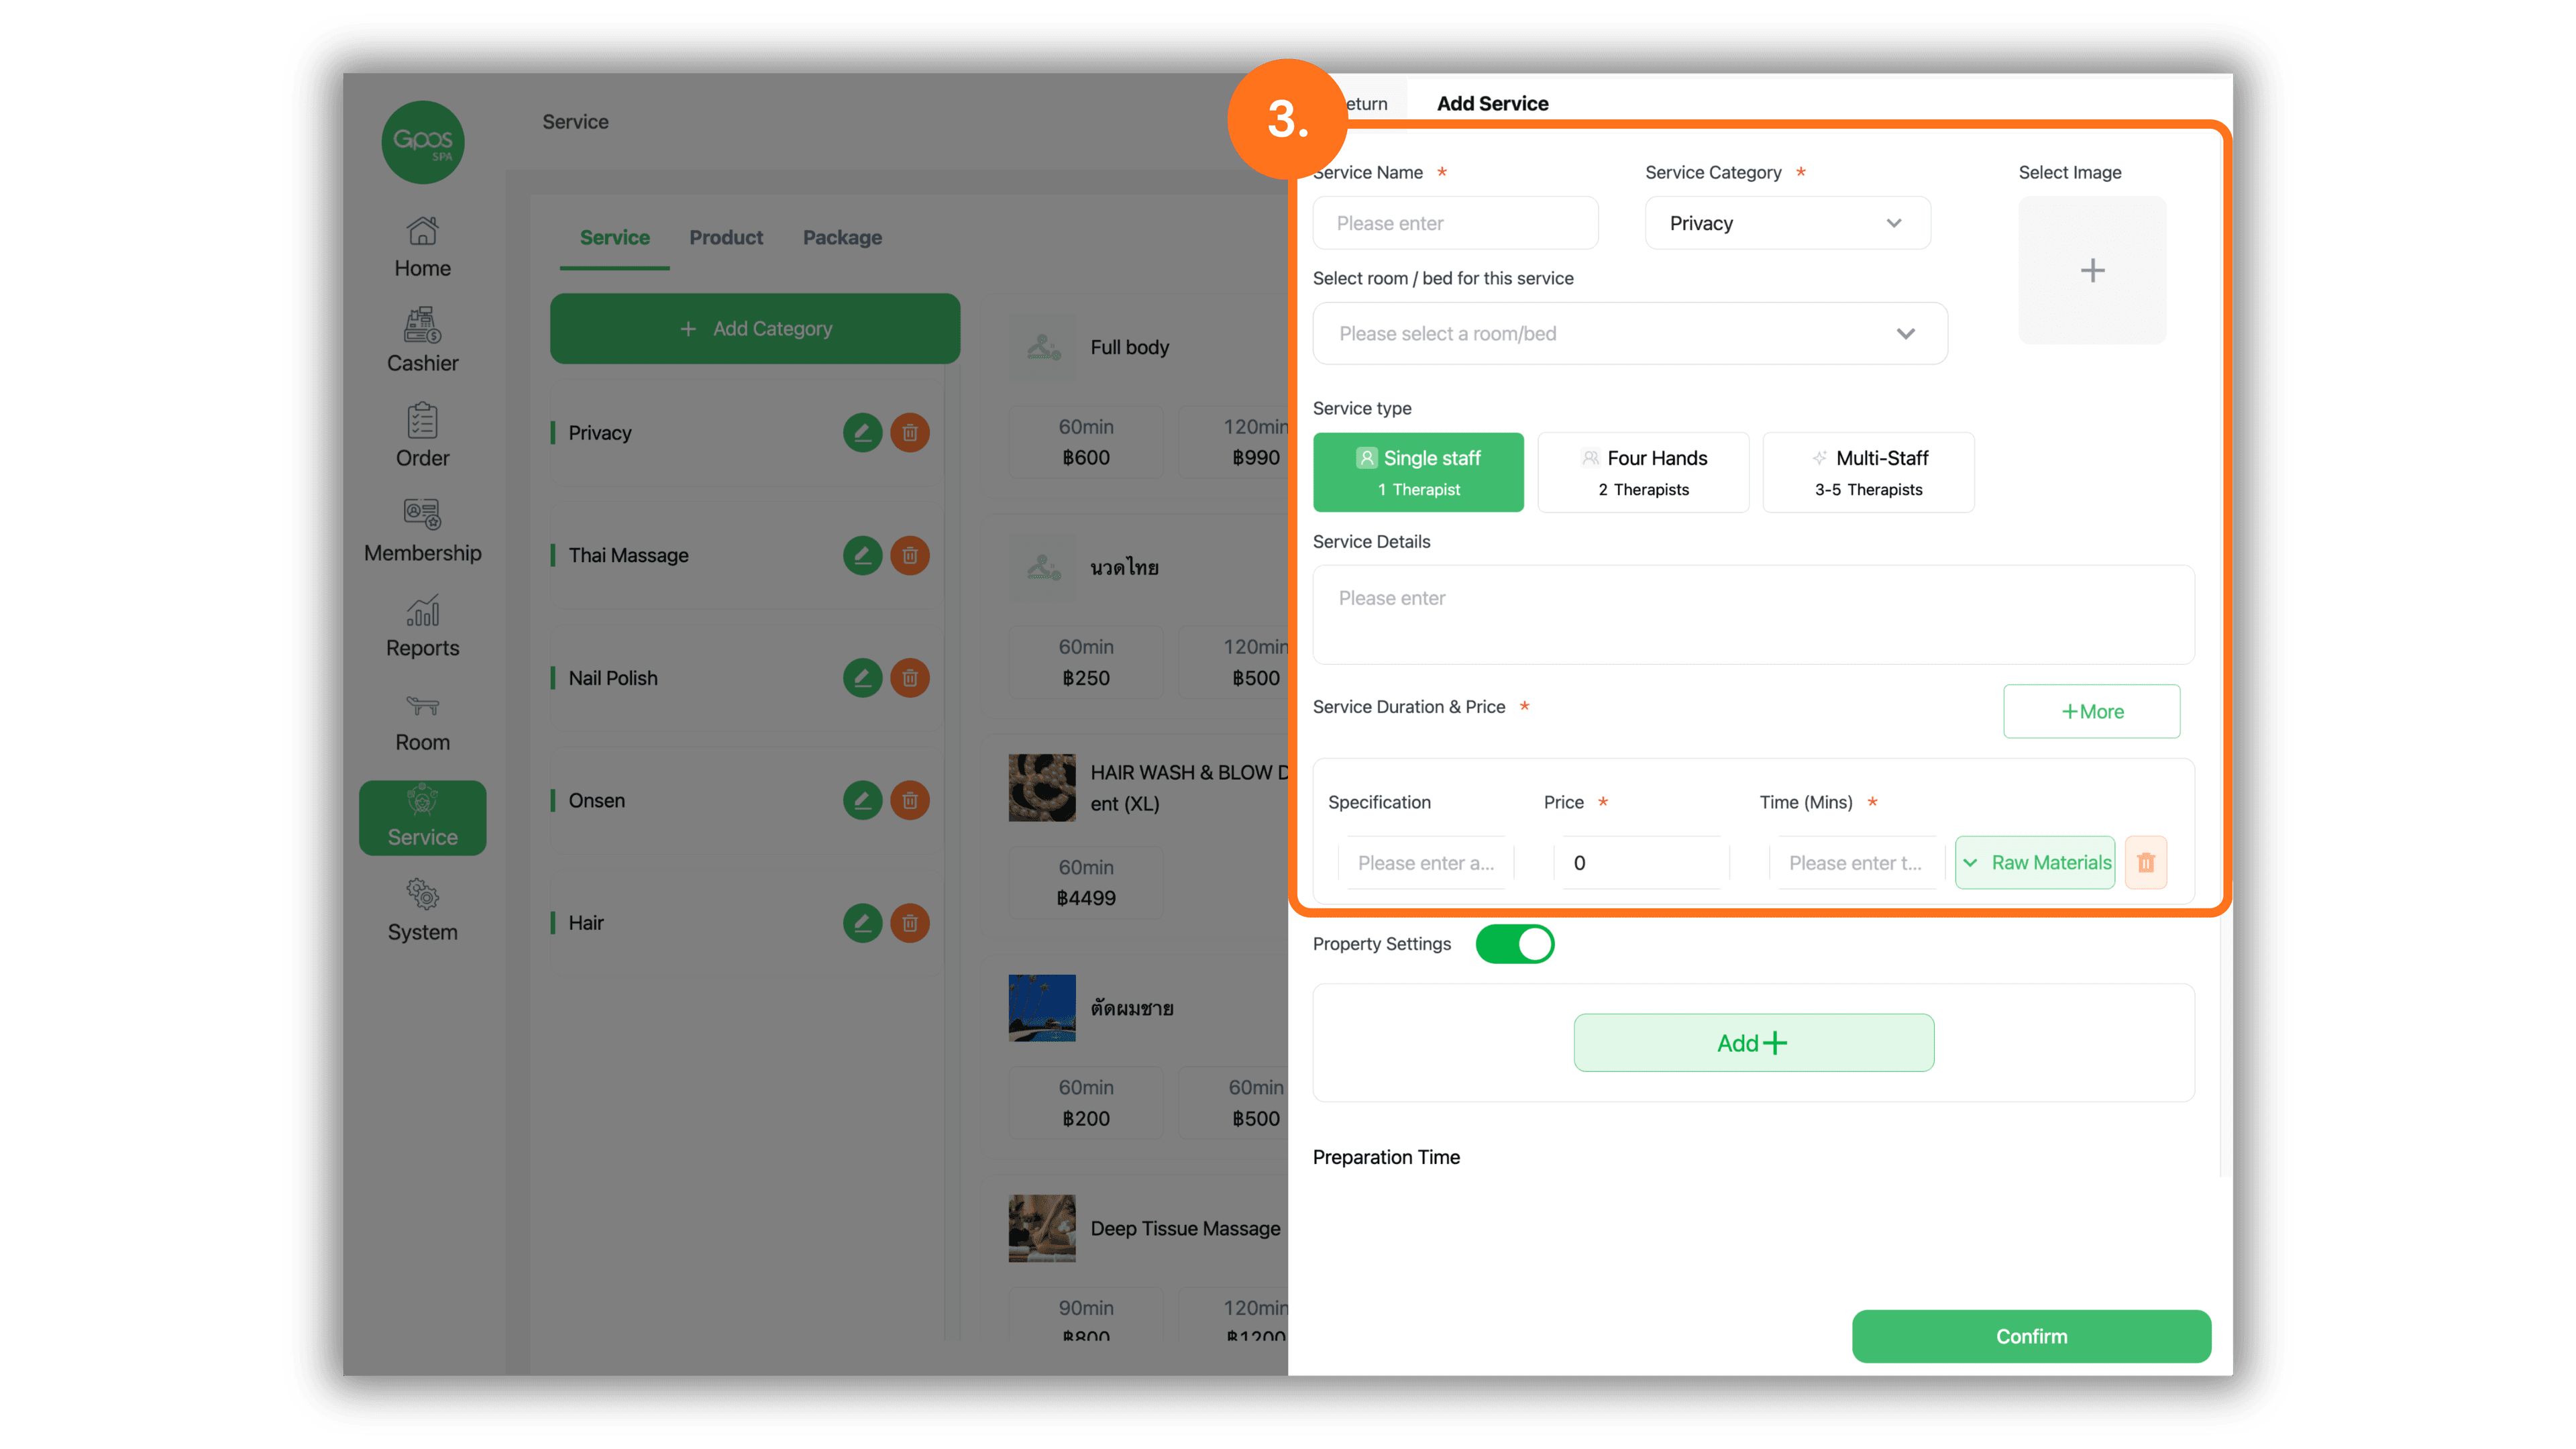
5. Add Sub-Attributes, Extra Pricing, and Save
Click the + icon at the end of the created primary attribute row to add option choices:
- In the Sub-attribute pop-up, enter the choice Name (e.g., Extra Long Hair or Lavender Oil).
- Enter the Extra price if this option adds an additional charge to the base price (optional).
- Set the Sort sequence (optional) and click Confirm.
- After configuring all primary attributes and sub-options, click the green Confirm button at the bottom of the page to save all changes.