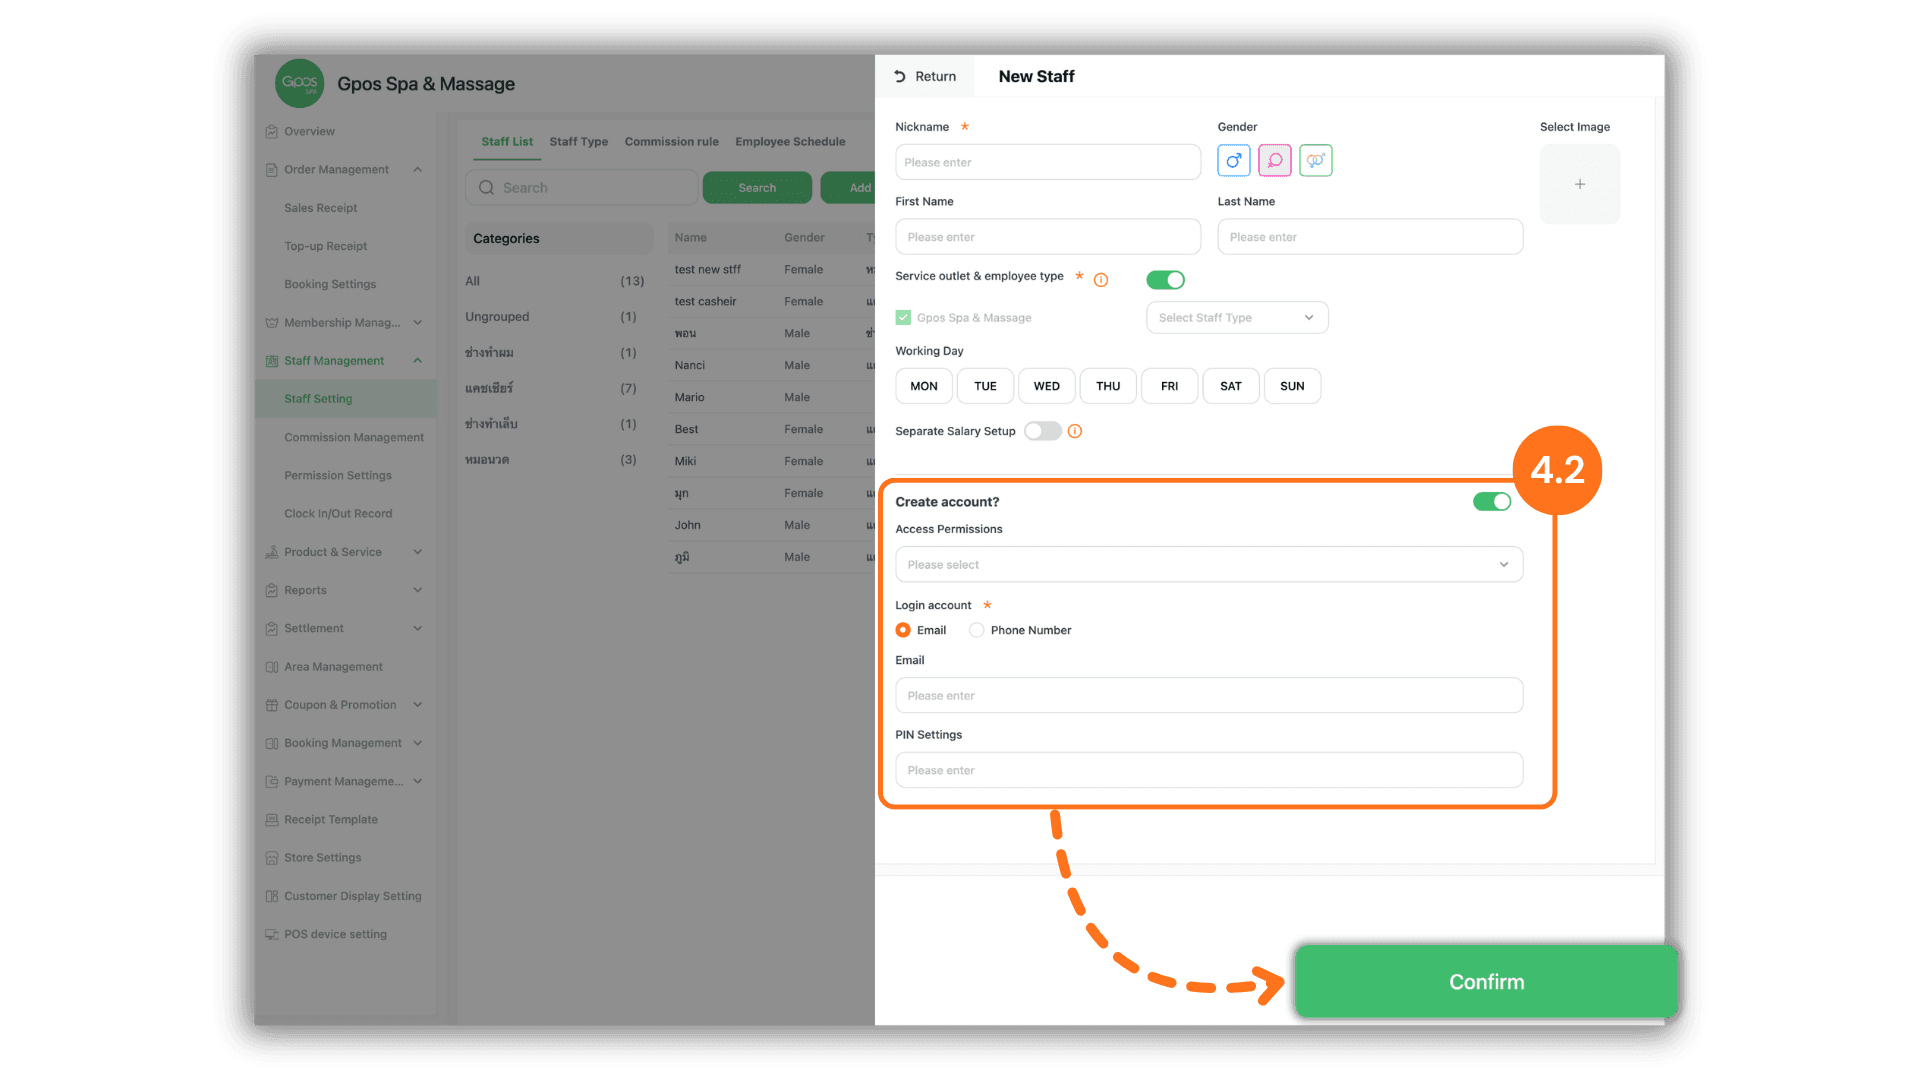
1. Select the store to manage
Start by selecting your target store or branch under "The store I joined" on the "Please select a store" landing page.
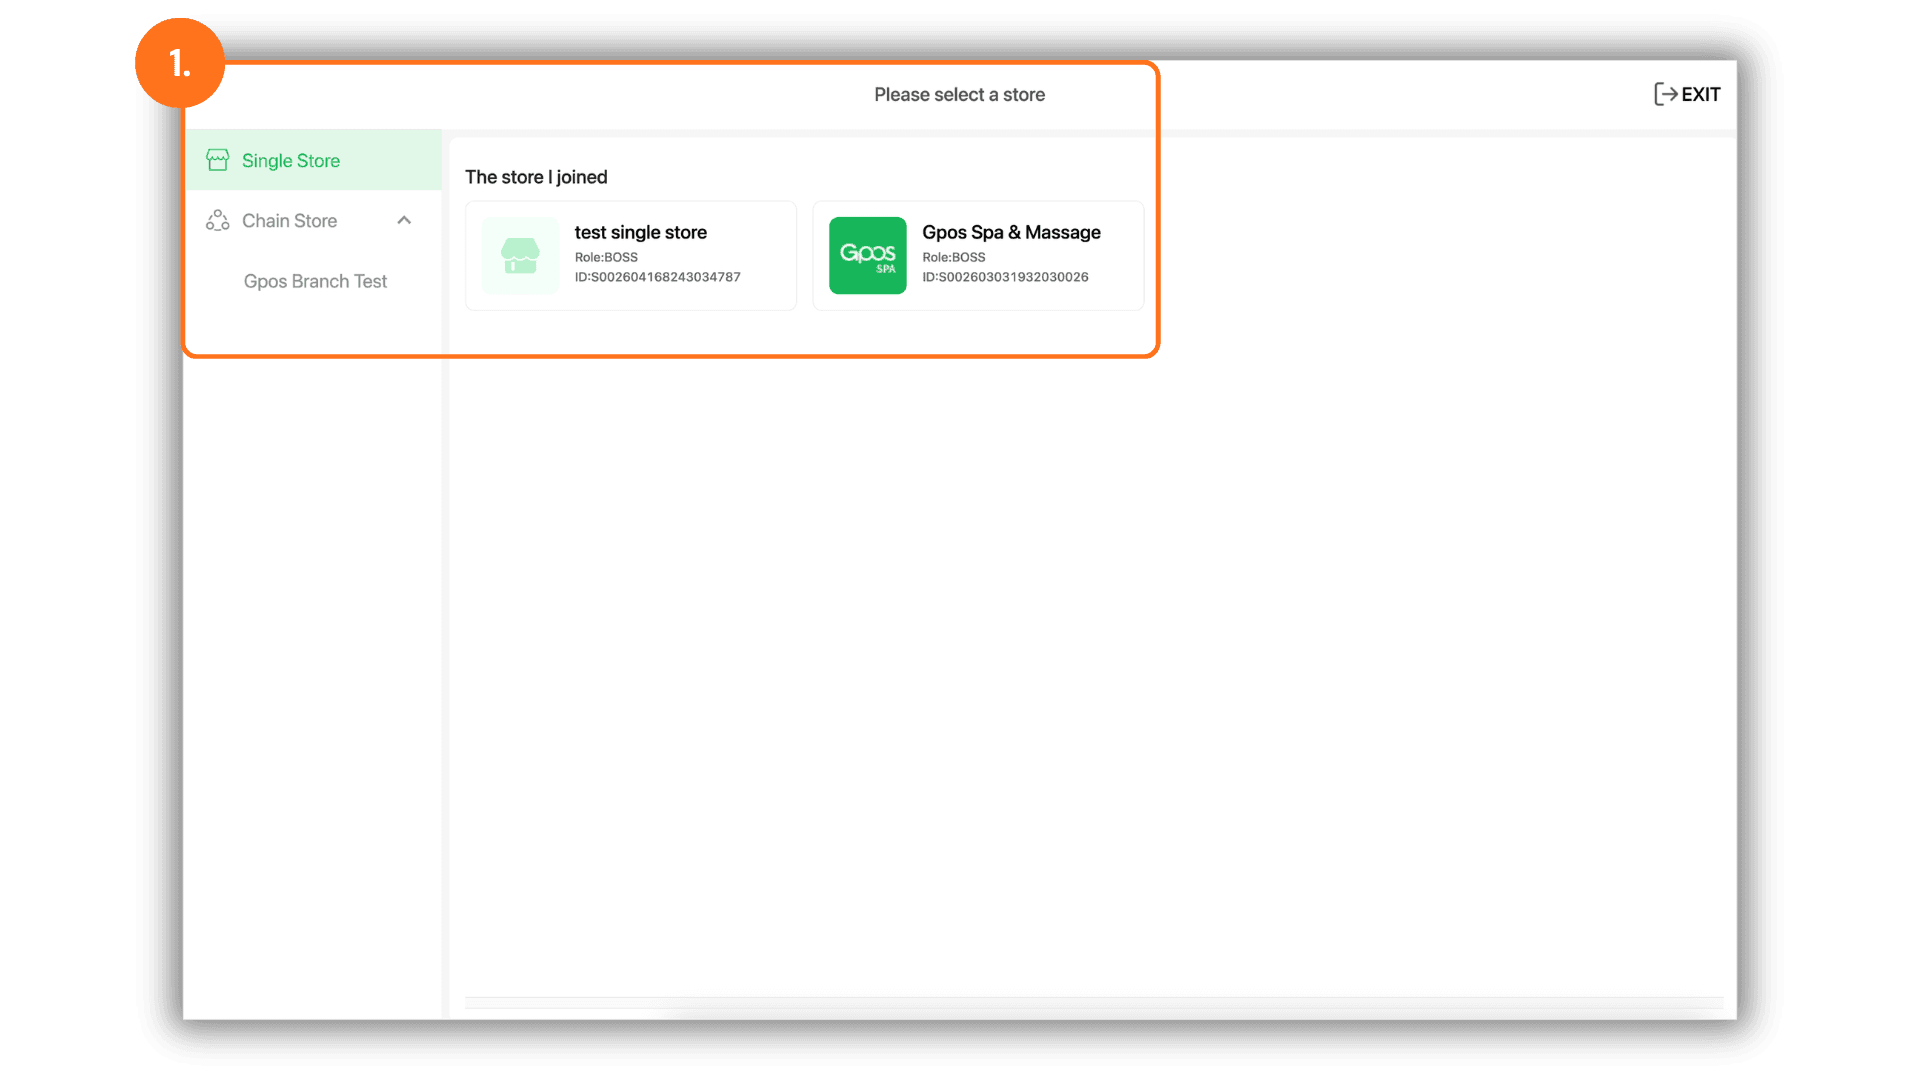
2. Create employee categories
Navigate to Staff Management > Staff Setting in the left menu. Select the Staff Type tab and click Add Category to define job roles or employee groups (e.g., Cashier, Masseuse, Hair Stylist).
Note: At least one staff category must be created before adding individual staff profiles.
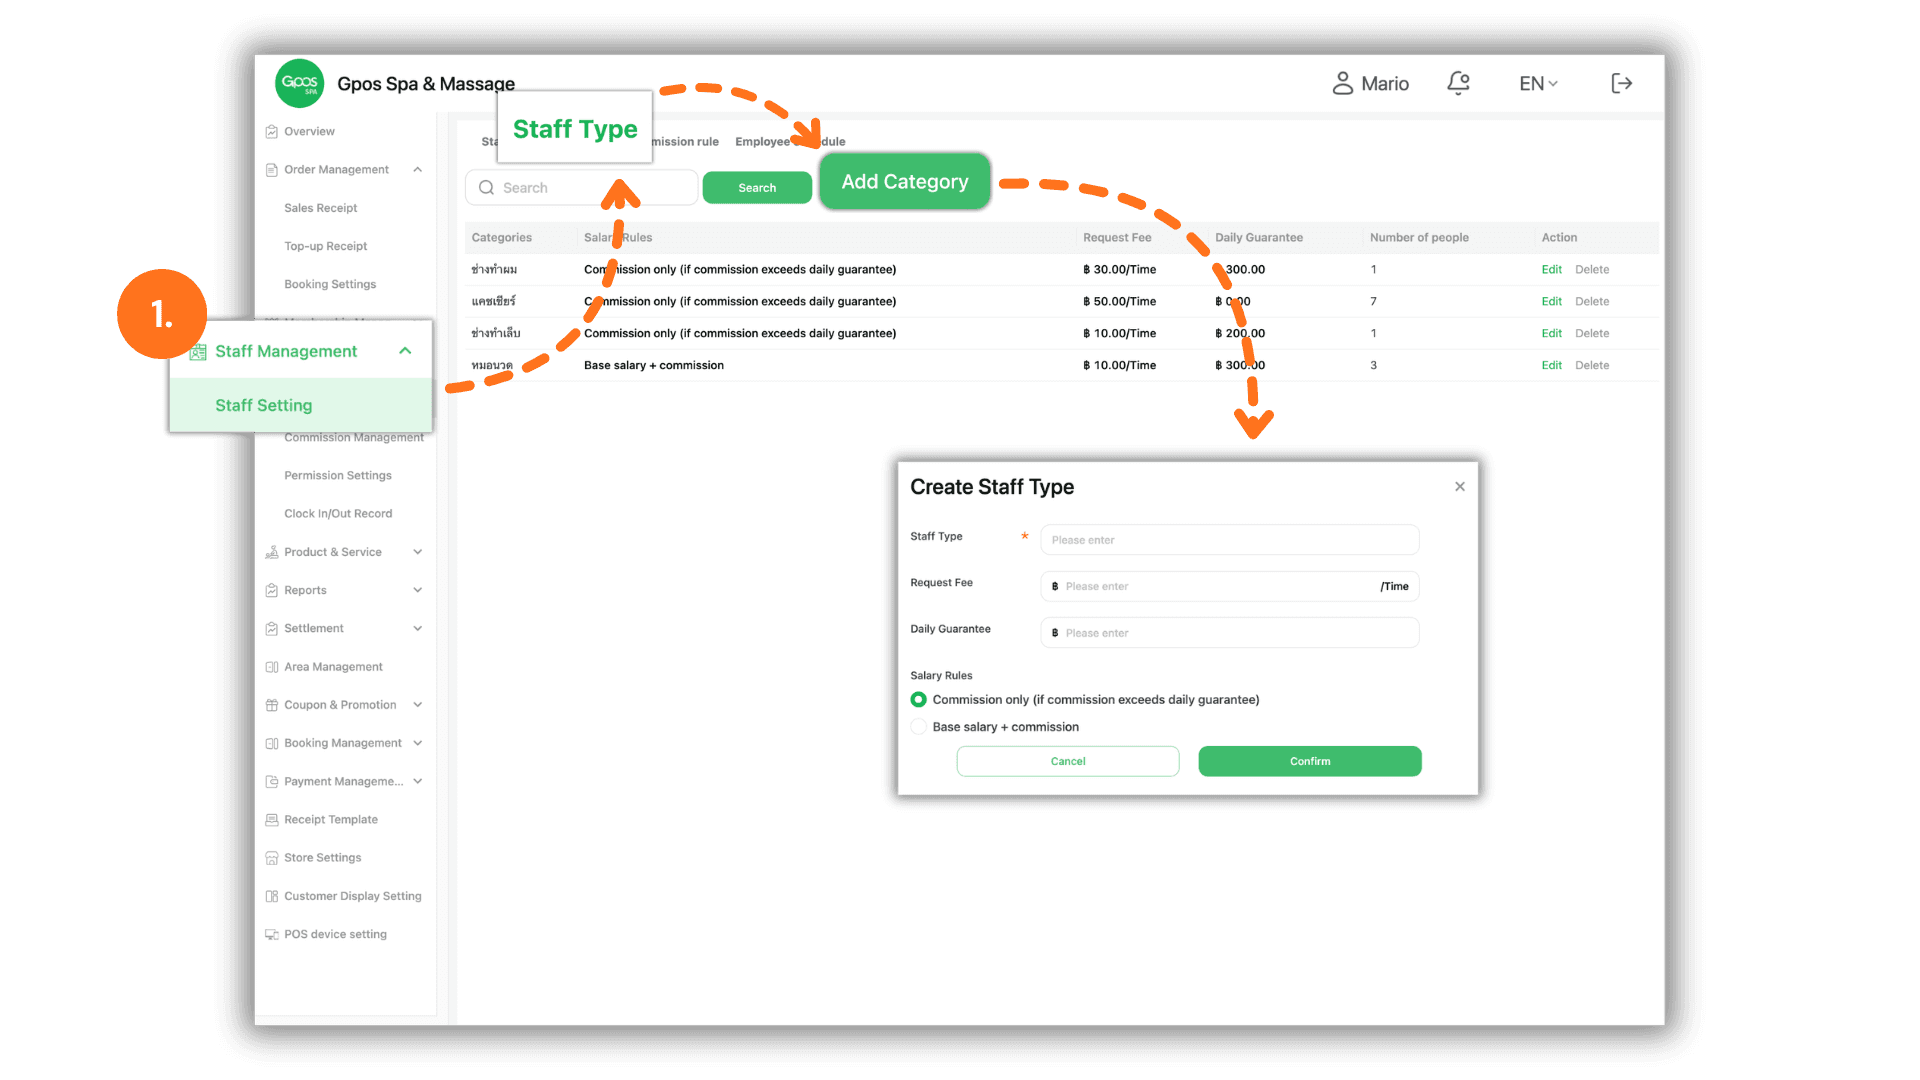
3. Open the staff creation form
Click the Staff List tab and click the green Add Staff button to start creating a new employee profile.
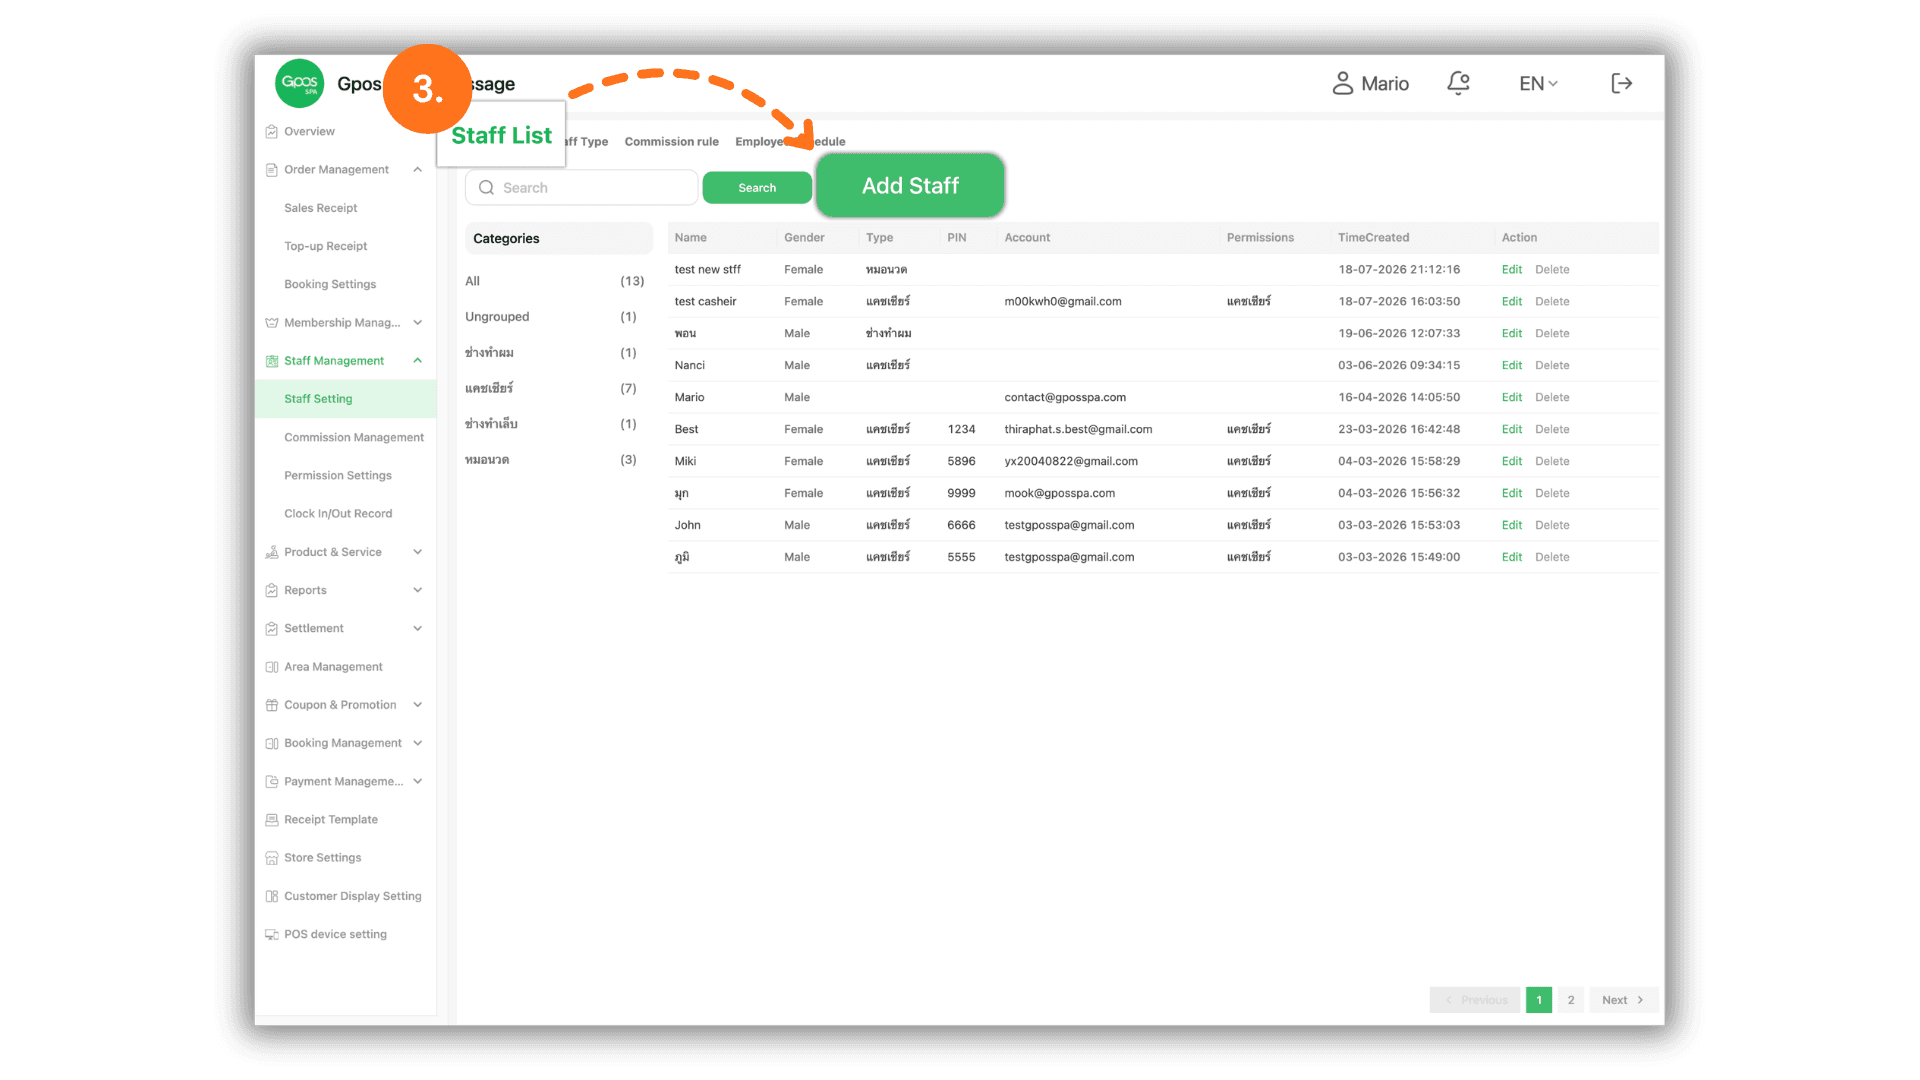
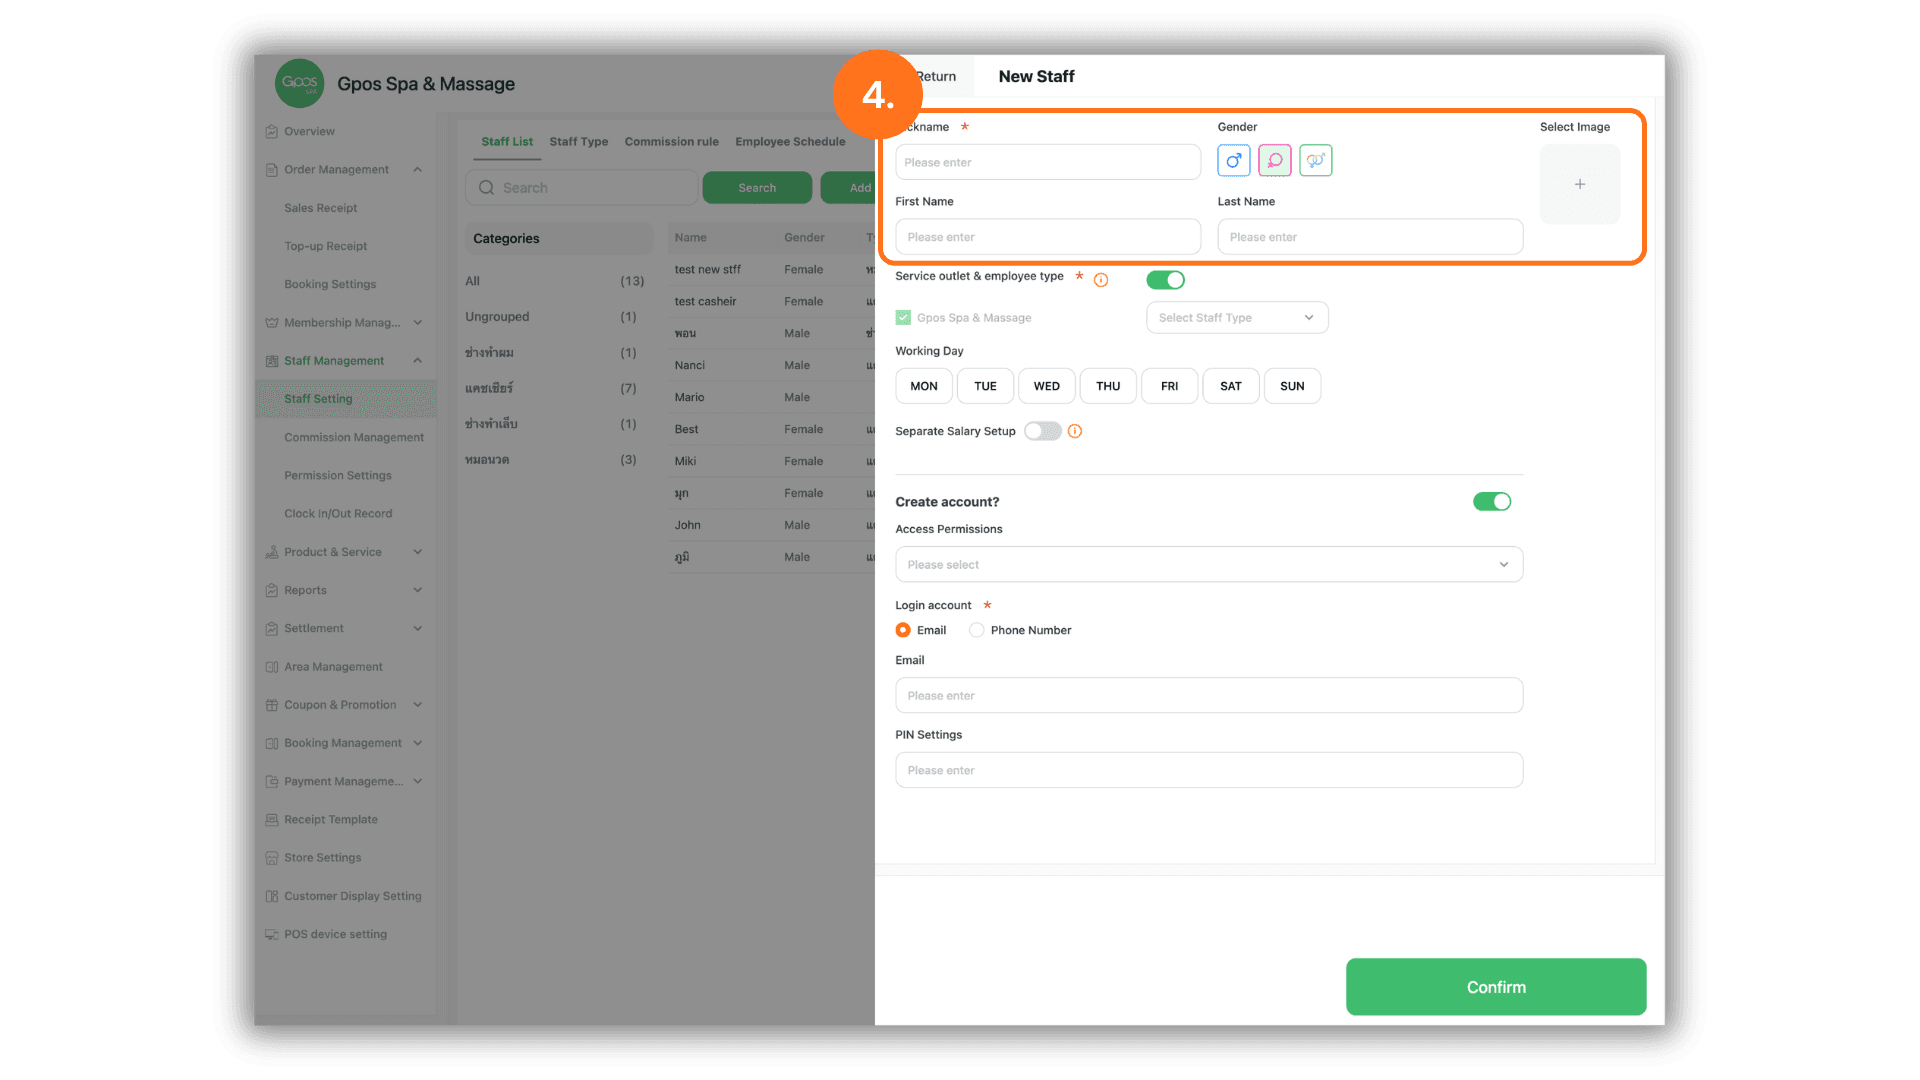
4. Fill in basic profile details
Enter the employee's basic personal details:
- *Nickname : Enter the display name used in system workflows (required).
- Gender: Select the employee's gender icon.
- First Name / Last Name: Enter real name details (optional).
- Select Image: Click to upload a profile photo for the employee (optional).
4.1 Configure outlet assignment, schedule, and individual salary rules
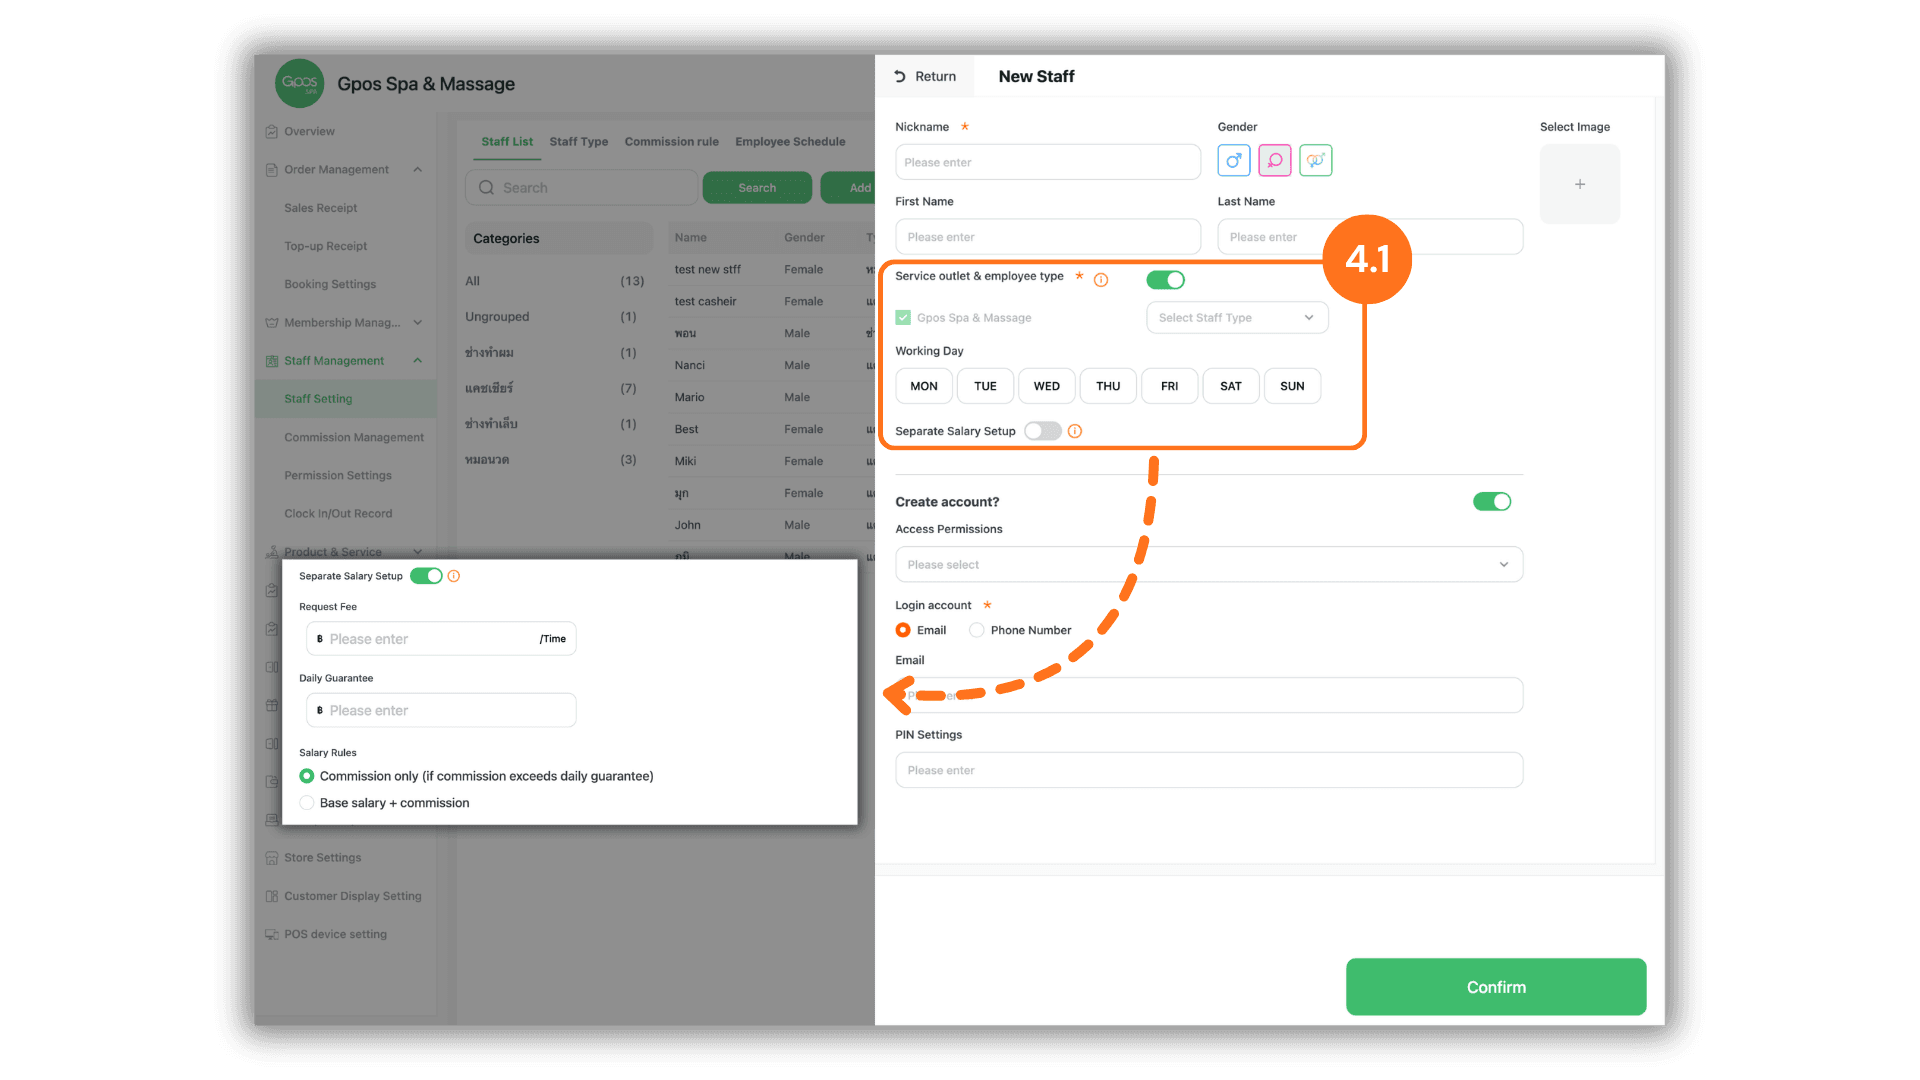
Set up employment parameters under Service outlet & employee type ***:
- Toggle Outlet Status:
- OFF: Keeps the default group; disables shift scheduling, time tracking, and commission calculations.
- ON: Activates the position for the chosen outlet. Allows time tracking, shift scheduling, and commission earning. Next, select the designated staff group.
- Working Day: Select the days of the week the staff member works (Note: Unselected days will prevent the employee from clocking in).
- Separate Salary Setup: Toggle ON if this individual requires custom Request Fee, Daily Guarantee, or Salary Rules different from the category default.
4.2 Configure account login credentials and confirm creation
Enable system login access by turning on Create account?:
- Access Permissions: Select an access role pre-configured in Permission Settings (Note: It is recommended to set up Permission Settings before creating staff accounts).
- *Login account : Choose either Email or Phone Number. Upon saving, auto-generated login passwords will be dispatched via:
- Email: Sent from SUNMAX
- SMS: Sent from iATSMS
- PIN Settings: Enter an optional PIN for quick cashier/POS verification.
- Click Confirm at the bottom to complete staff account creation.