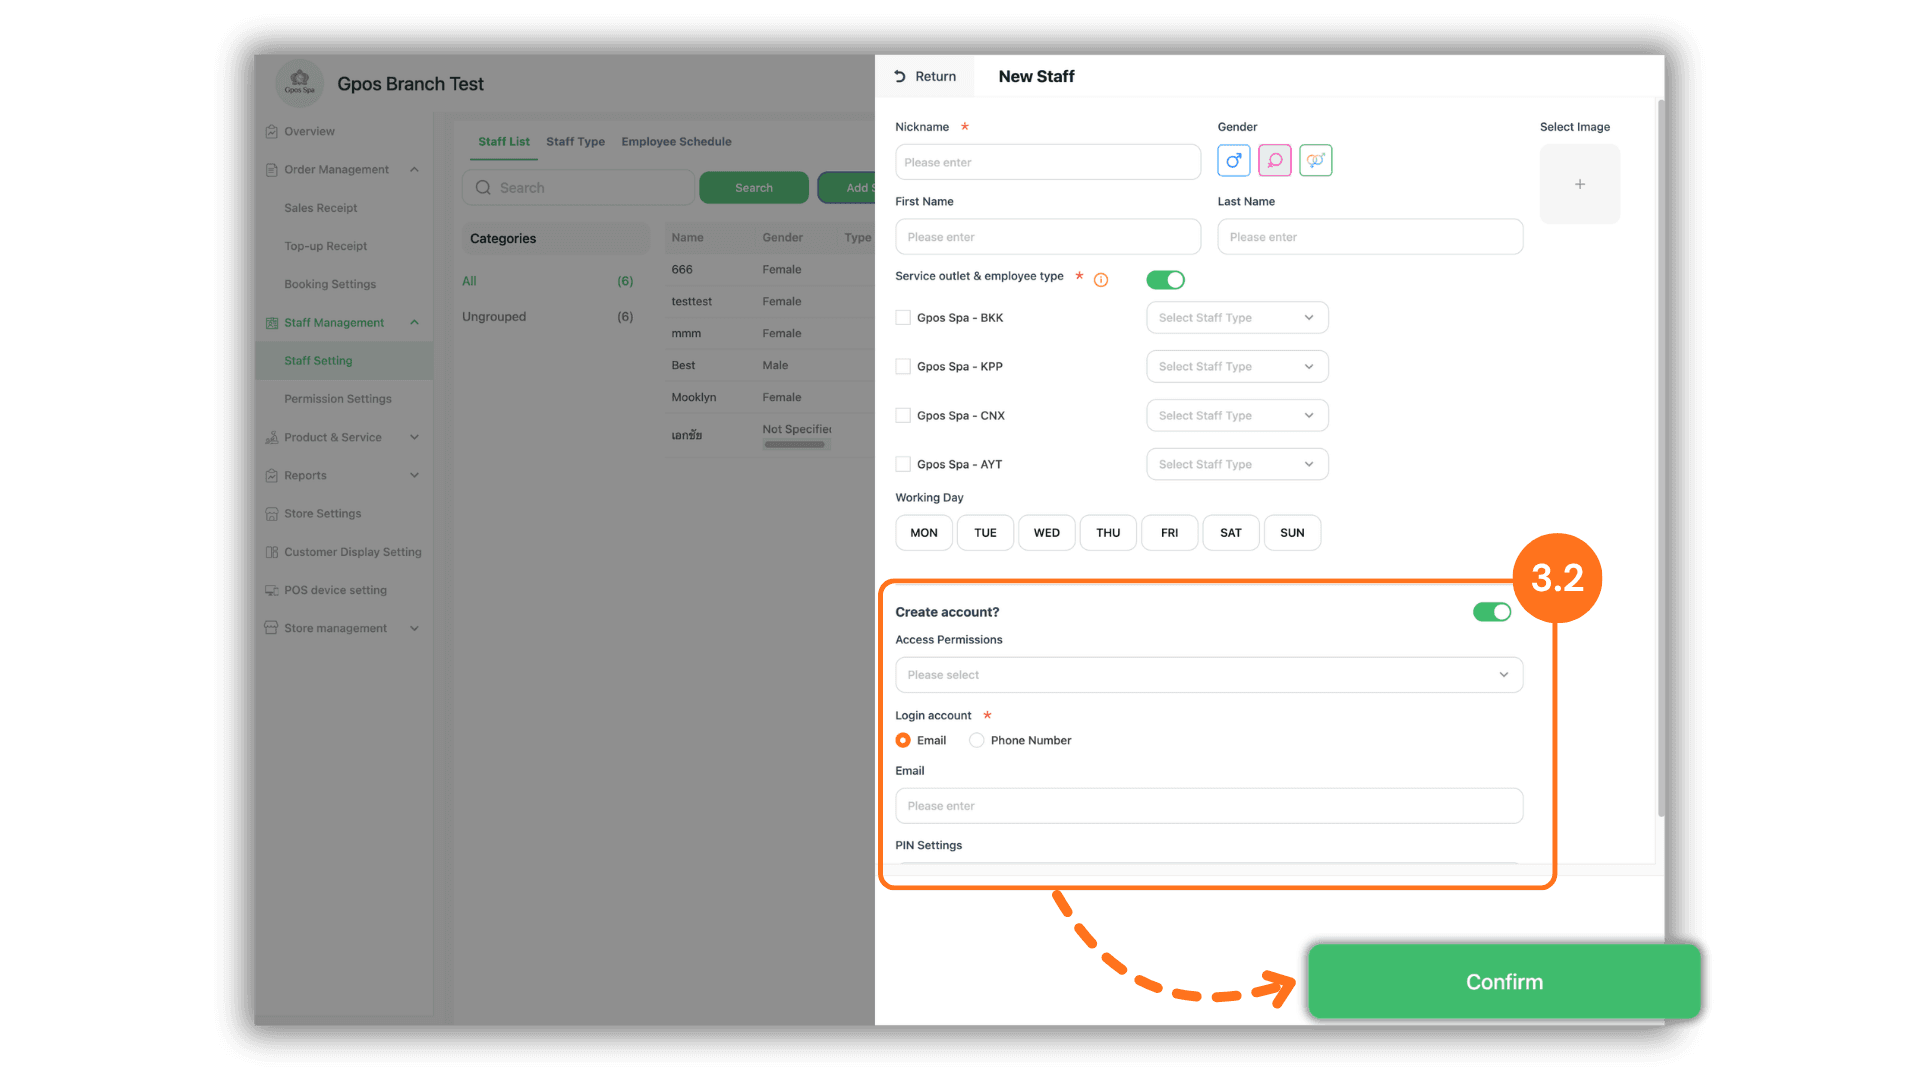
1. Select Headquarters to Access the System
Start by clicking to select Headquarters (e.g., Gpos Branch Test) from the Please select a store page to enter the central administration portal.
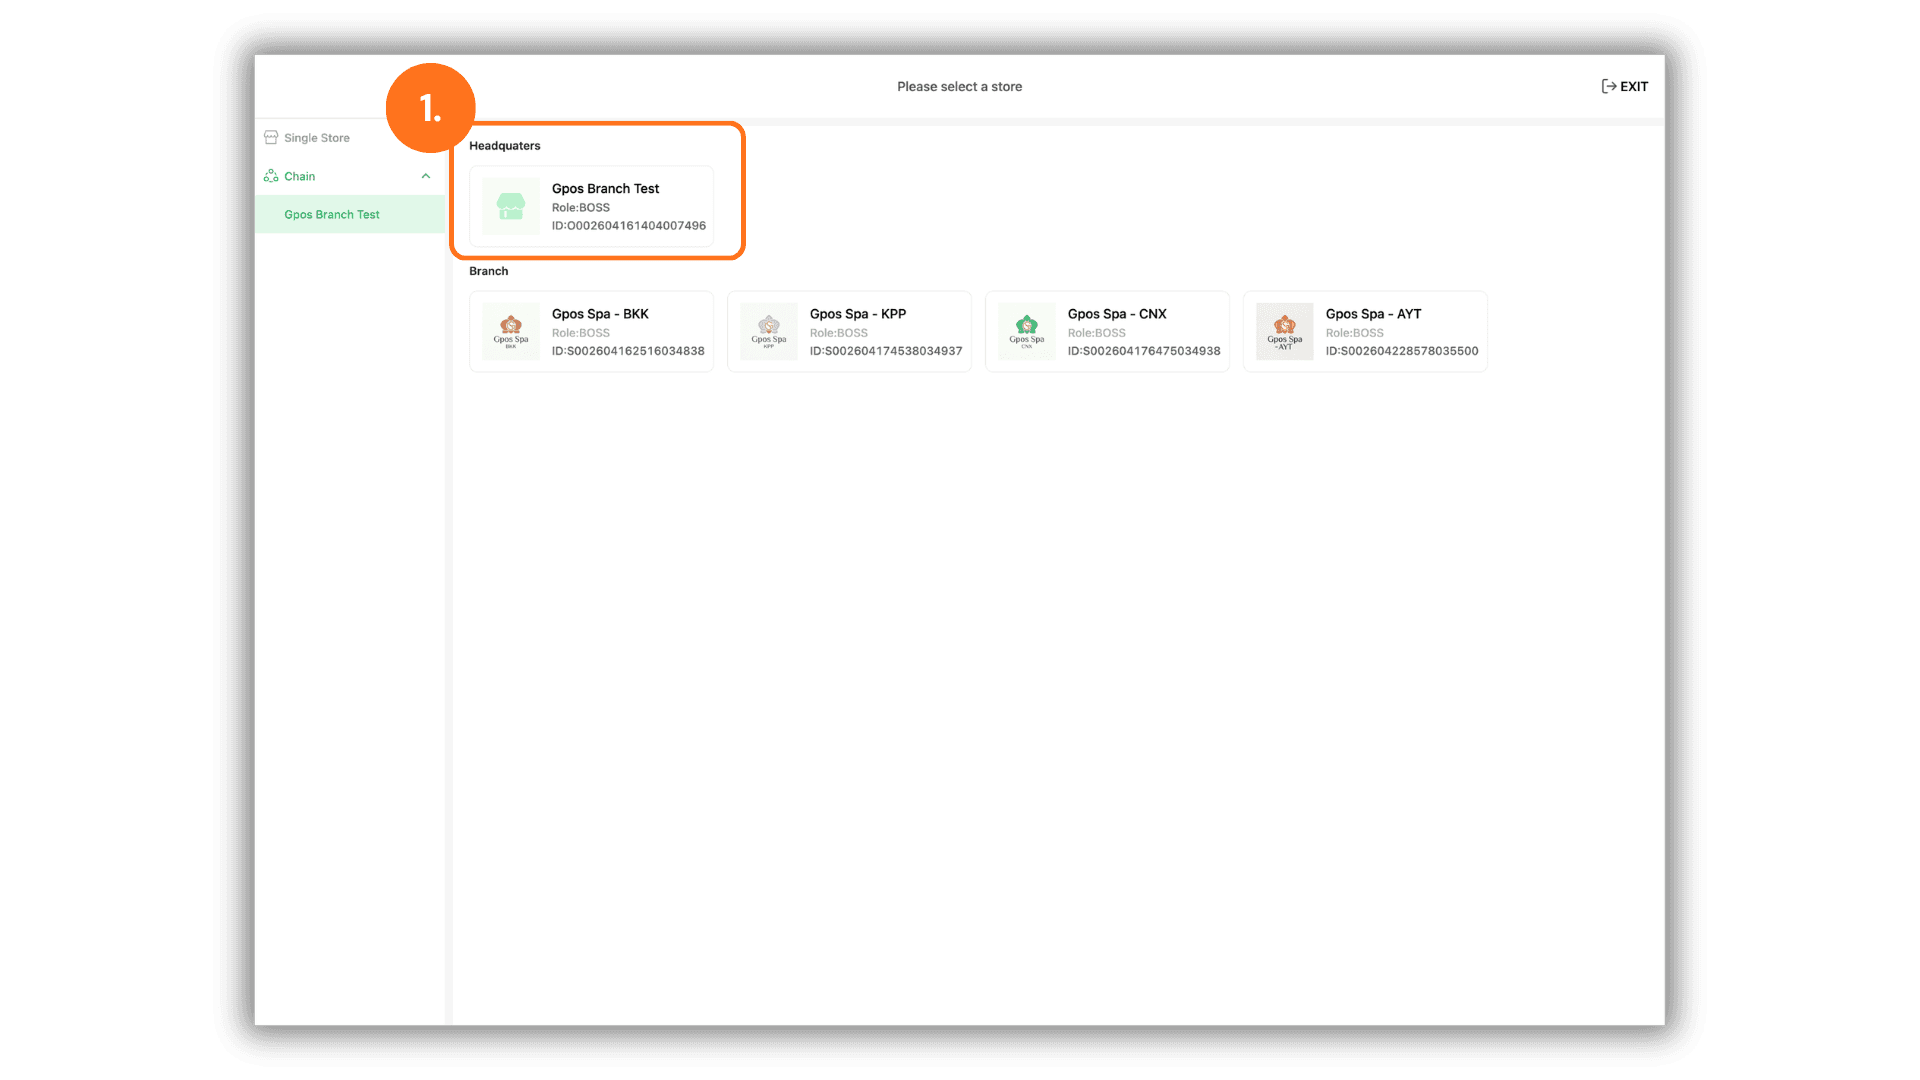
2. Navigate to Staff Settings and Click Add Staff
Go to the left-hand menu, select Staff Management, click Staff Setting, and then click the green Add Staff button at the top right to start creating a new employee profile.
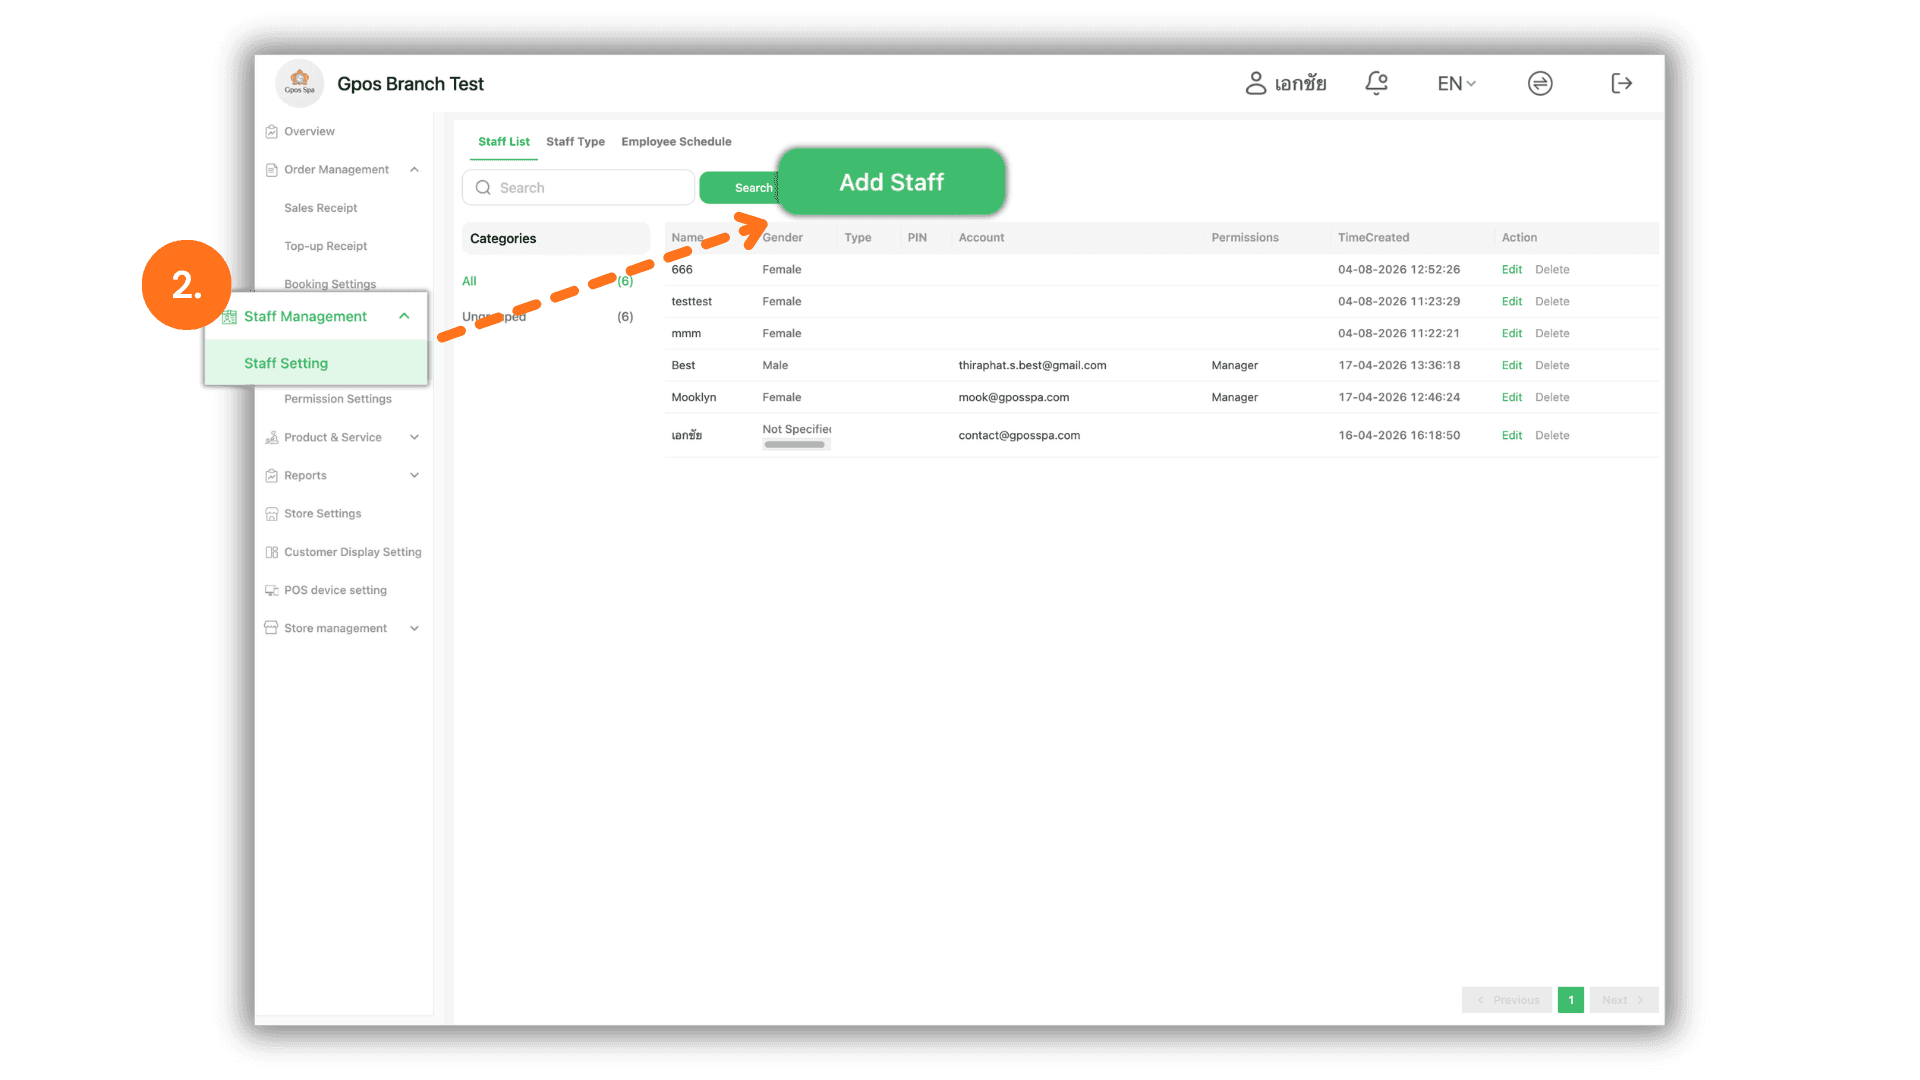
3. Enter Basic Staff Details
Fill in the employee's basic personal information in the New Staff window as follows:
- Nickname: Enter the employee's nickname (required field).
- Gender: Select the employee's gender option.
- First Name / Last Name: Enter the employee's first name and last name (optional).
- Select Image: Click the + icon to upload a profile photo of the employee (optional).
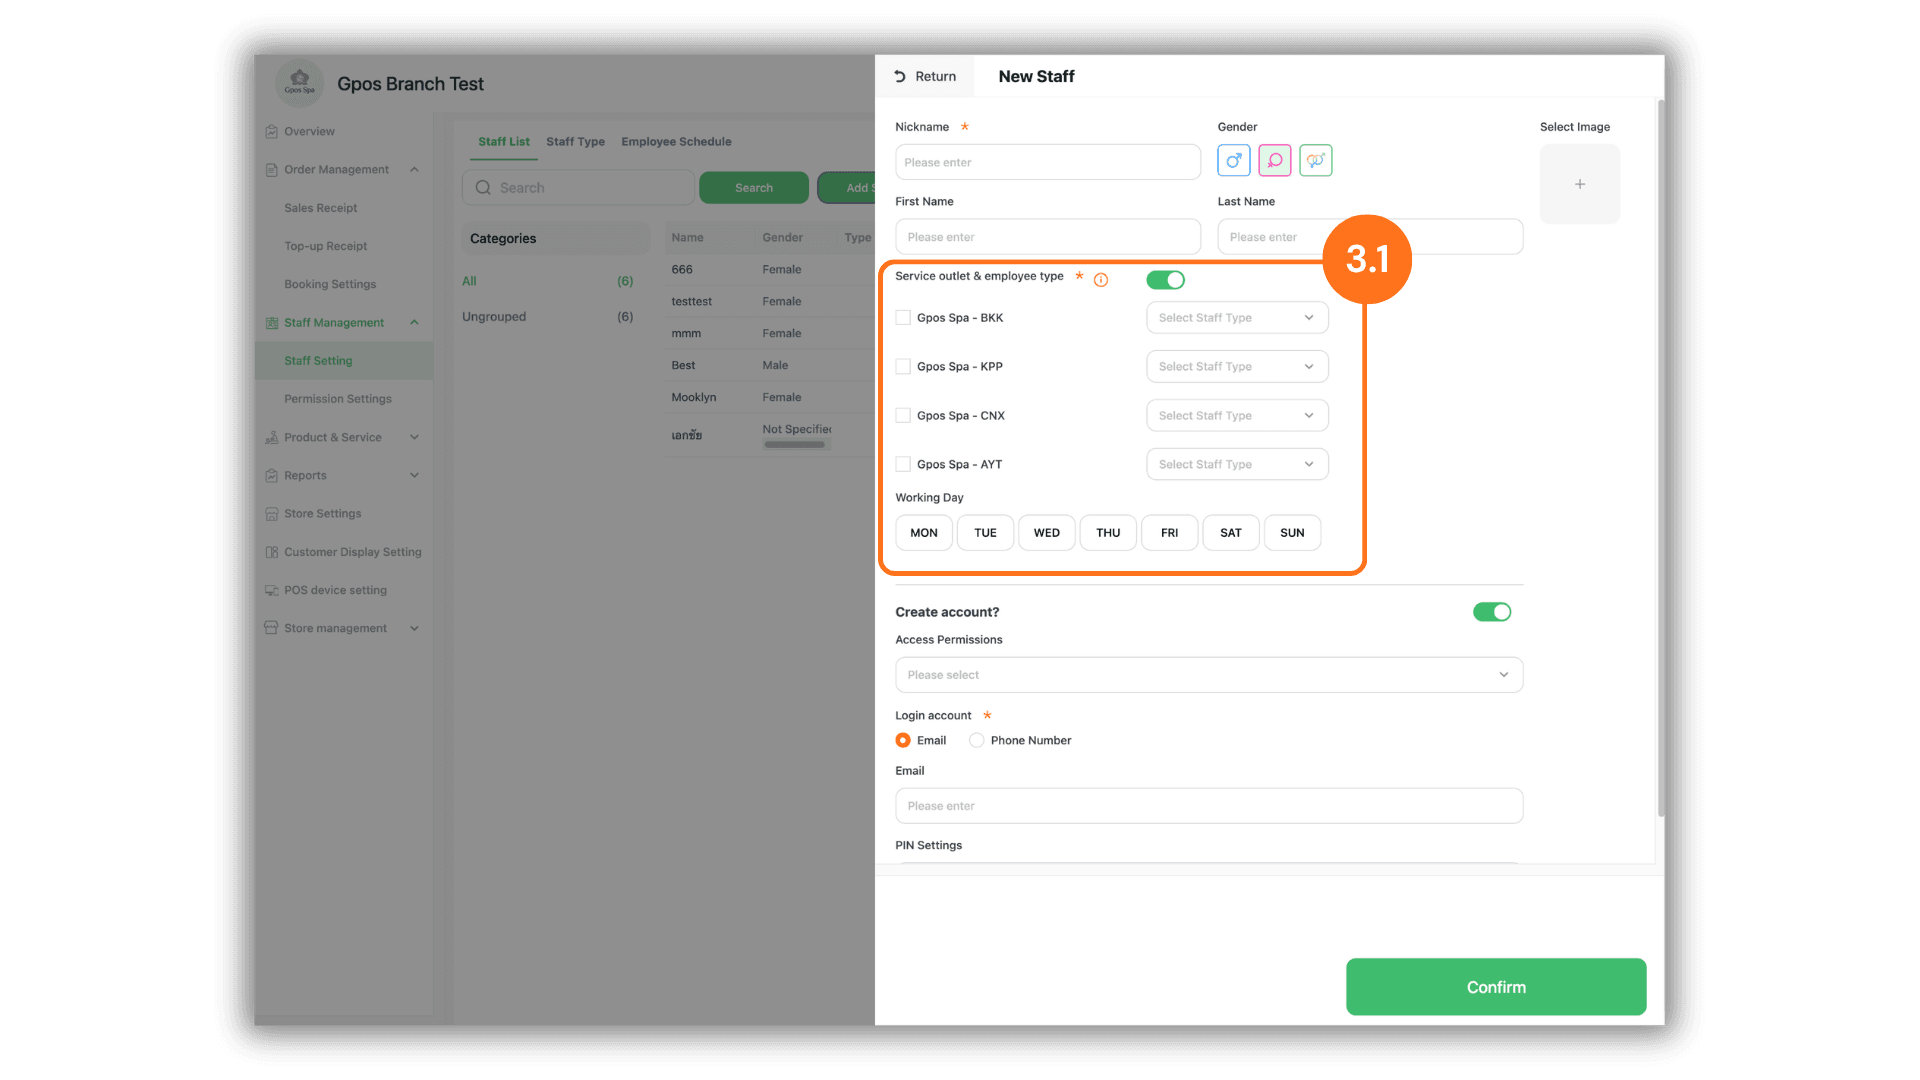
3.1 Assign Service Outlets, Staff Types, and Working Days
Configure the assigned branch locations, employee role categories, and work schedule:
- Service outlet & employee type: Toggle the switch ON or OFF as needed.
- OFF: Keeps the default group unchanged. The employee will not be eligible for shift scheduling, time clocking, or commission calculations.
- ON: Position assignments for the selected branch take effect immediately. The employee can enter shifts, log working time, and be included in commission calculations. Select the appropriate staff type for each enabled branch.
- Working Day: Click to select the employee's active workdays (MON, TUE, WED, THU, FRI, SAT, SUN). (Note: If no working days are selected, the employee will not be able to clock in/out in the system).
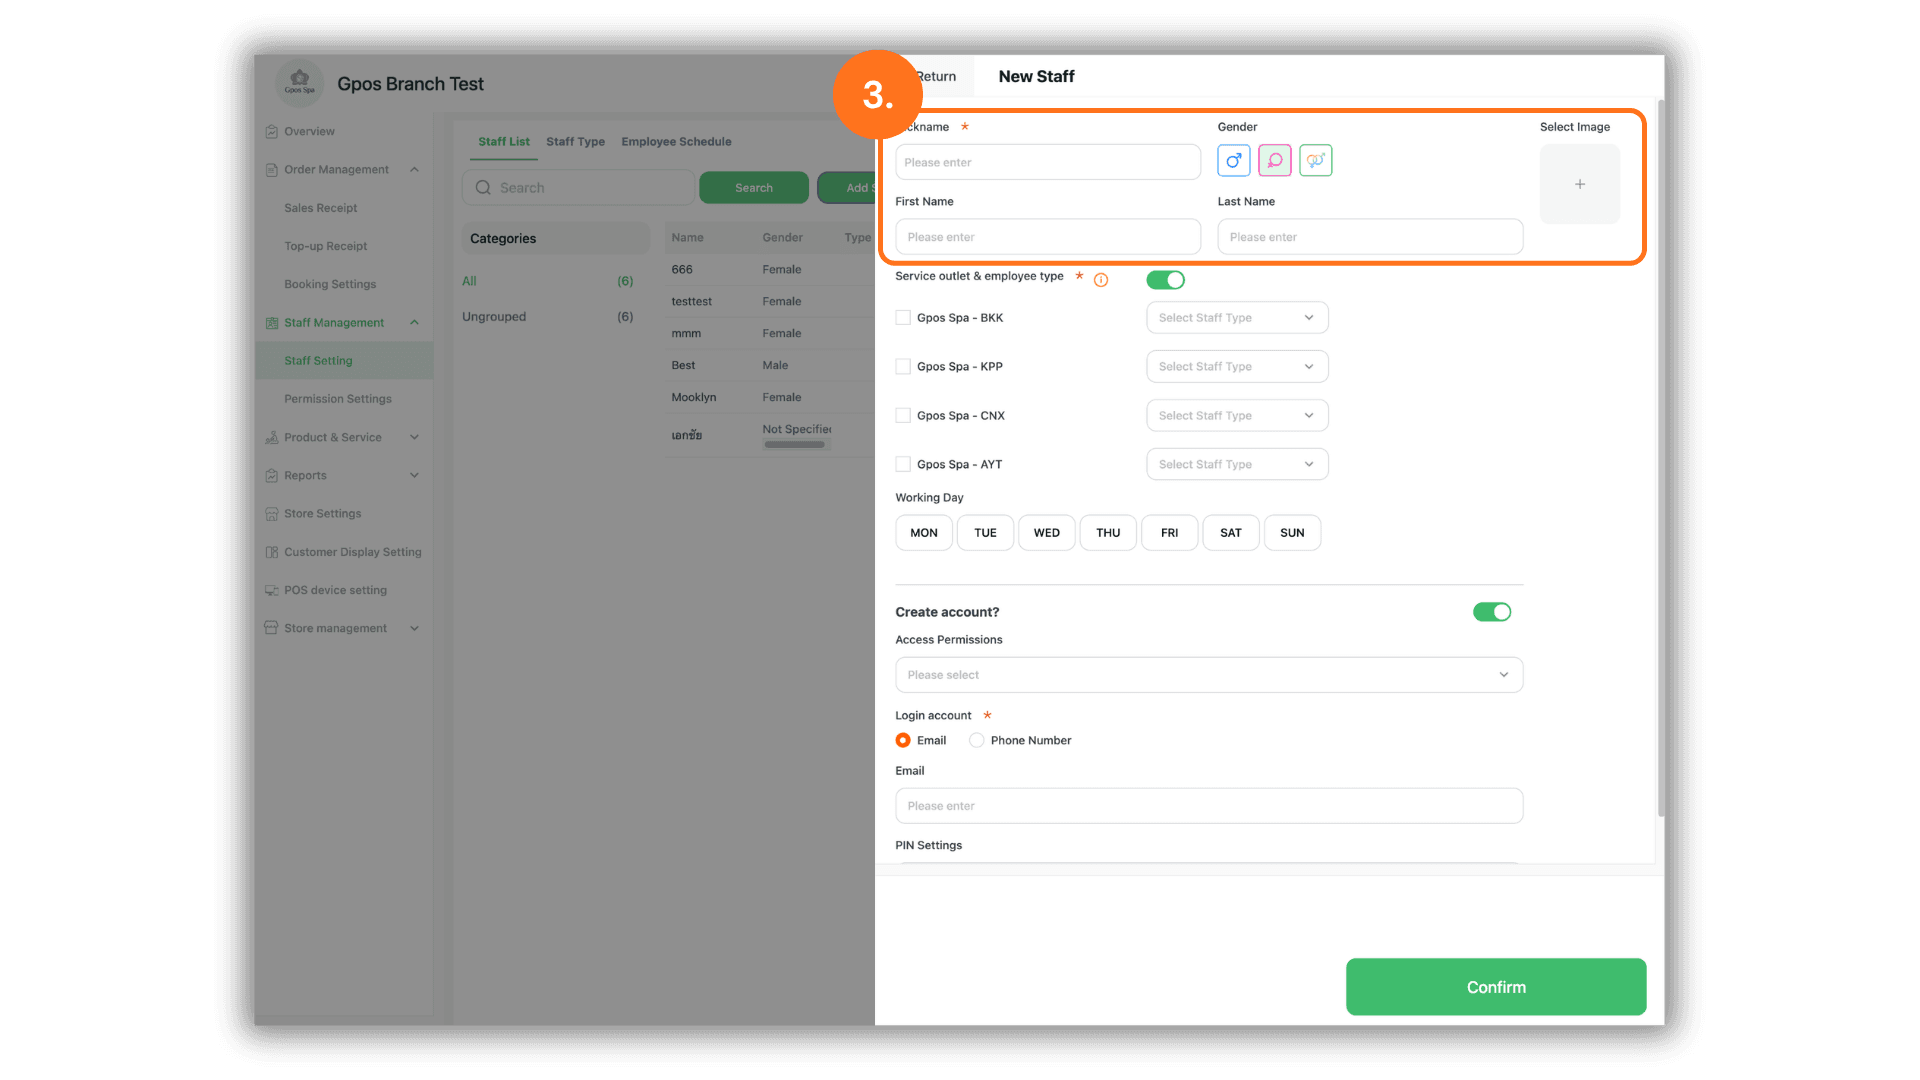
3.2 Configure Account Creation, Access Permissions, and Confirm
To grant the employee system login access, turn ON the Create account? toggle and configure the account credentials:
- Access Permissions: Select the designated access permission role from the dropdown menu (Note: It is recommended to configure roles in Permission Settings before creating staff accounts).
- Login account: Select either Email or Phone Number as the primary login credential. Upon saving, initial login credentials will be sent automatically via the chosen channel:
- Via Email: Sender name SUNMAX
- Via SMS: Sender name iATSMS
- PIN Settings: Set a PIN code for the staff member to log in on POS devices (optional).
- Confirm: Once all settings are completed, click the green Confirm button at the bottom right to immediately save the new staff member.