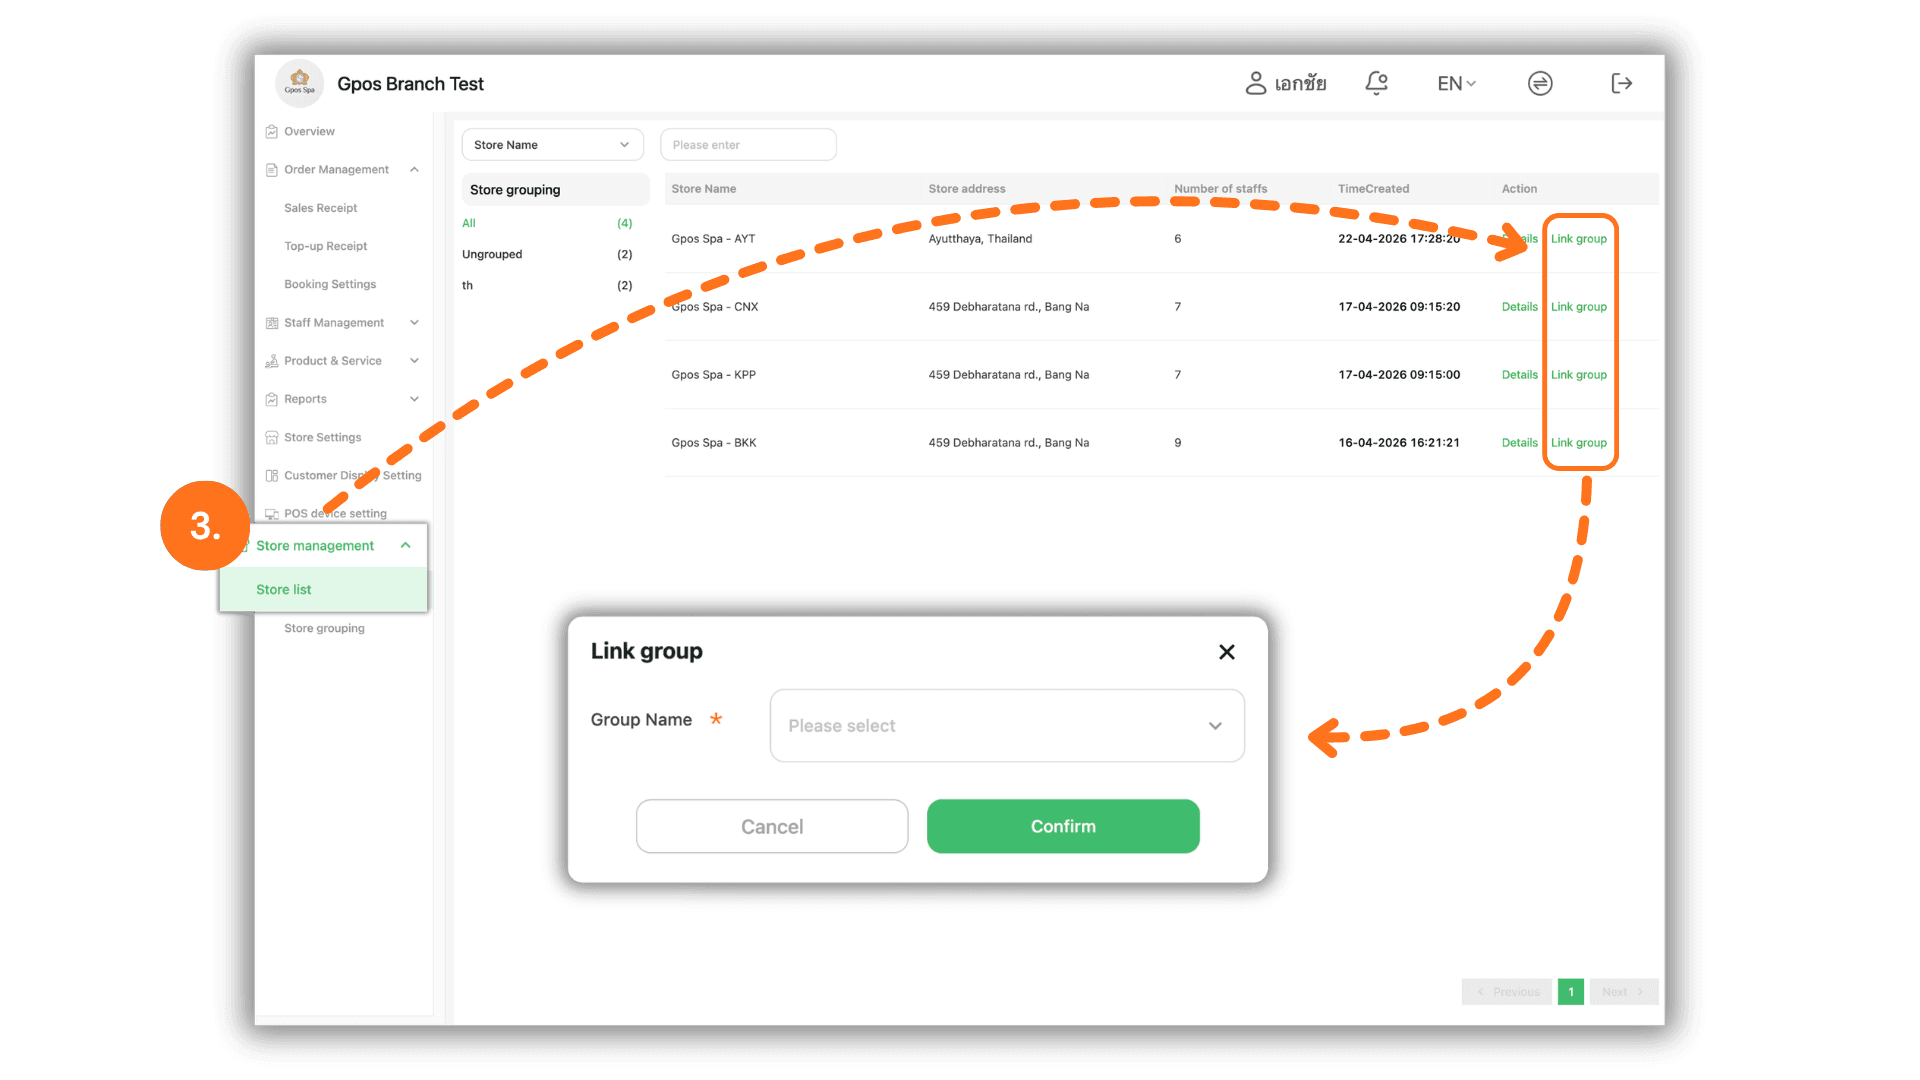
1. Select Headquarters to Access the System
Start by clicking to select Headquarters (e.g., Gpos Branch Test) on the Please select a store page to enter the central administration portal.
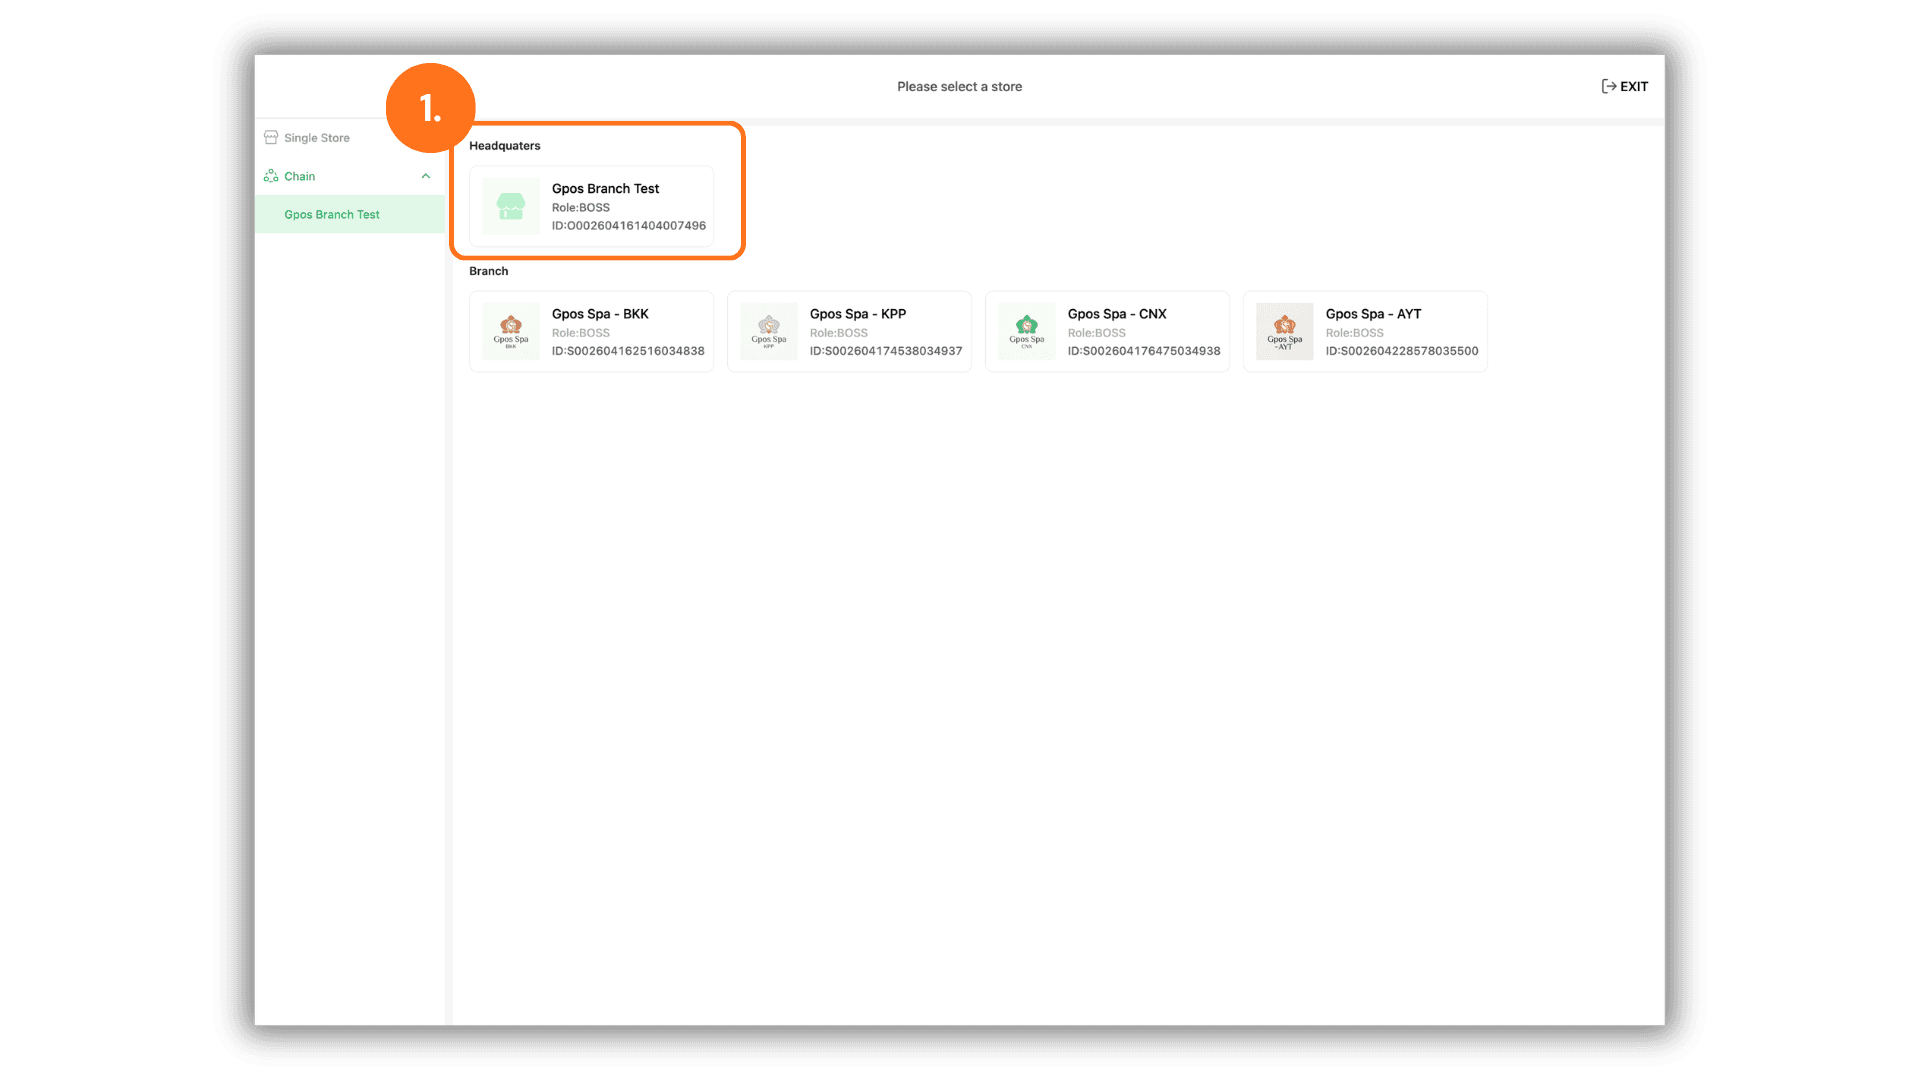
2. Create a New Store Group
Go to the left-hand menu, select Store management, and click Store grouping:
- Click the green Add new group button at the top right.
- In the Add new group pop-up window, enter the store group name in the Group Name field.
- Click the green Confirm button to save the new store group.
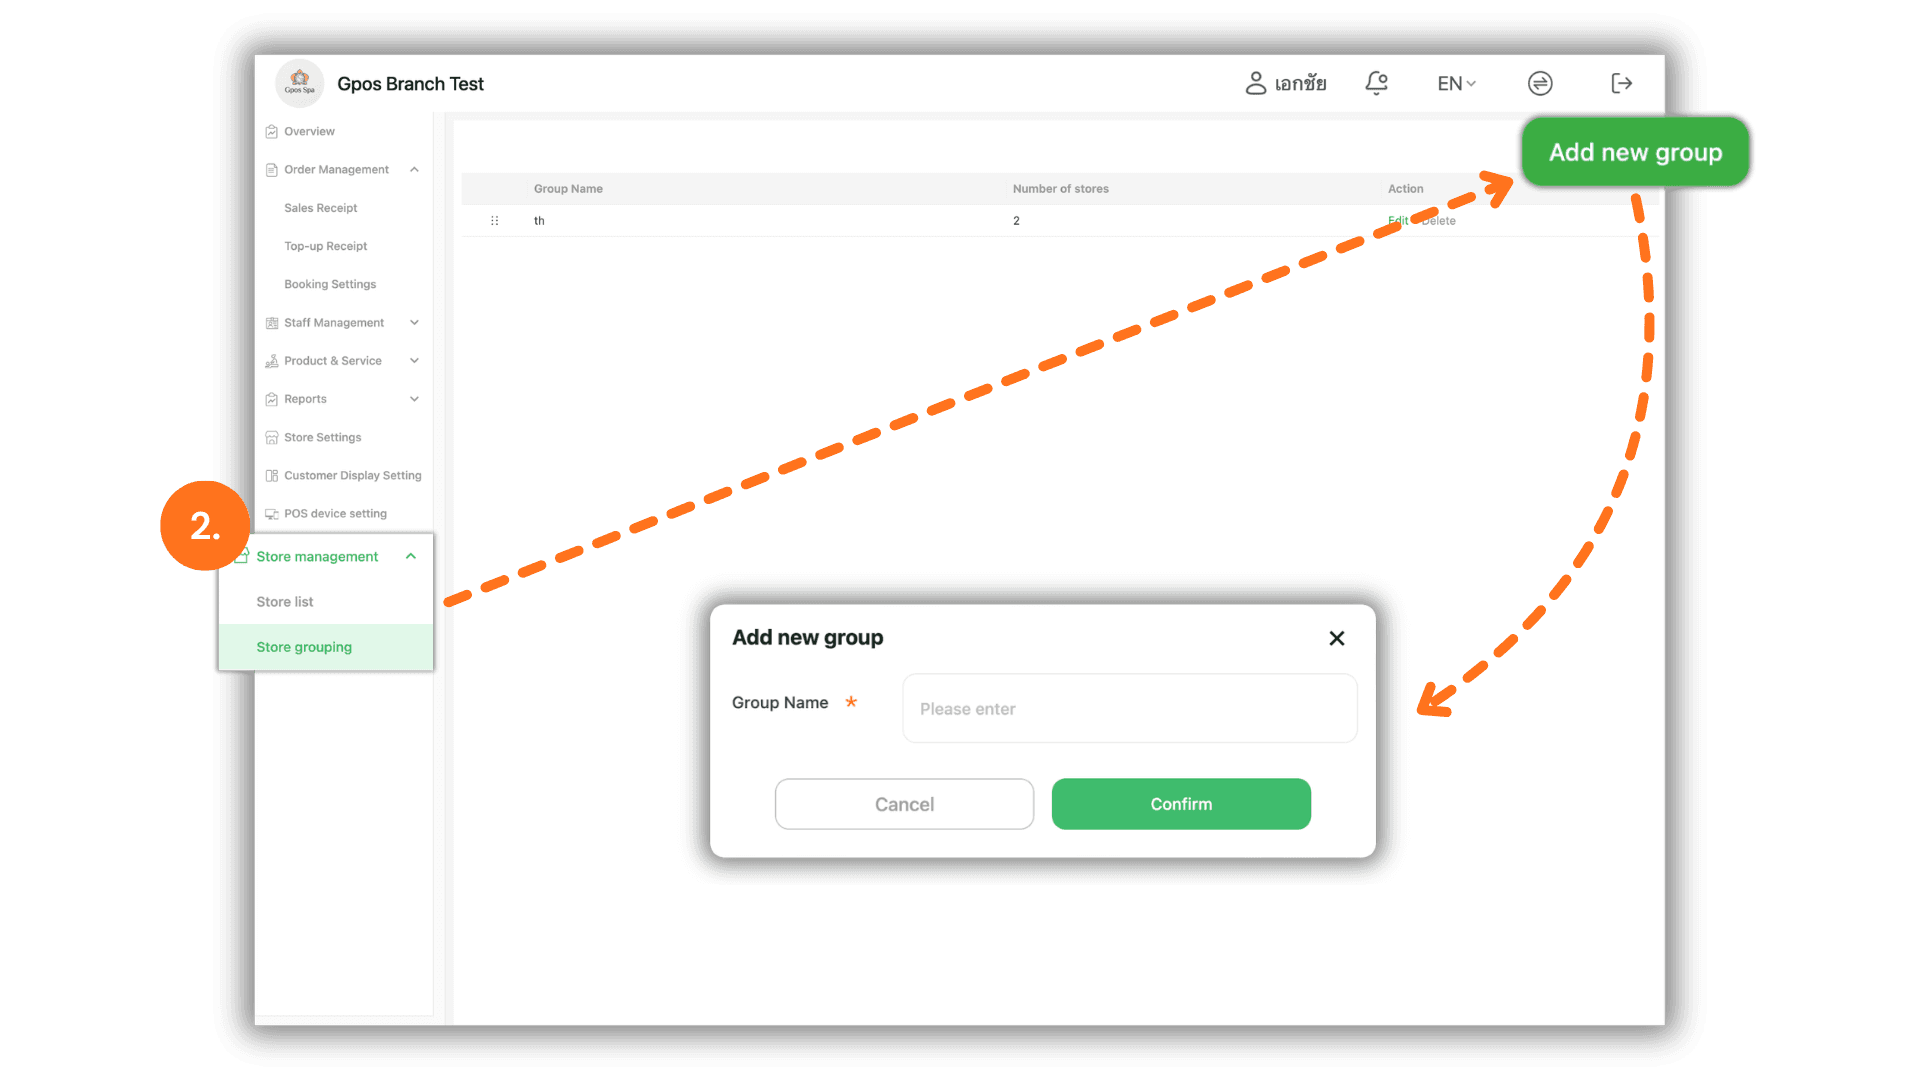
3. Link Branch Stores to the Store Group
Go to the left-hand menu, select Store management, and click Store list:
- Locate the branch store you wish to assign, then click Link group in the Action column on the right.
- In the Link group pop-up window, click the Group Name dropdown and select the target group.
- Click the green Confirm button to save and finish linking the branch store.