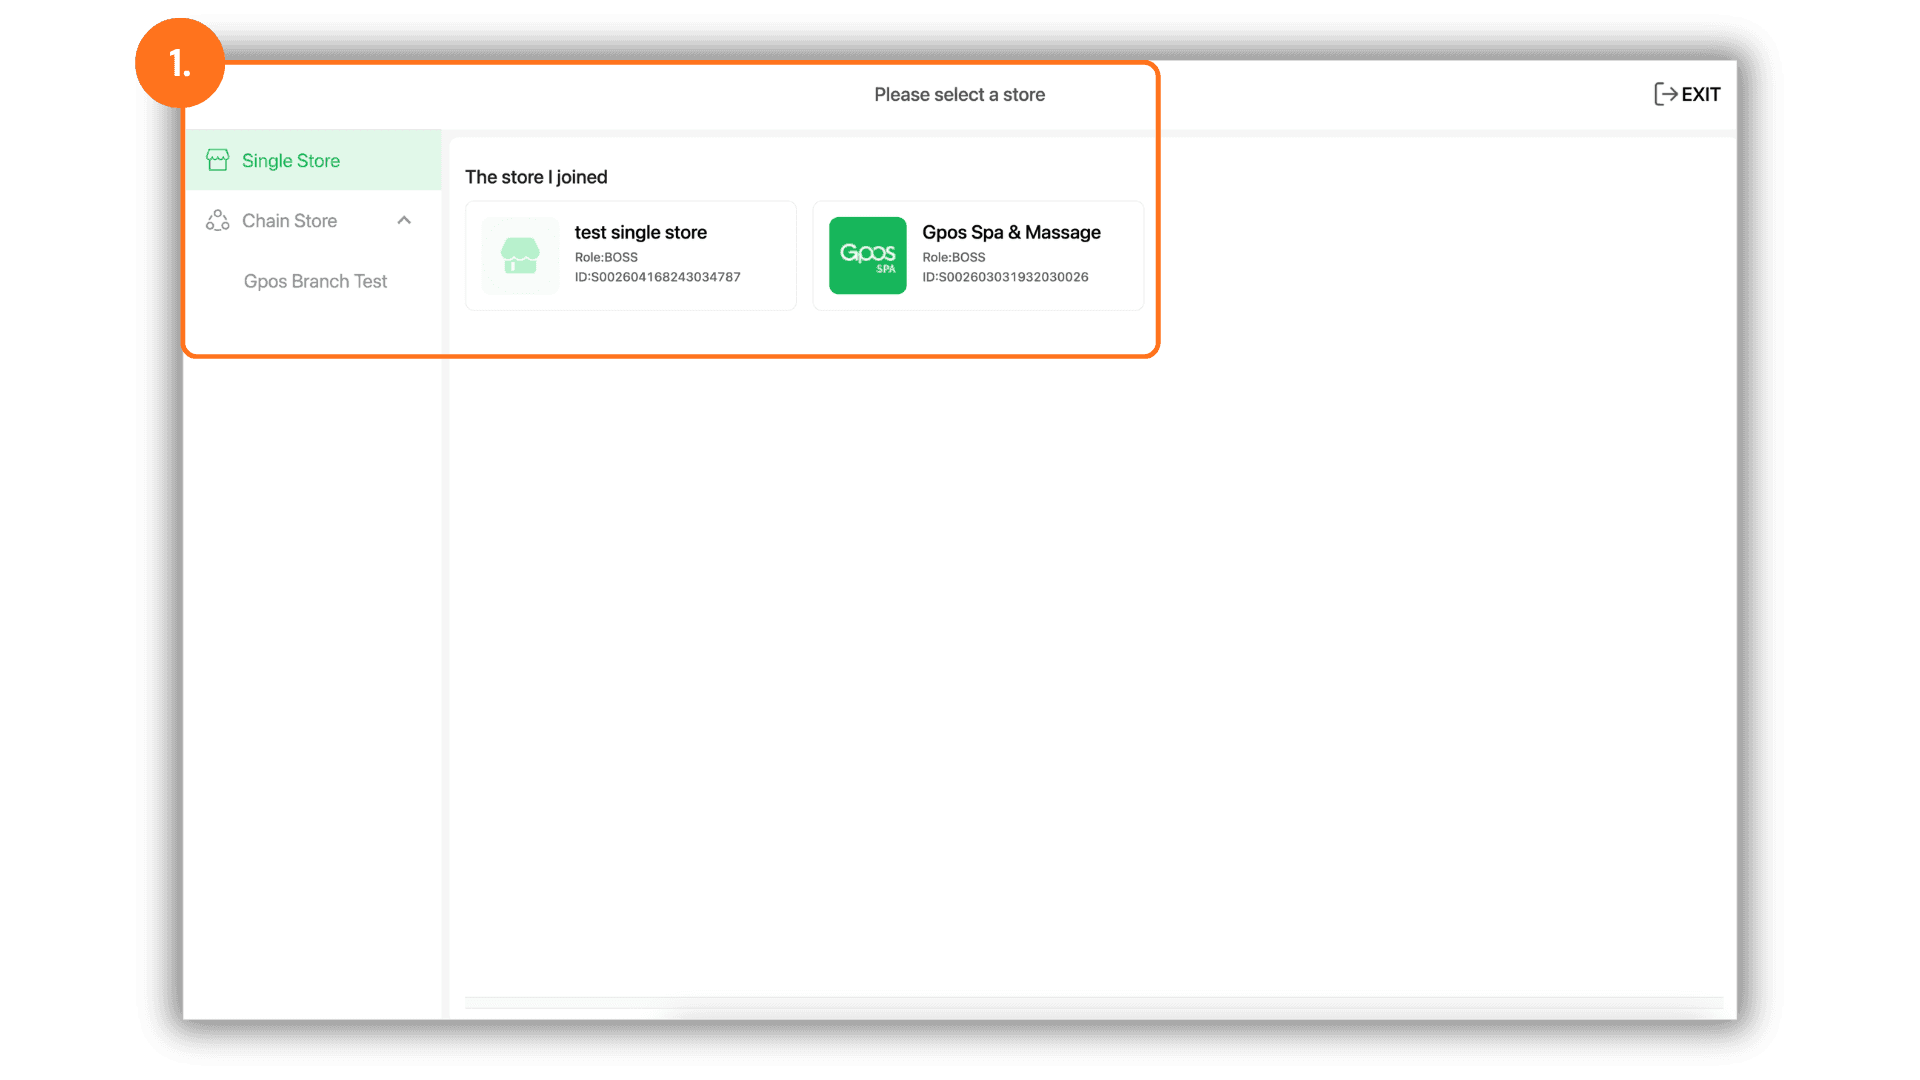
1.Select the Service Branch
- Begin by selecting the specific Store or Branch where you wish to manage the cash drawer to ensure the financial records are updated for the correct location.
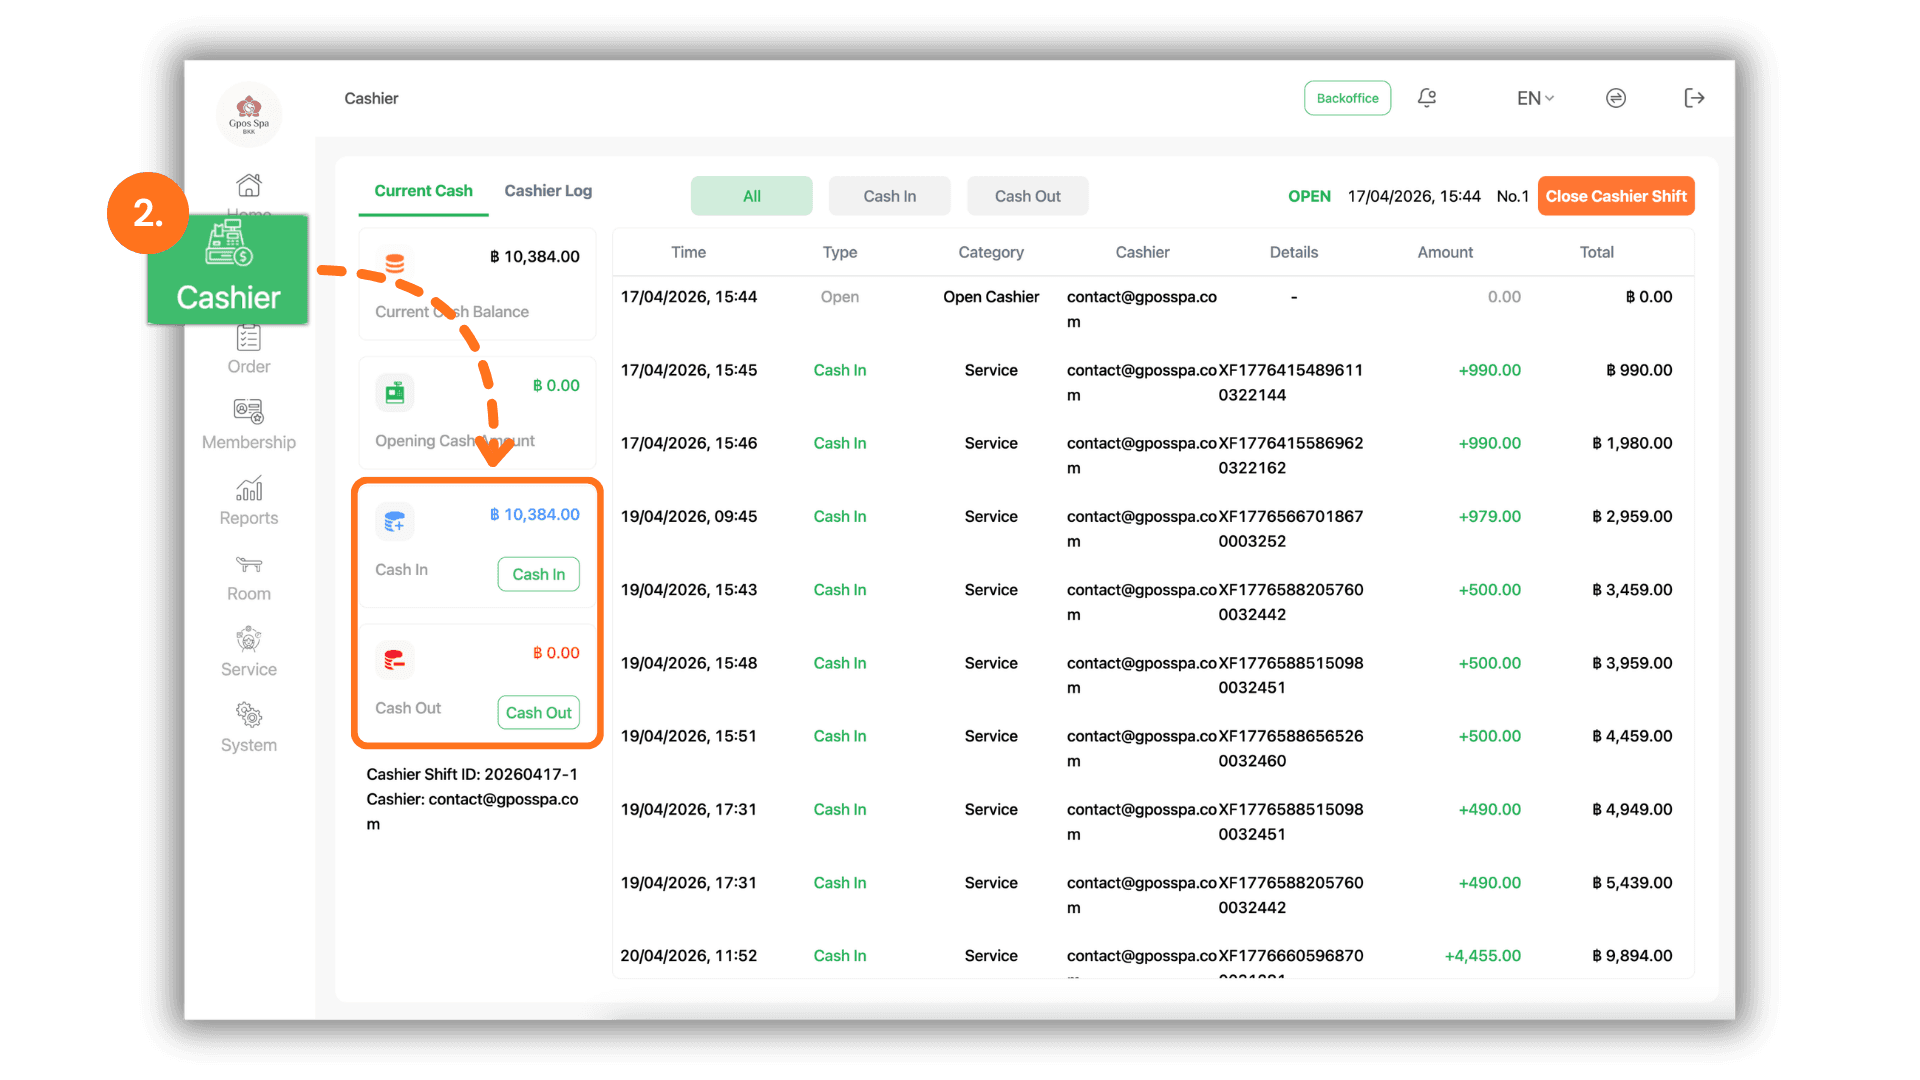
2.Access the Cash Management Interface
- Navigate to the "Cashier" menu. Within this section, you can select either the "Cash In" or "Cash Out" function depending on the type of transaction you need to perform.
3.Enter Transaction Details
- Complete the transaction by filling in the following required information:
- Category: Select the pre-defined category that best describes the reason for the cash movement.
- Amount: Enter the specific amount of cash being added to or removed from the drawer.
- Note: You may enter additional details or descriptions in the "Remarks" field for future reference.
- Click the confirmation button to finalize the entry.

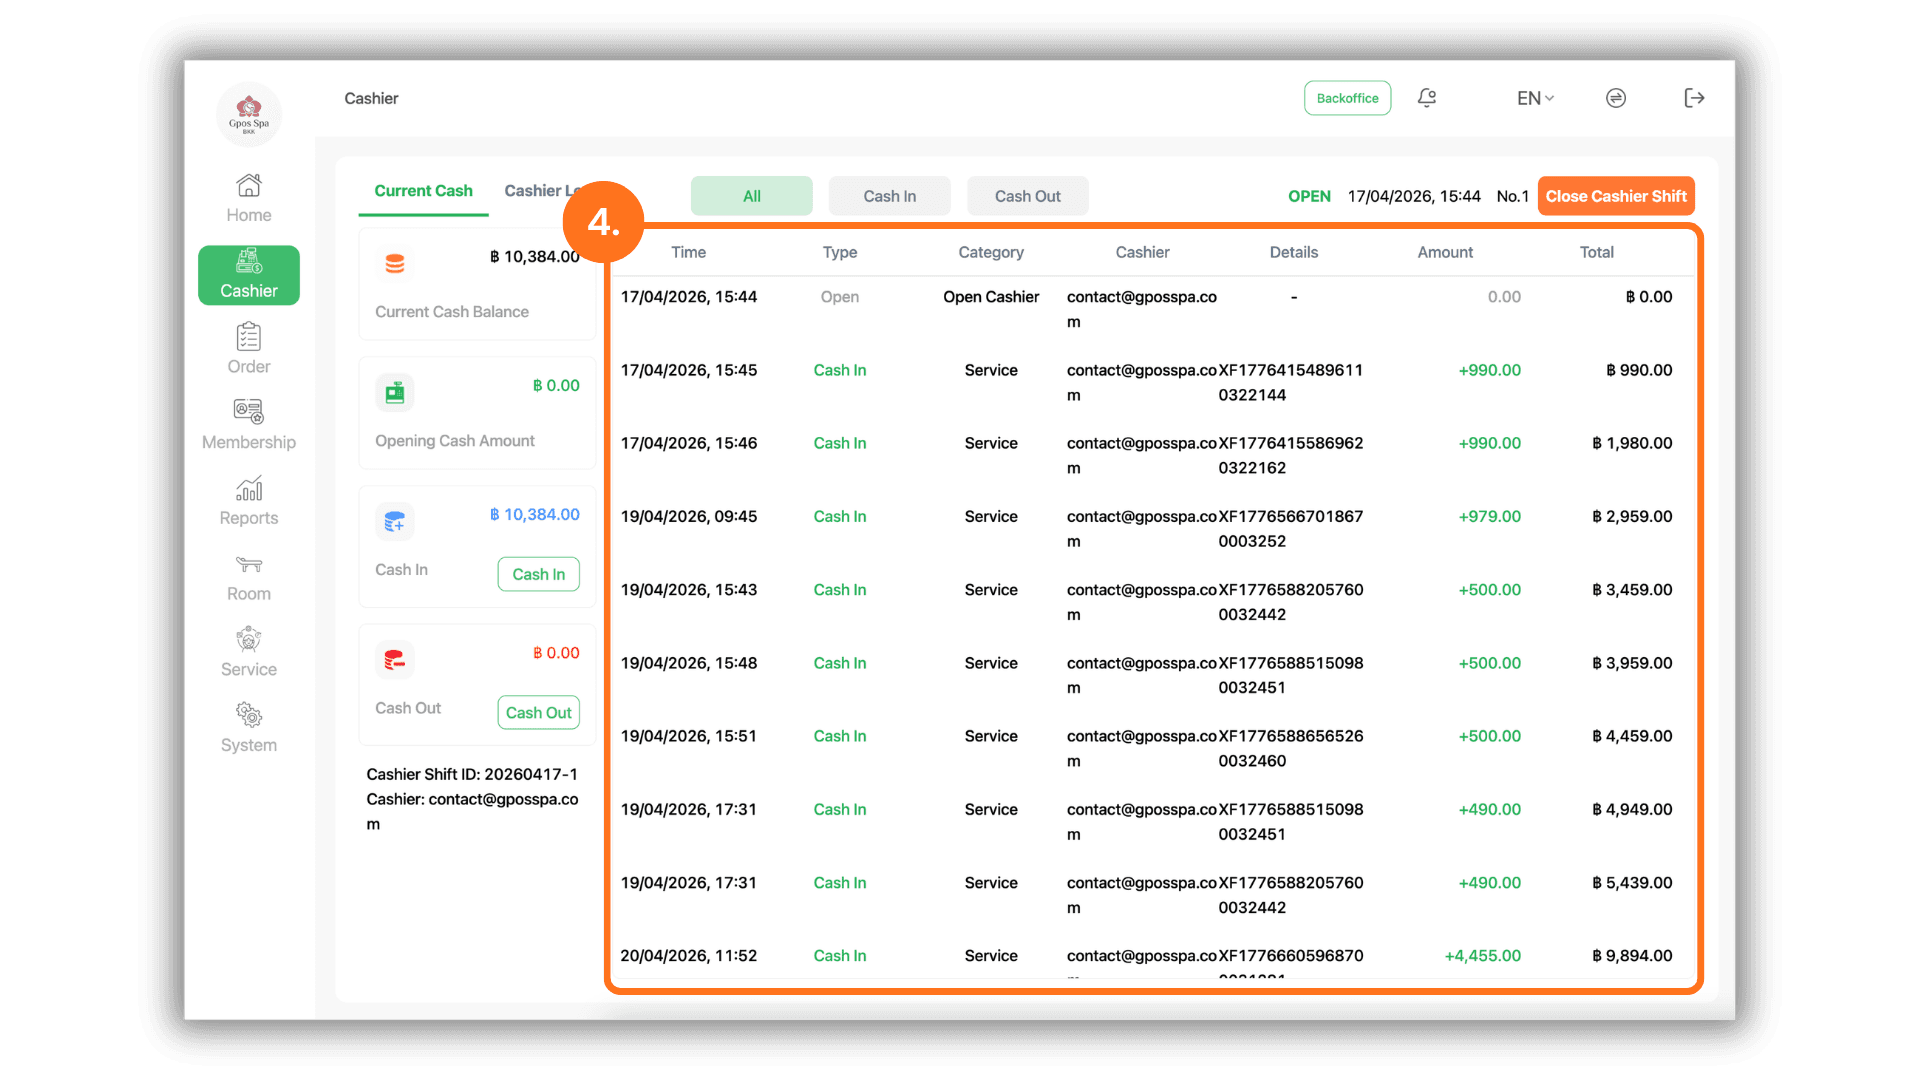
4.Review Transaction History
- After completing the process, you can immediately review the Transaction History to verify the details of your entry and ensure all manual cash movements are correctly logged for auditing.