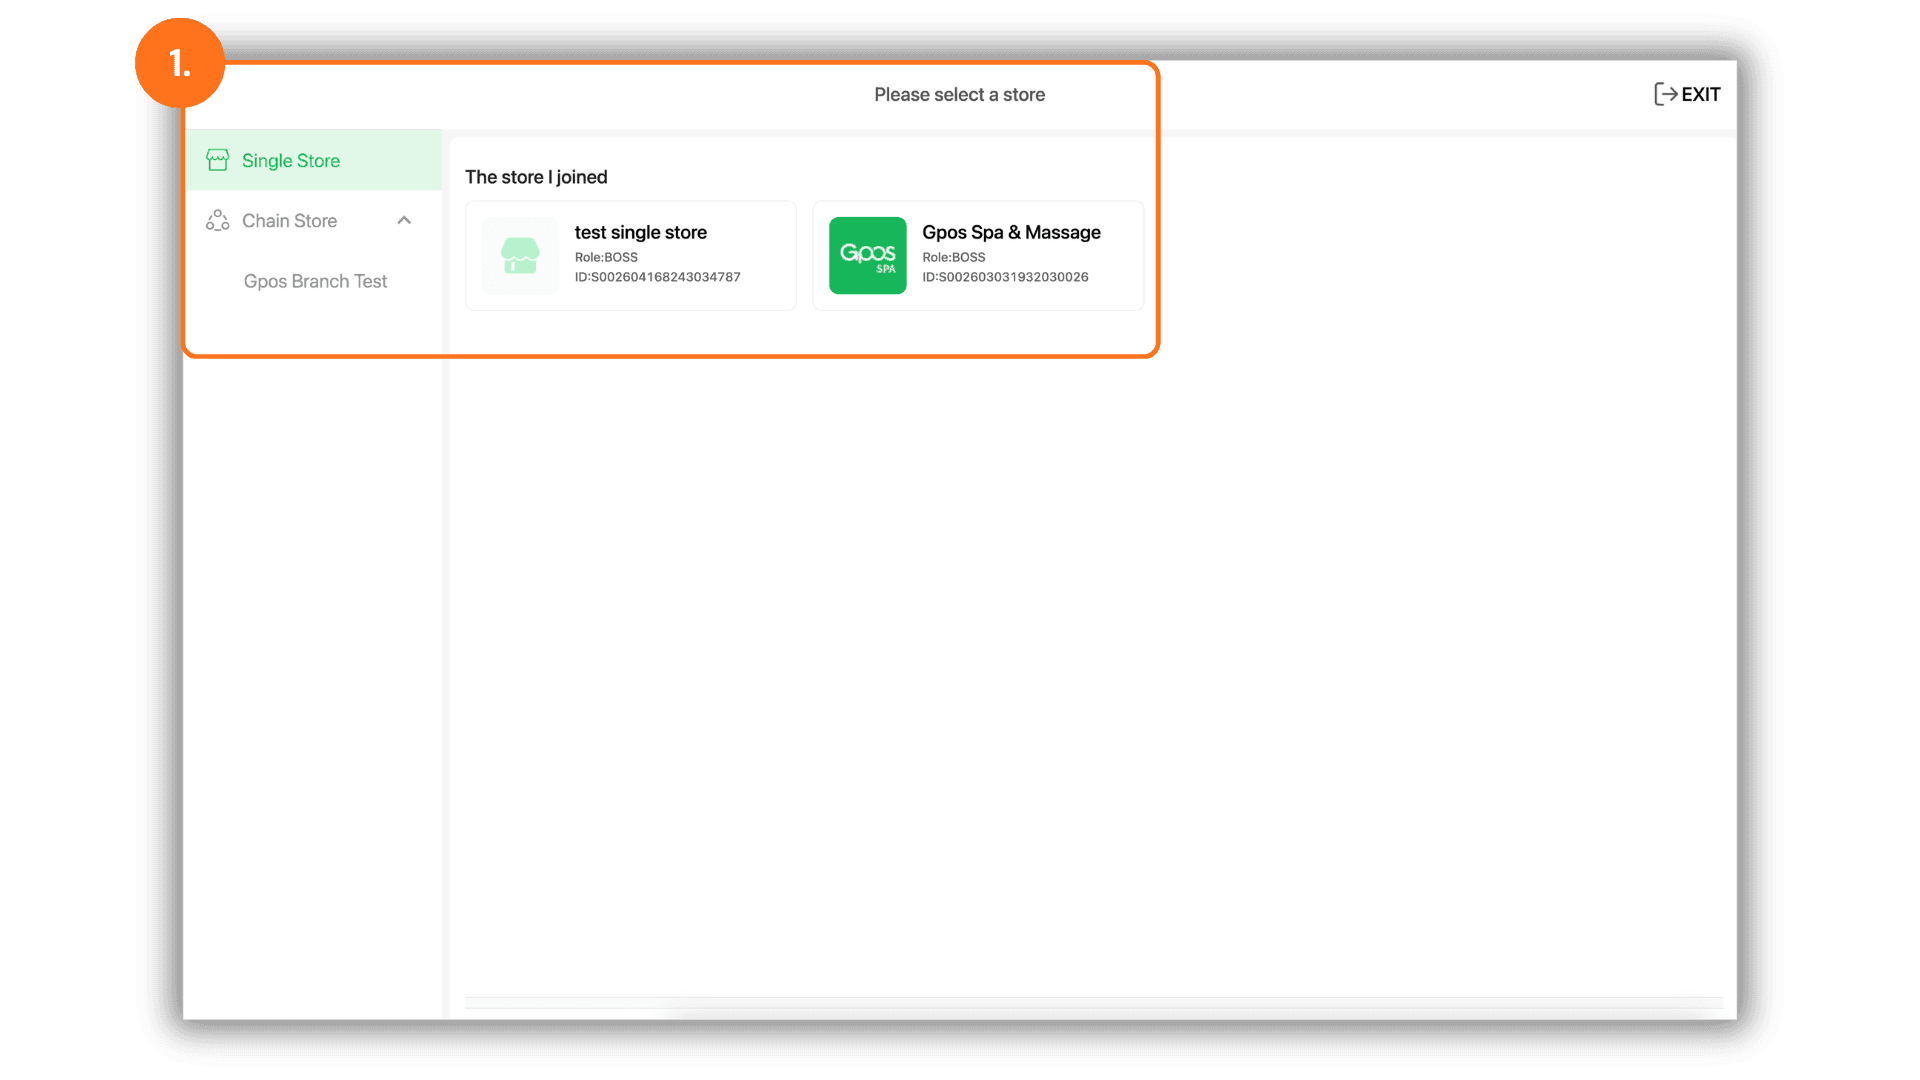
1. Select a Store or Branch
• Start by selecting the specific store or branch where you want to manage transactions. This ensures you are modifying the correct location's data.
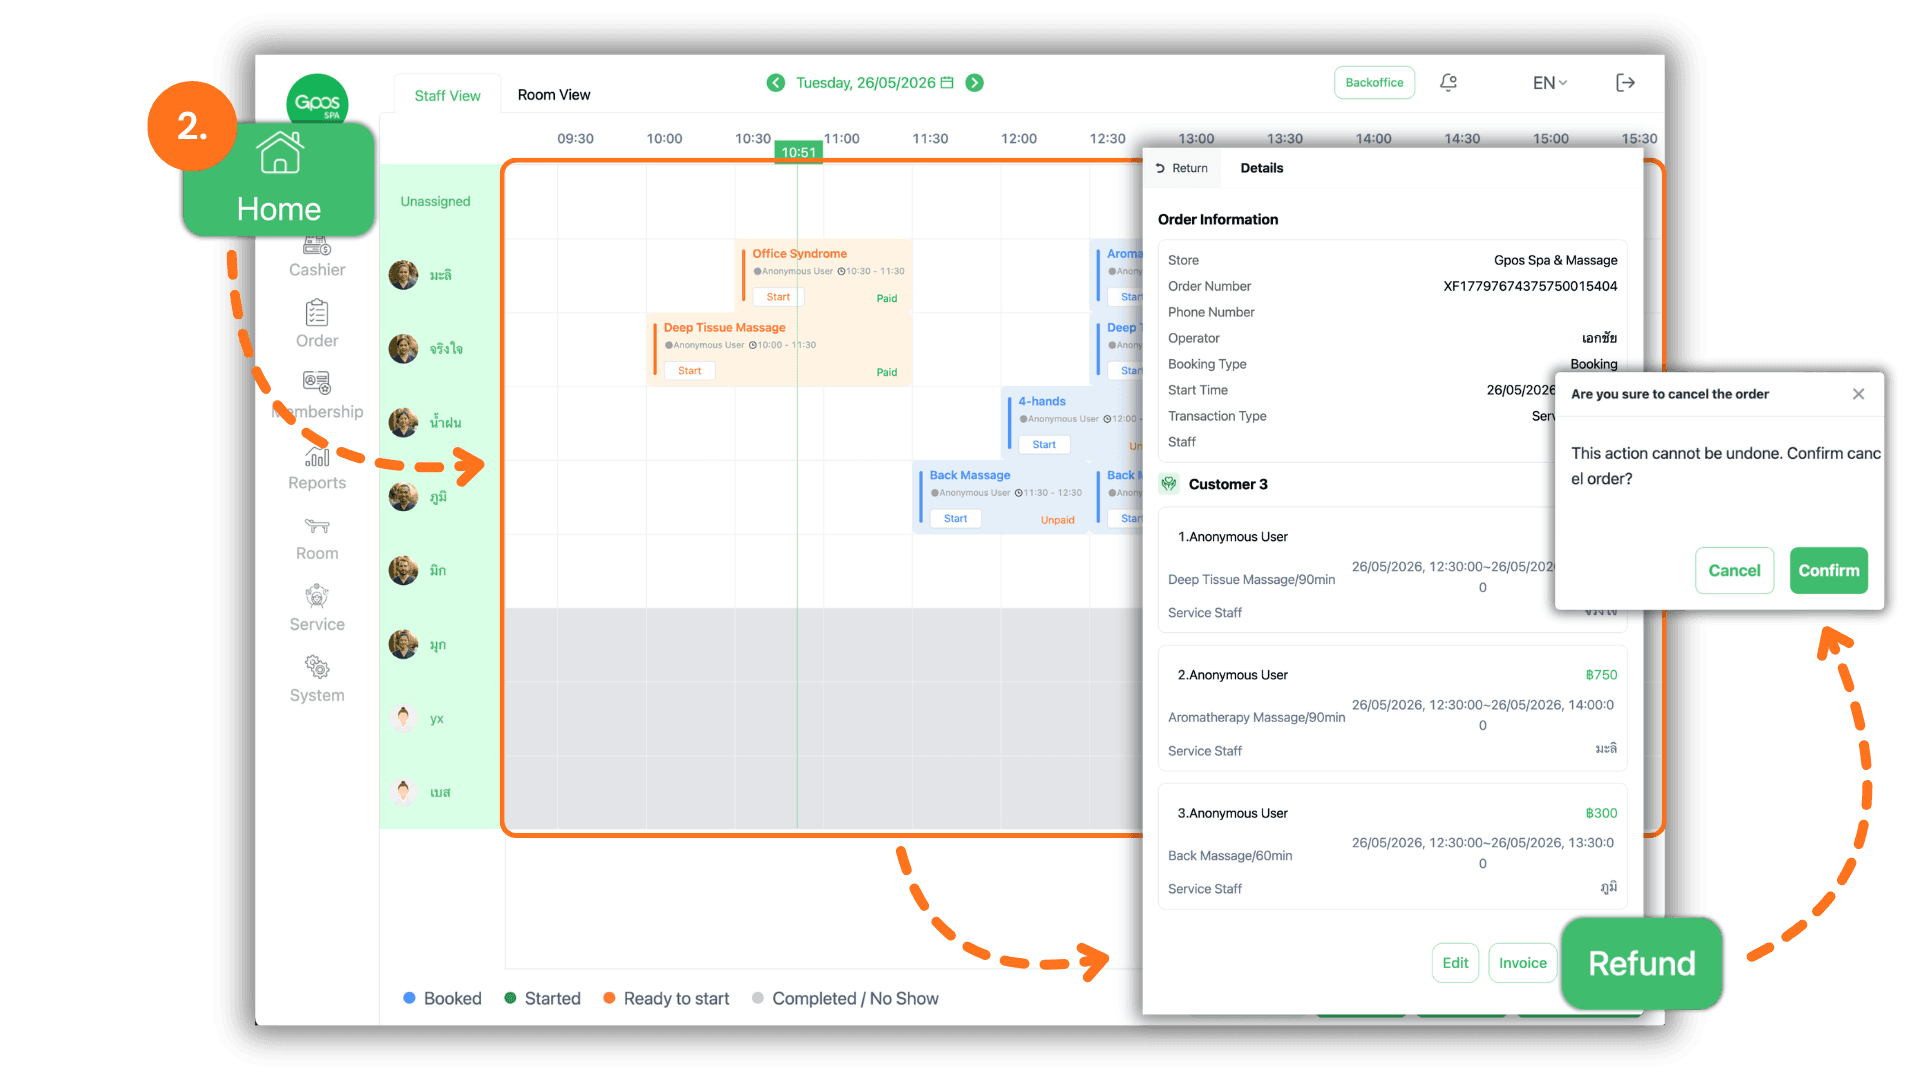
2. Refund via the Main Schedule
• Navigate to the “Main Page” (Schedule dashboard) and click on the specific time slot or booking block you wish to cancel or refund. When the information window pops up, click the “Refund” button and confirm the action.
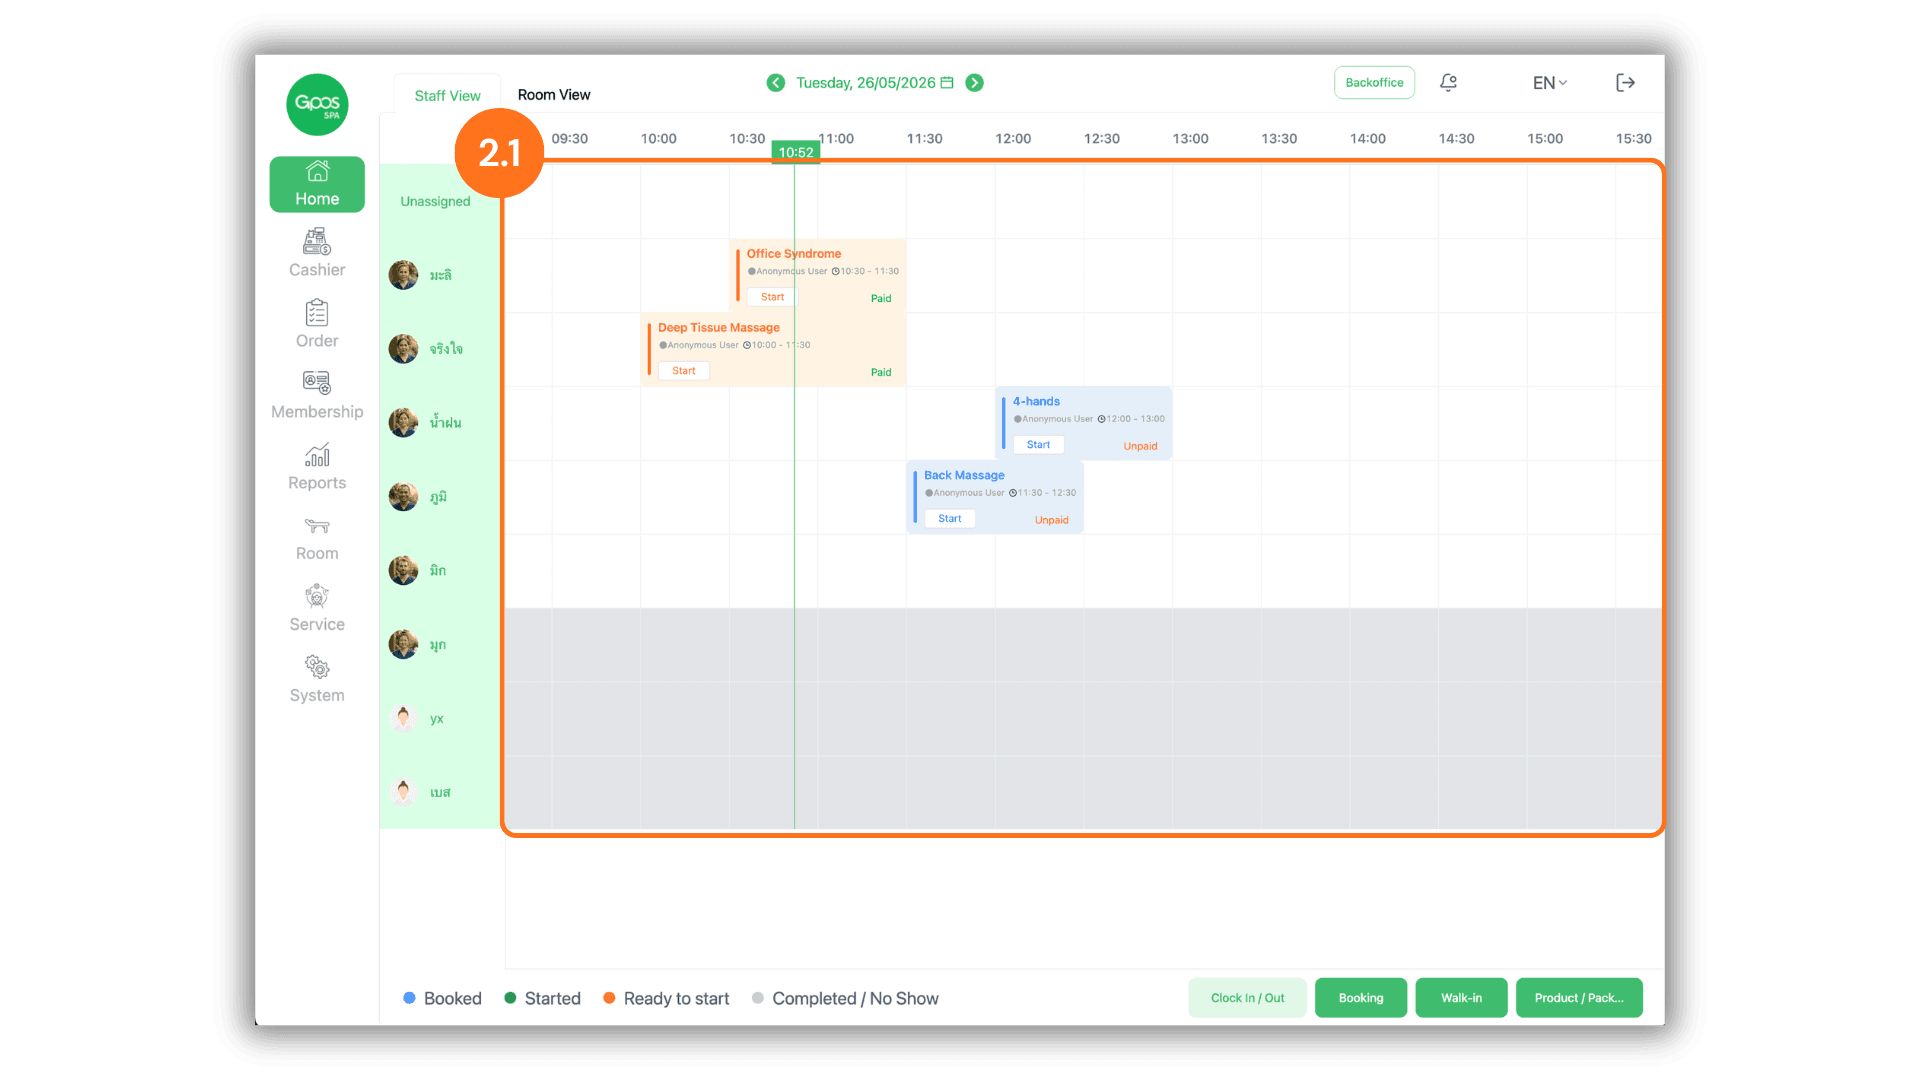
2.1 Verify Schedule Status After Refund
• Once confirmed, the system will automatically remove that specific service appointment from the Main Page schedule, immediately opening up the time slot for other customers to book.
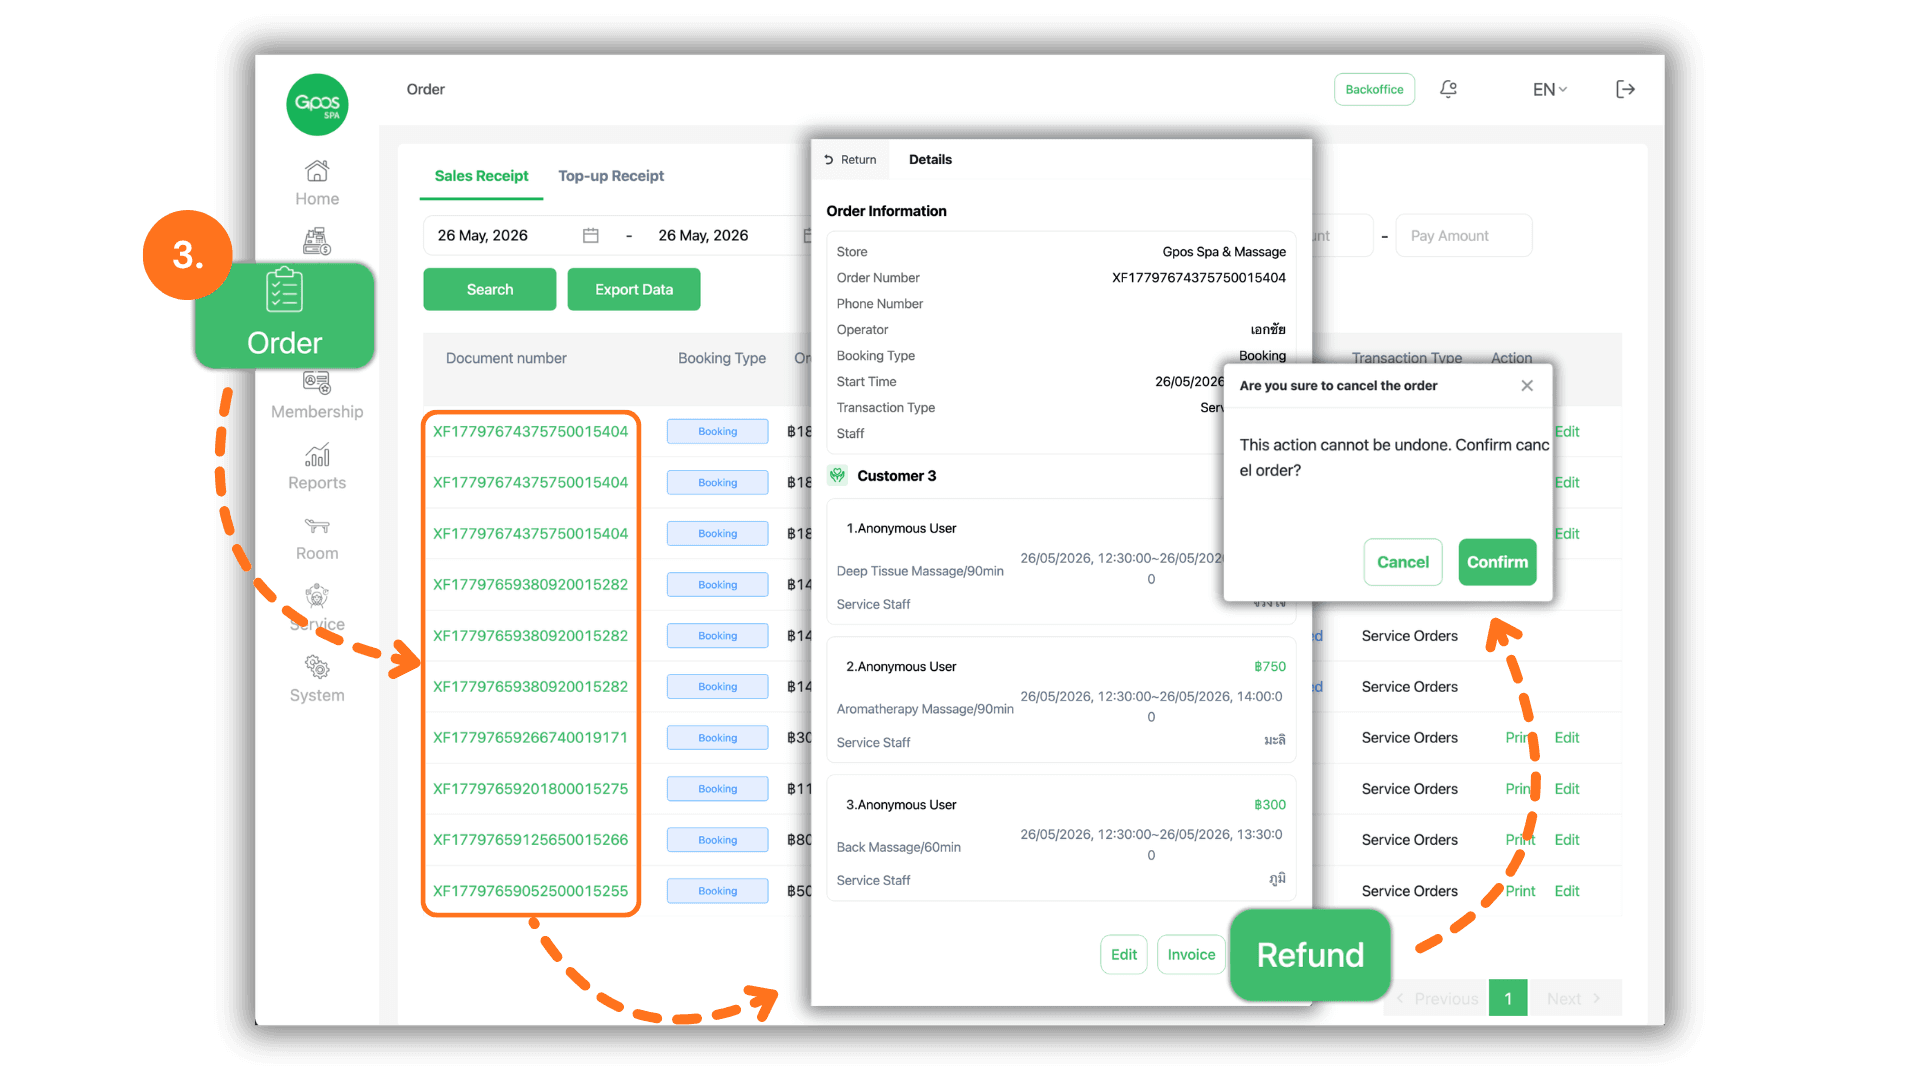
3. Refund via the Orders or Receipts Page
• Navigate to the “Orders” page, then find and click on the specific Receipt Number you want to refund. Once the order details screen appears, click the “Refund” button and confirm to complete the process.
3.1 Verify Order Status After Refund
• After confirmation, the system will instantly update and change the status of that specific transaction to “Order Cancelled” to maintain an accurate audit trail for store sales records.
