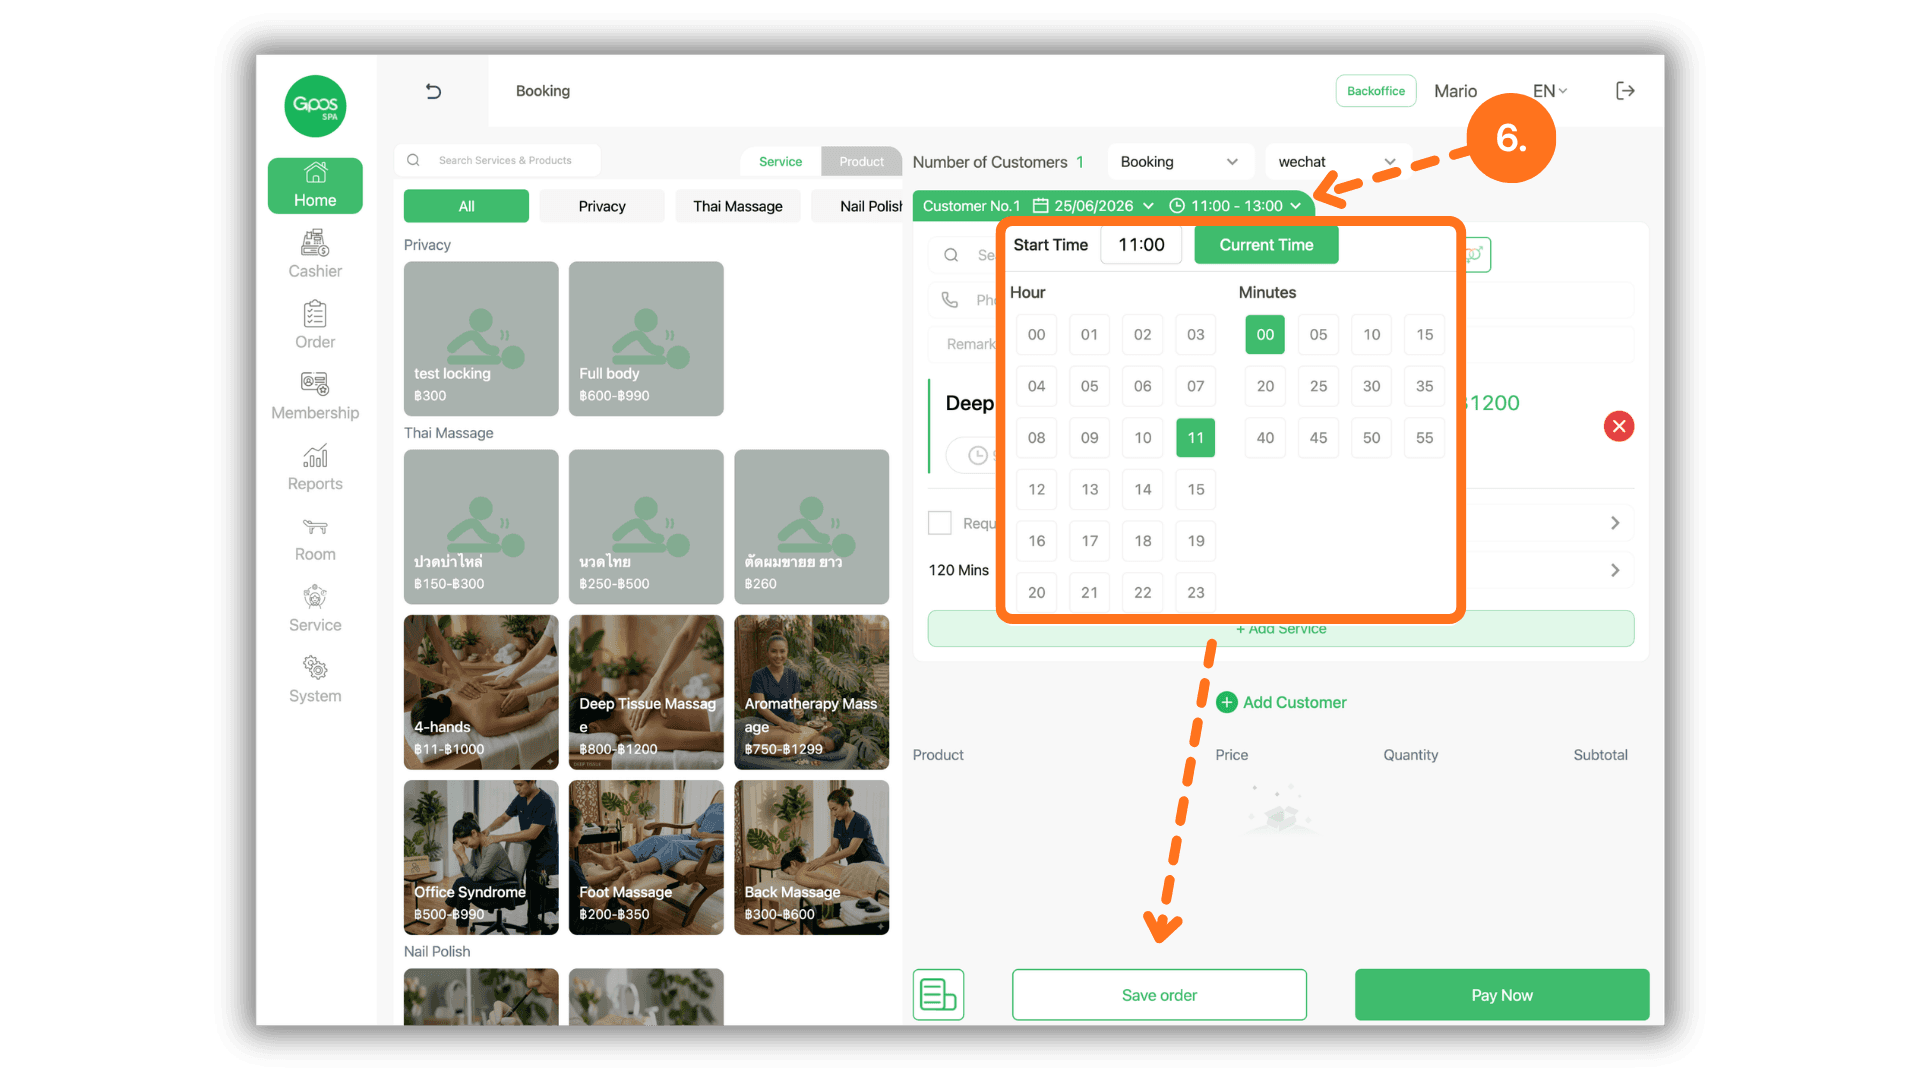
1. Select a Store or Branch
- Begin on the initial landing dashboard by clicking and selecting the specific store or branch you want to operate. This routes you into the correct active local database.
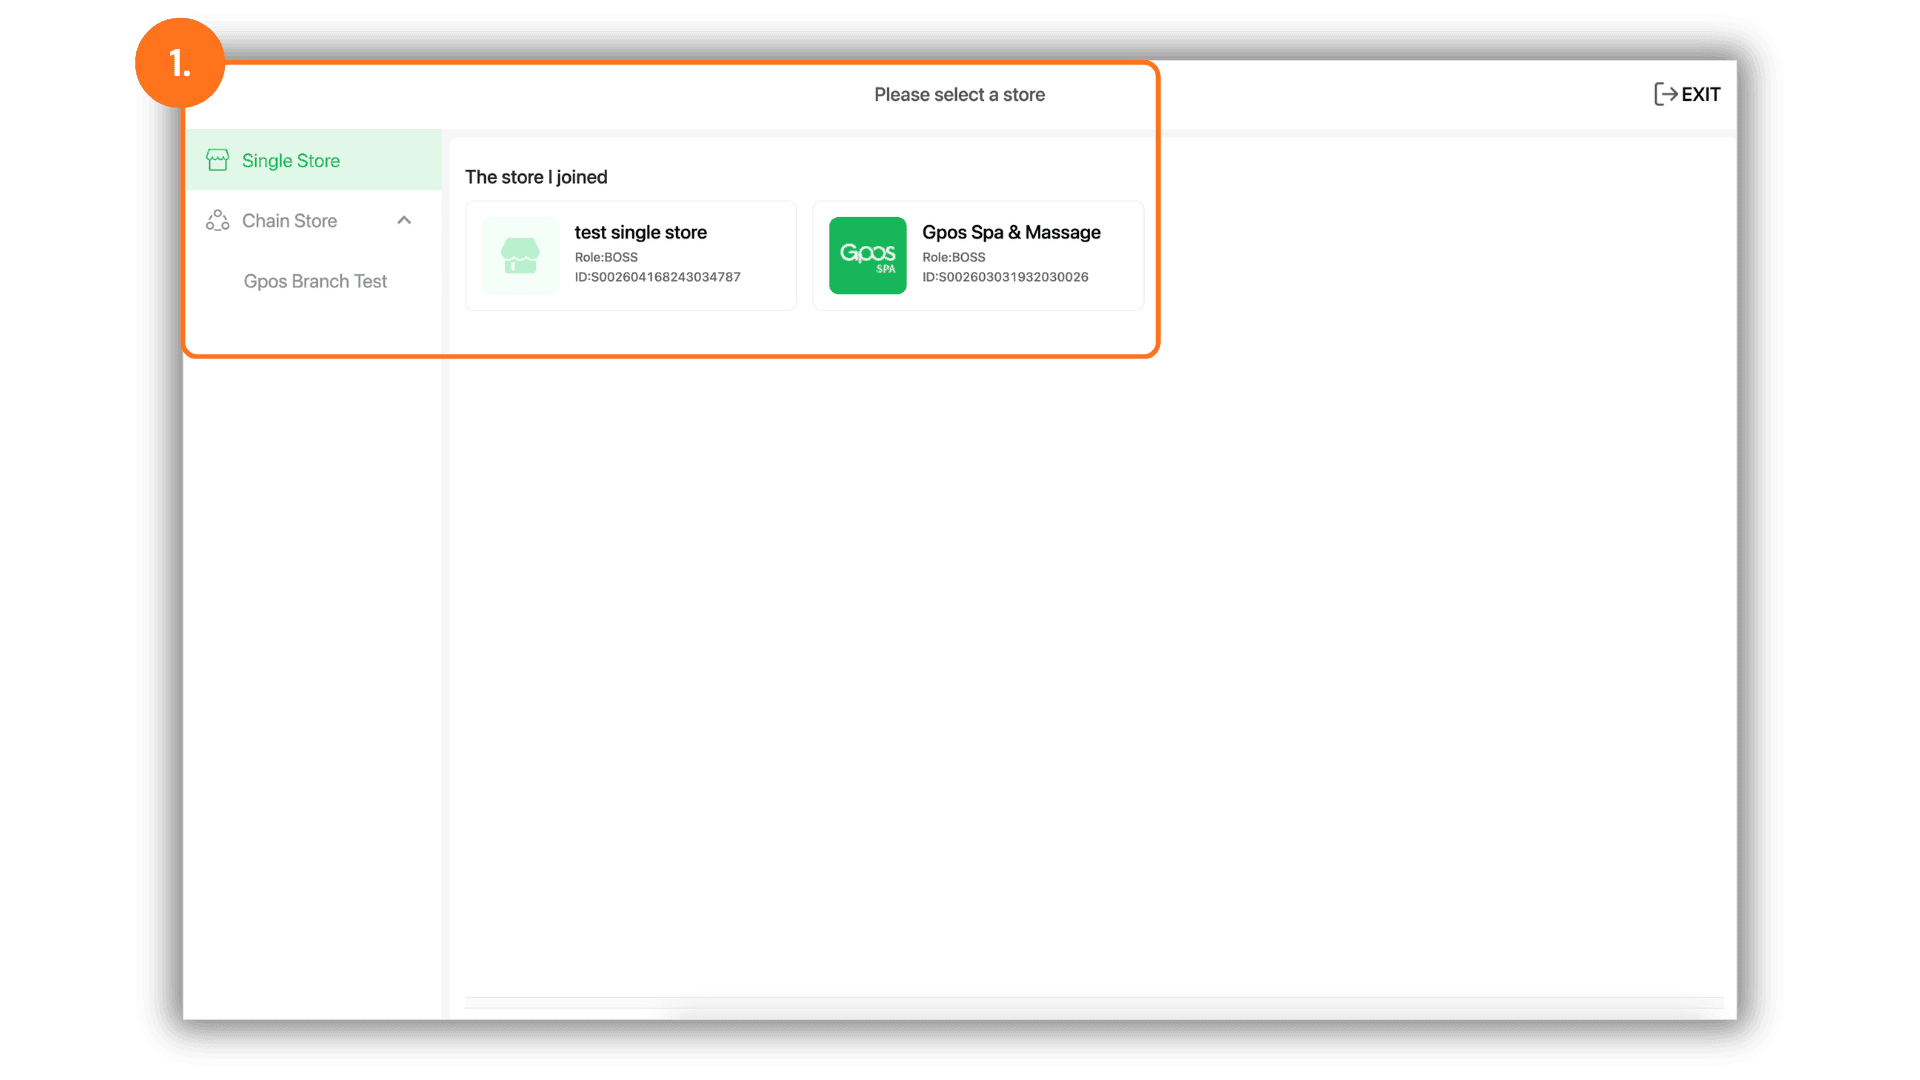
2. Unlock the Schedule Panel
- Navigate to the left sidebar and click on the “Home” menu to load the main schedule grid.
- Look at the top right header and click the orange “Panel:Lock” button to unlock calendar adjustments.
- Important Conditions:
- If you do not click to unlock the panel, appointments cannot be moved. The system will display a warning badge: “Note: Schedule is locked. Please unlock before moving.”
- Any appointment that has already been toggled to “Started” status is permanently fixed and cannot have its timing shifted or edited.
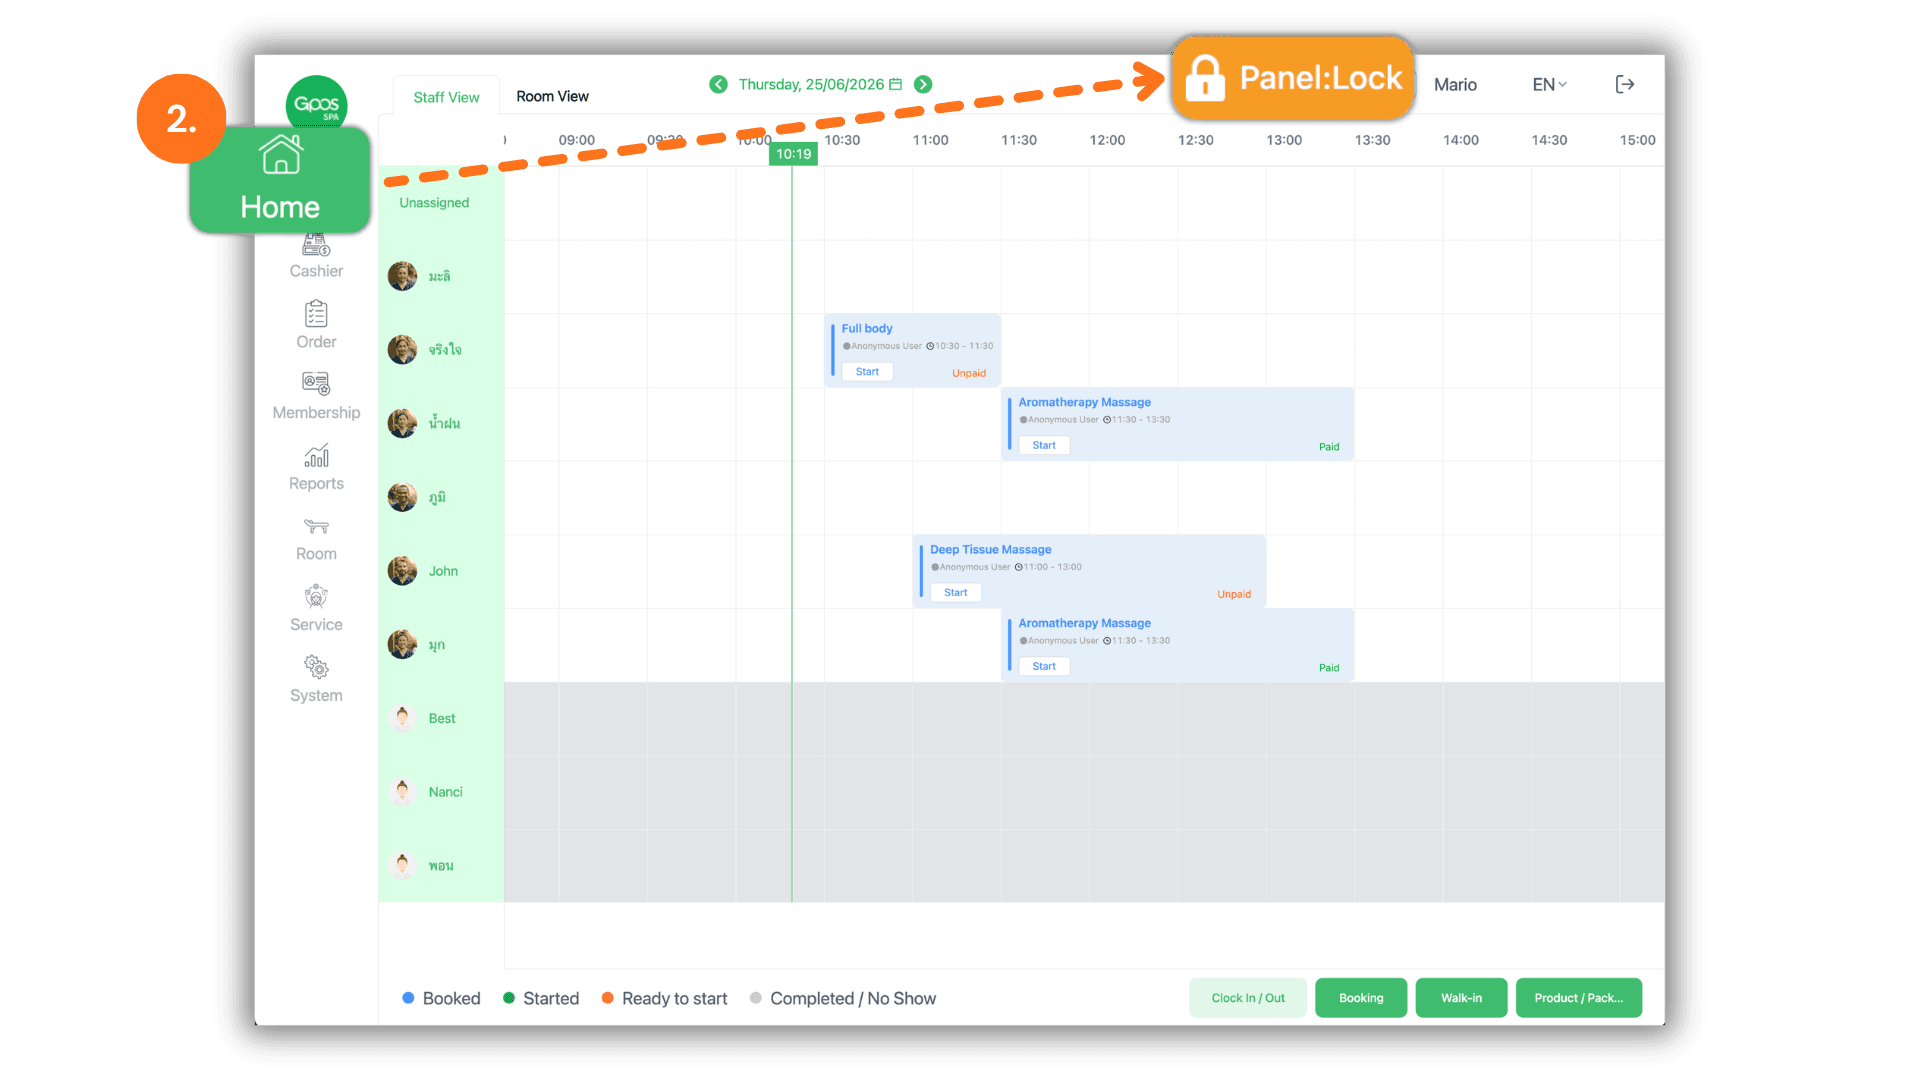
3. Drag and Drop to Move Time Slots
- Once the top-right indicator turns green and displays “Panel:Unlock”, click and hold (long-press) on the specific service appointment block you want to move. Drag it vertically or horizontally across the grid and drop it onto the new desired time frame.
4. Open Deep Order Editing
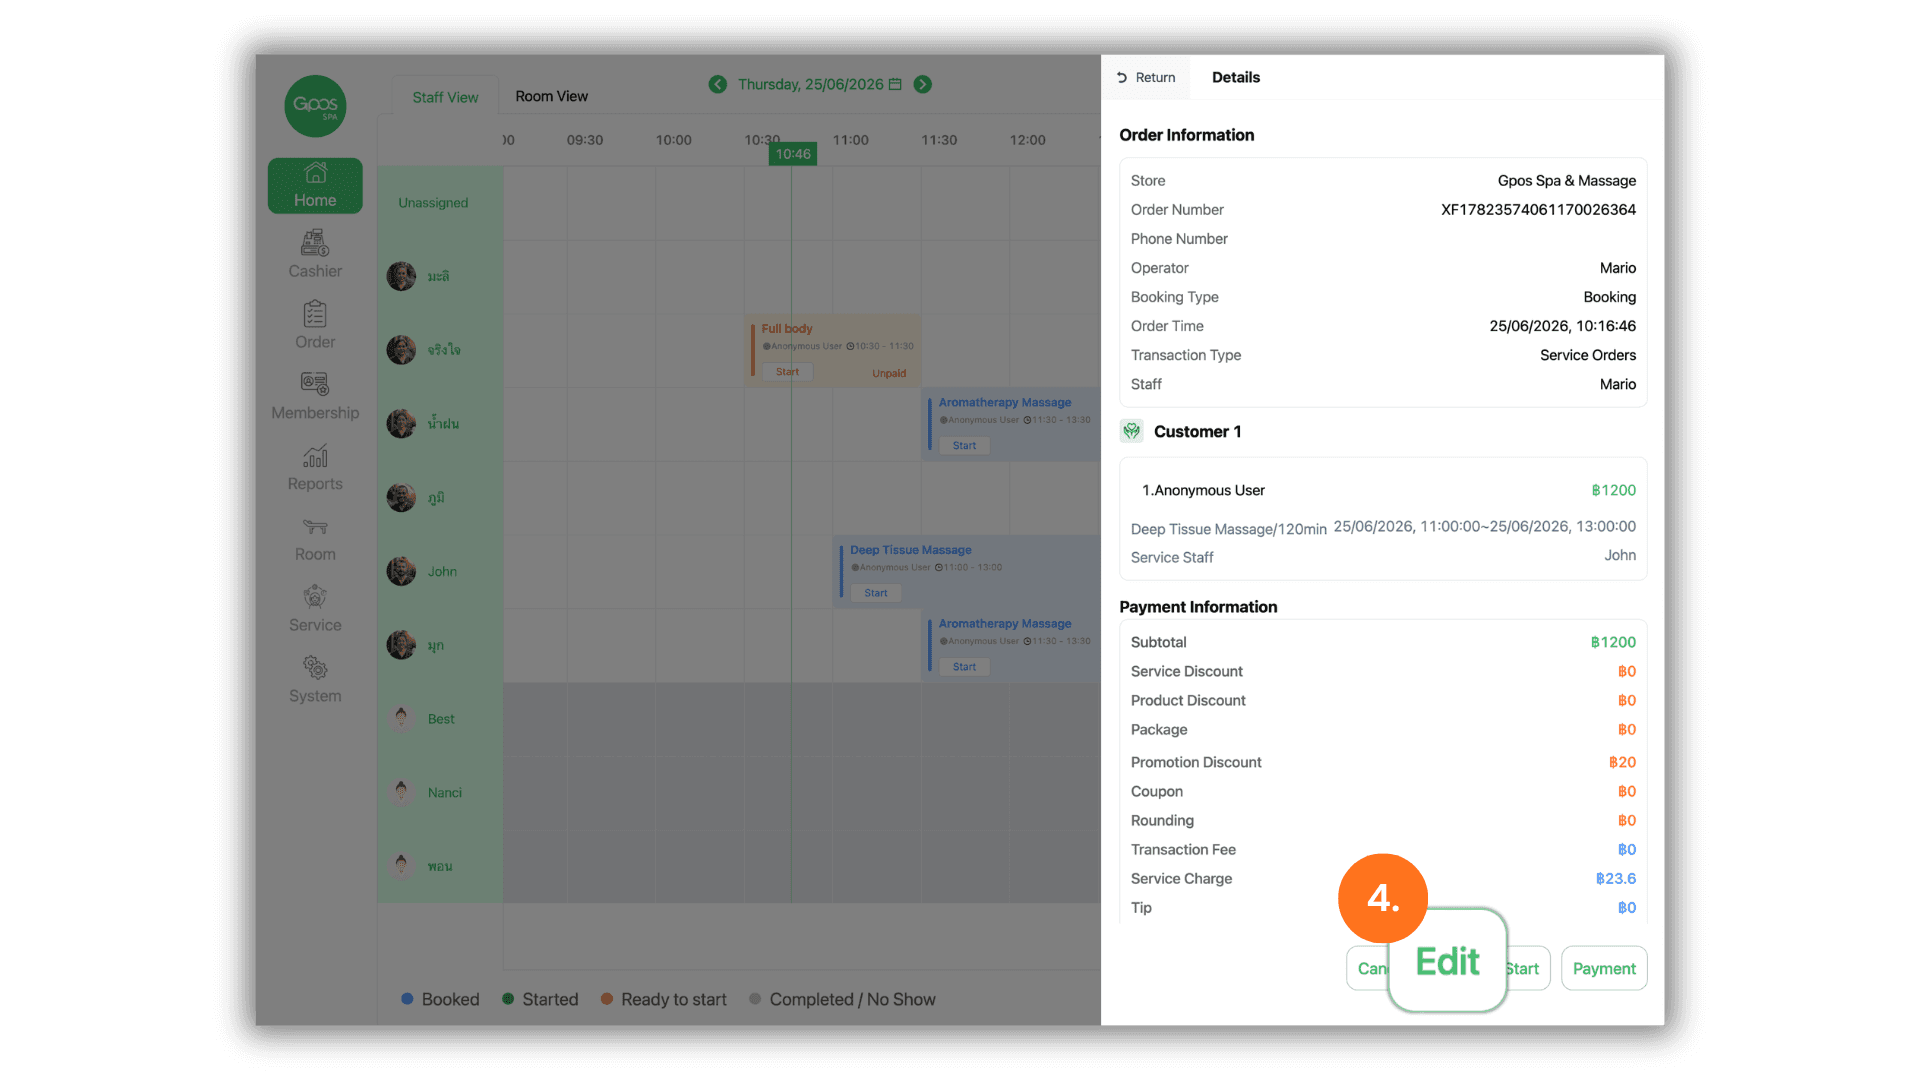
- To make precise modifications instead of dragging, click once on the desired appointment block to open its summary slider on the right side.
- Click the green “Edit” button at the bottom of the column to access the deep order modifications workspace.
5. Select the Customer Information Window
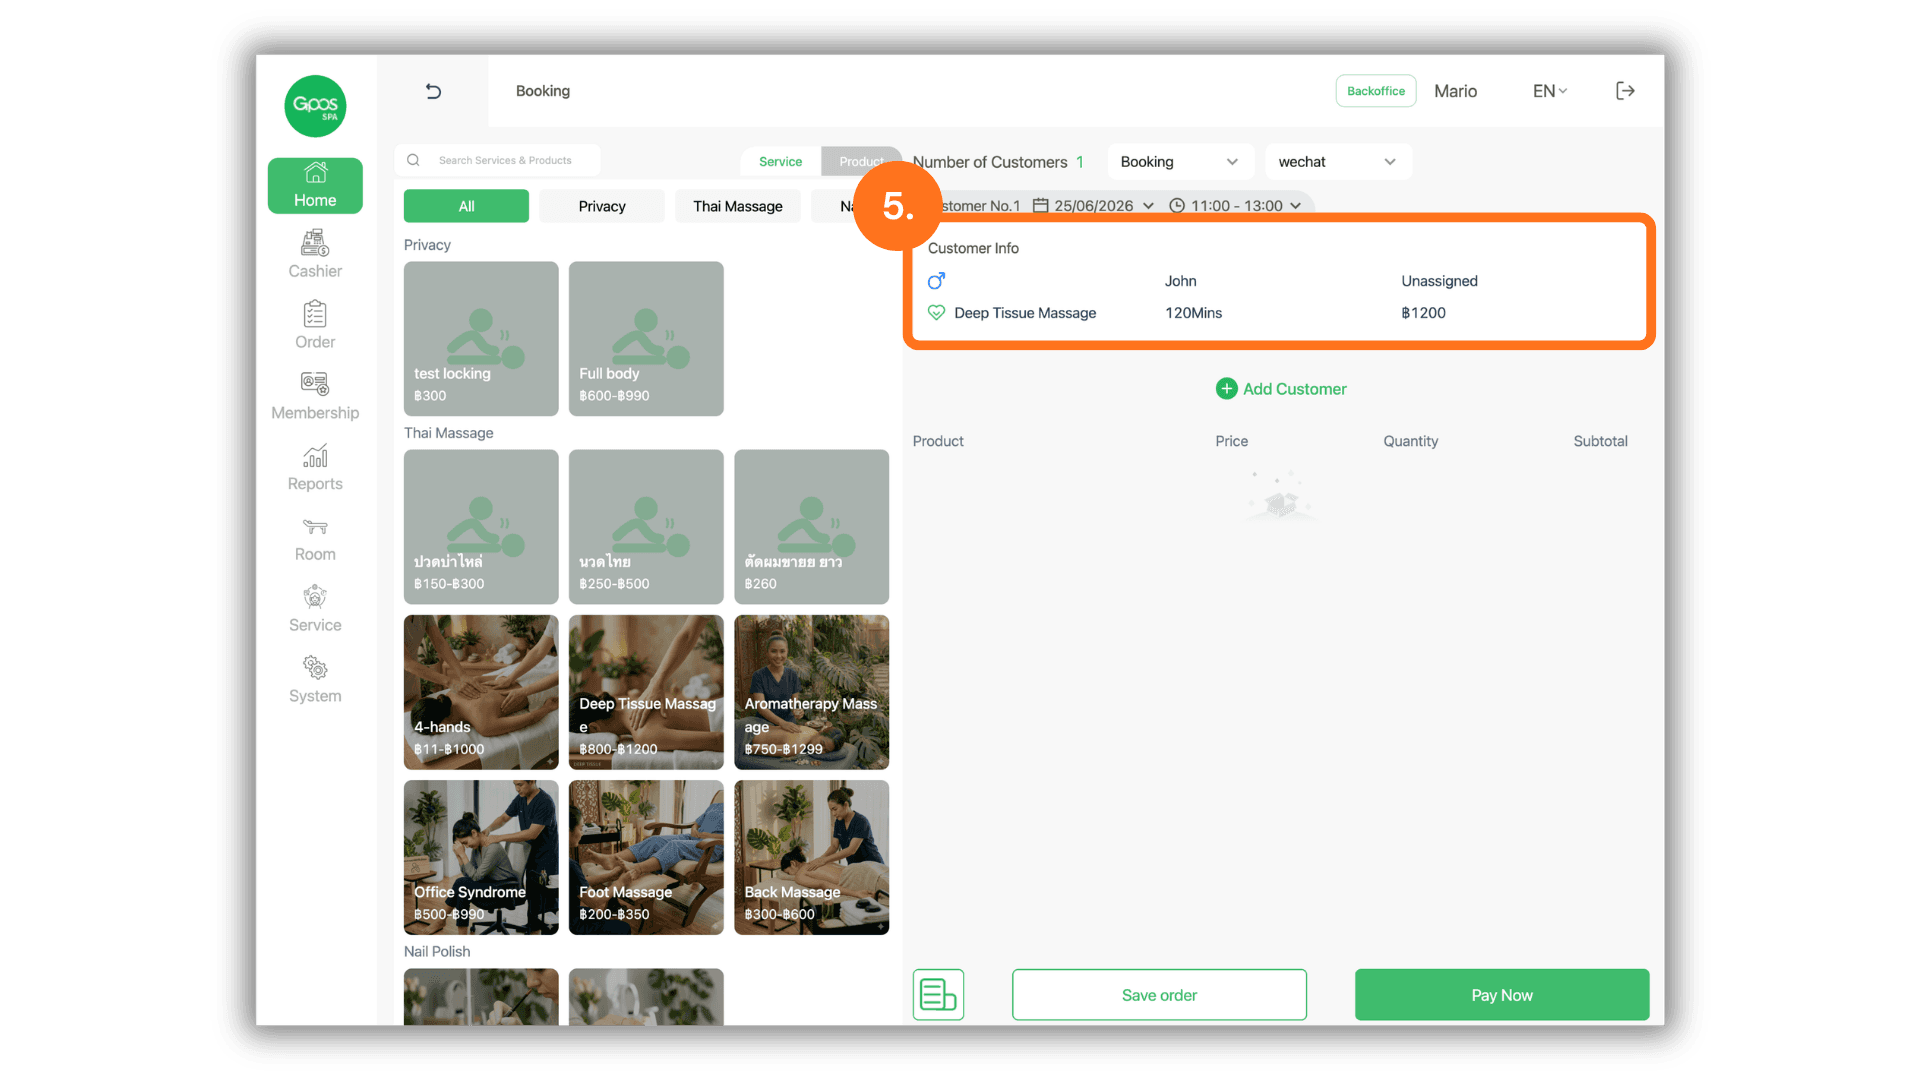
- Once redirected to the order modification screen, find and click directly inside the “Customer Info” field box located at the top-right quadrant of the page.
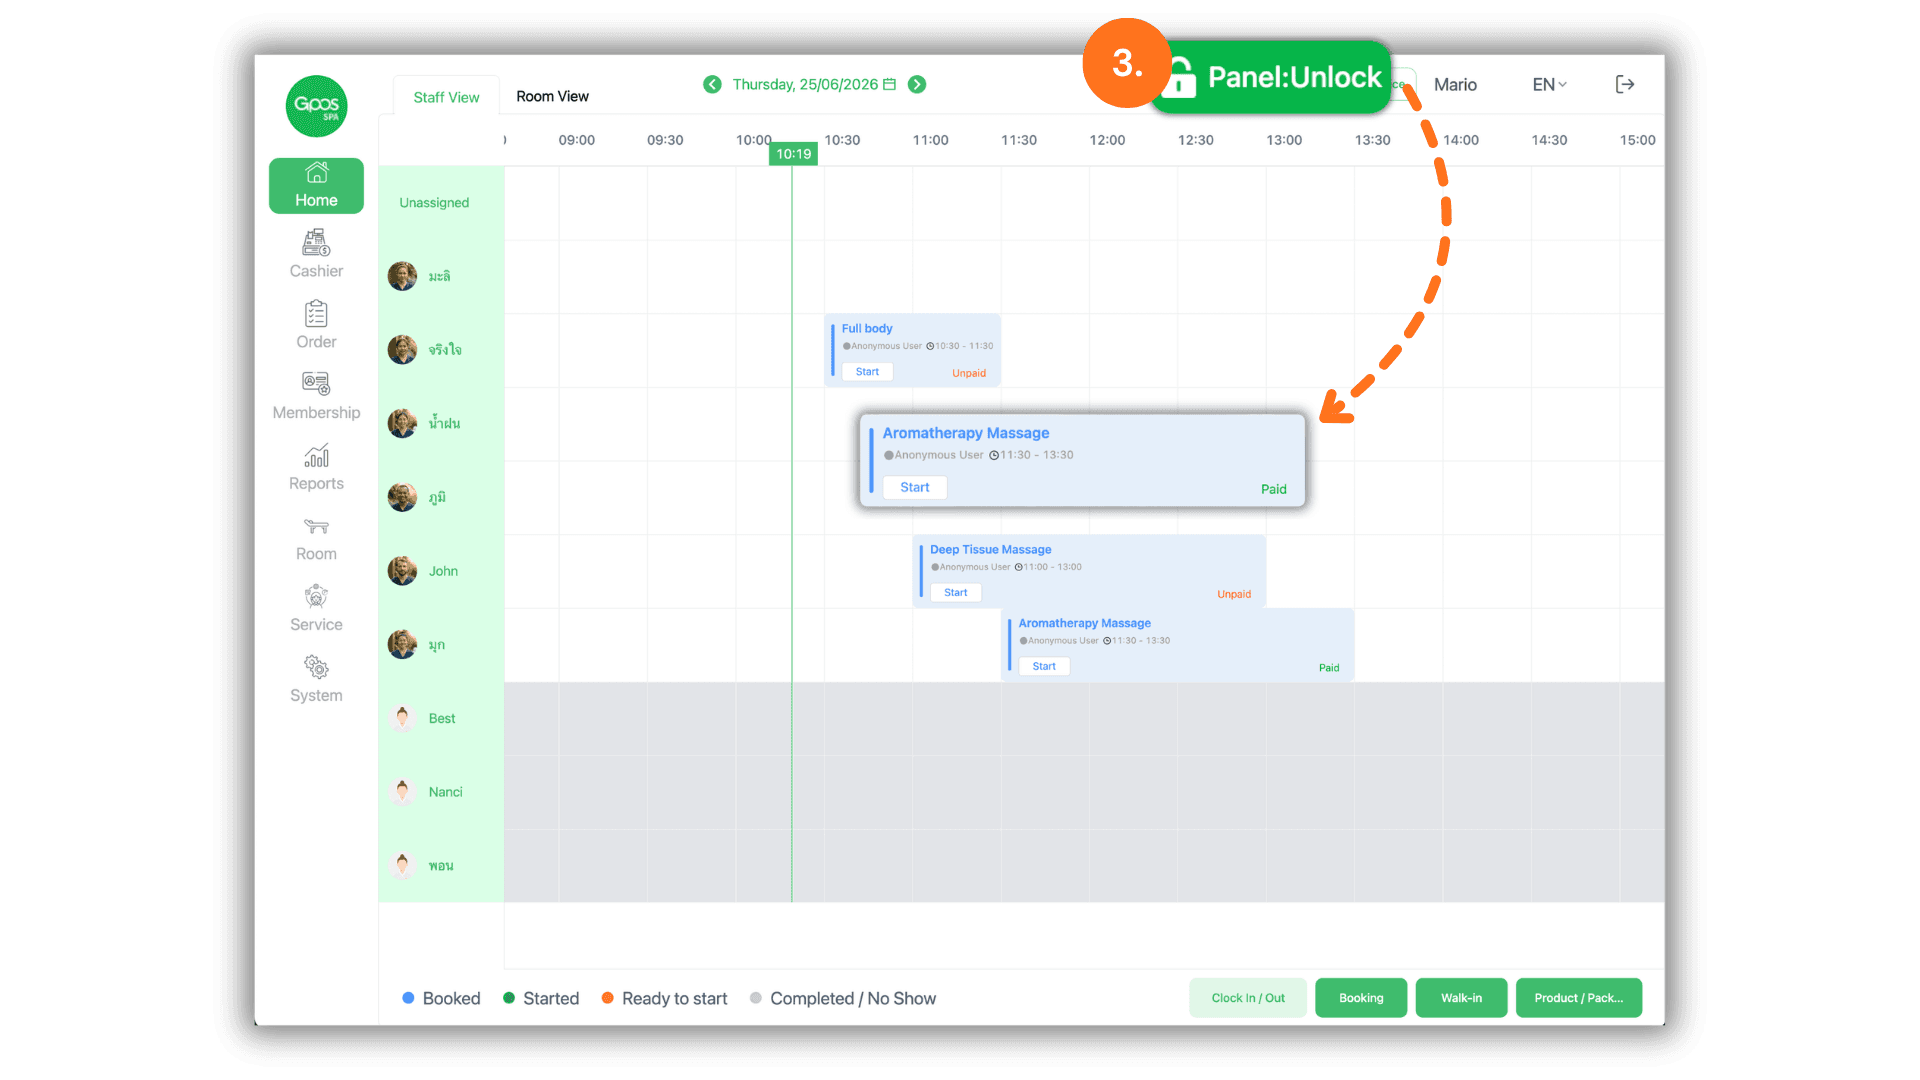
6. Adjust Duration and Save Your Changes
- Click on the green customer time badge at the top of the interface to open the interactive hour and minute matrix picker. Specify the new service boundaries.
- Once the correct hours, minutes, or durations are selected, move down and click the “Save order” button at the bottom center to commit changes and instantly update the system schedule status.