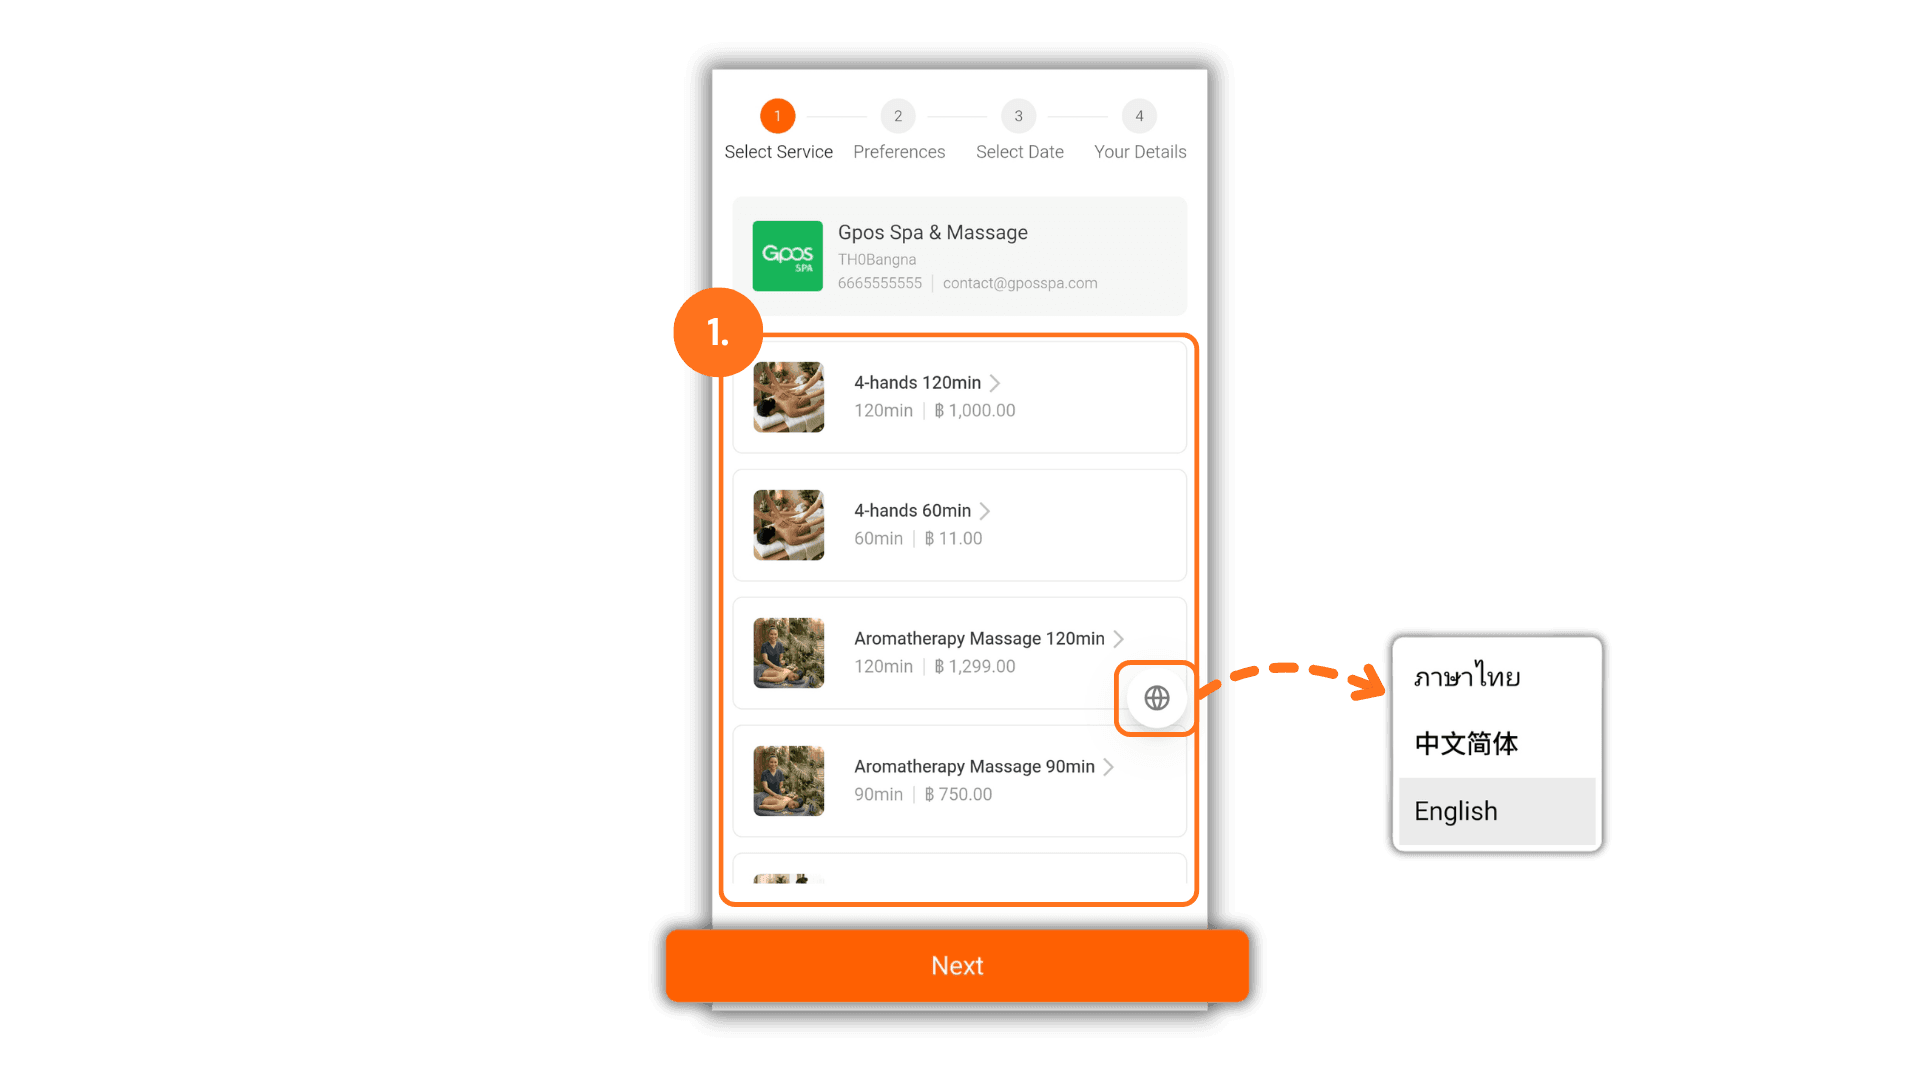
1. Select Your Desired Service
- Customers click and select the specific service they wish to receive from the available list, then click "Next".
- Note: The system language can be switched at any time by clicking the globe icon located at the bottom right corner of the screen.
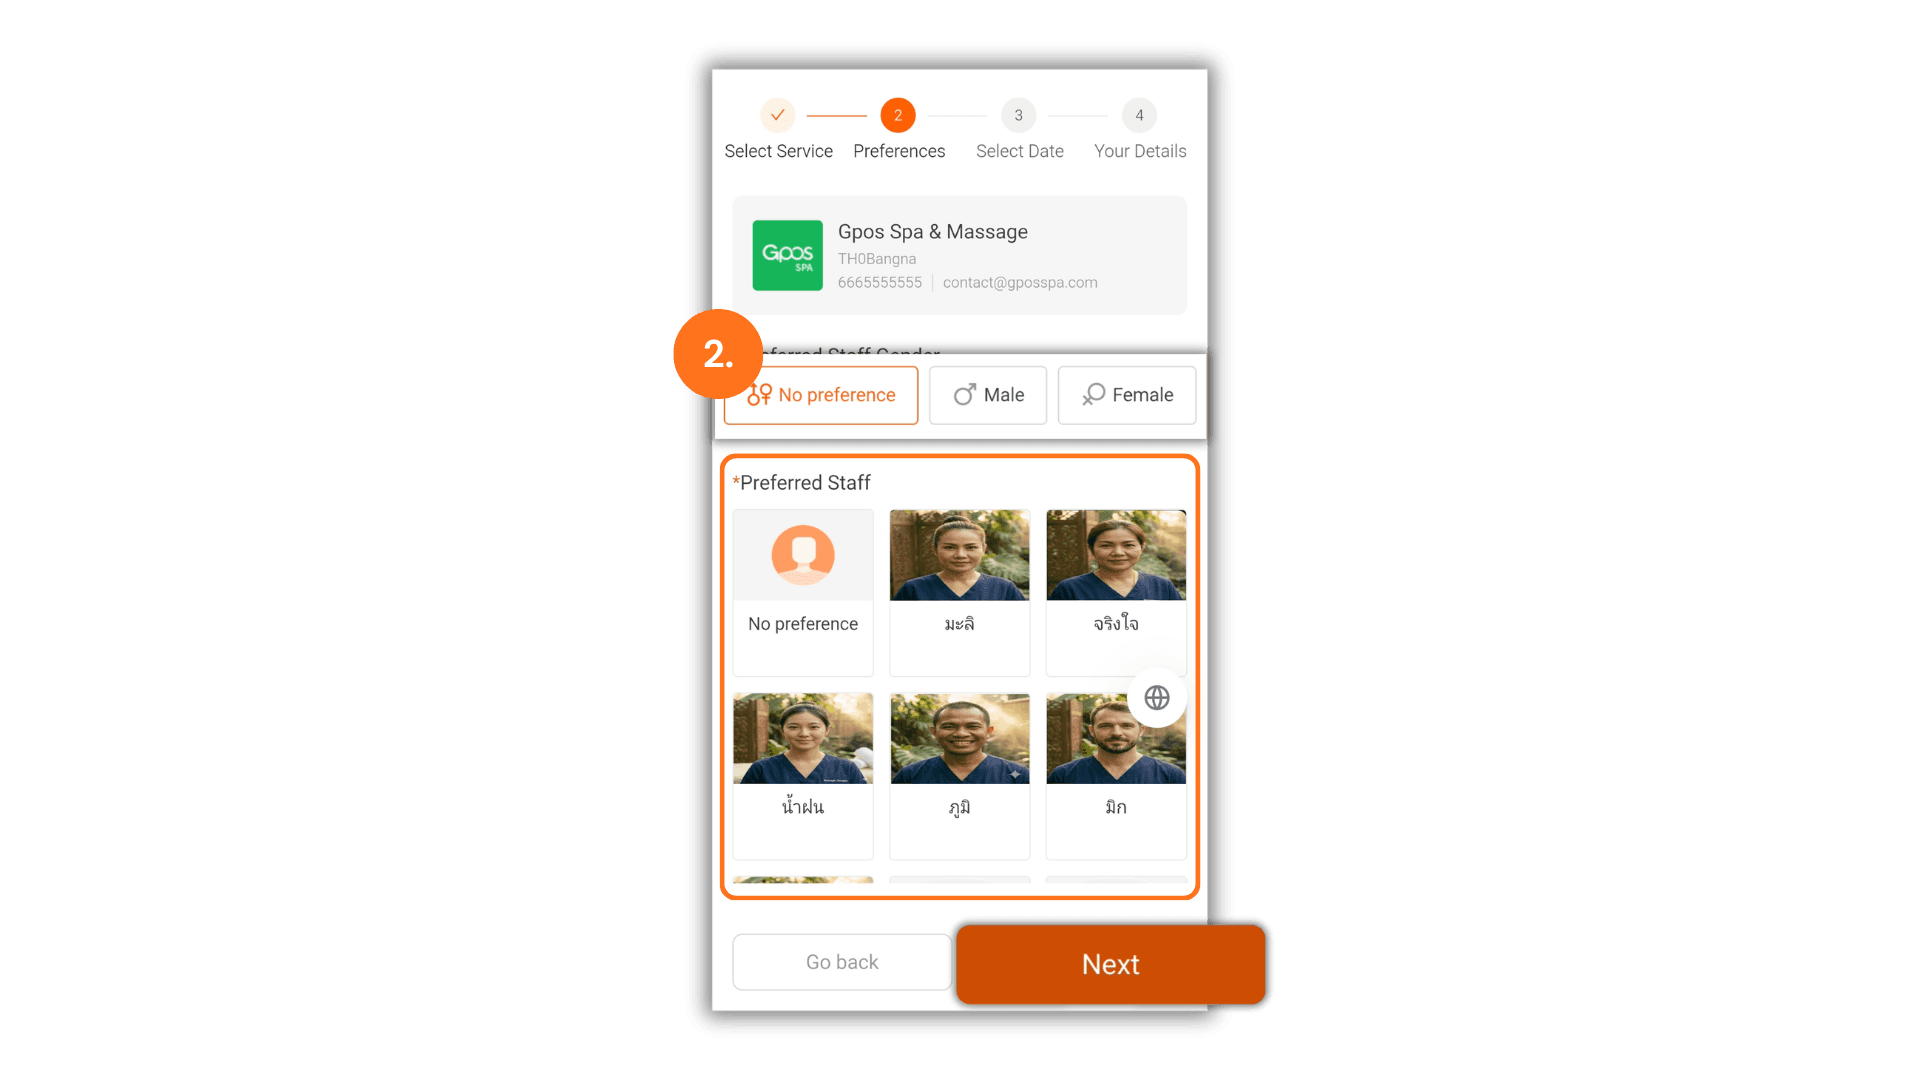
2. Select a Preferred Staff Member
- Customers can choose the preferred gender of their service provider or select a specific staff member directly from the list.
- Note: Only staff members who are qualified and assigned to perform the previously selected service will be displayed here.
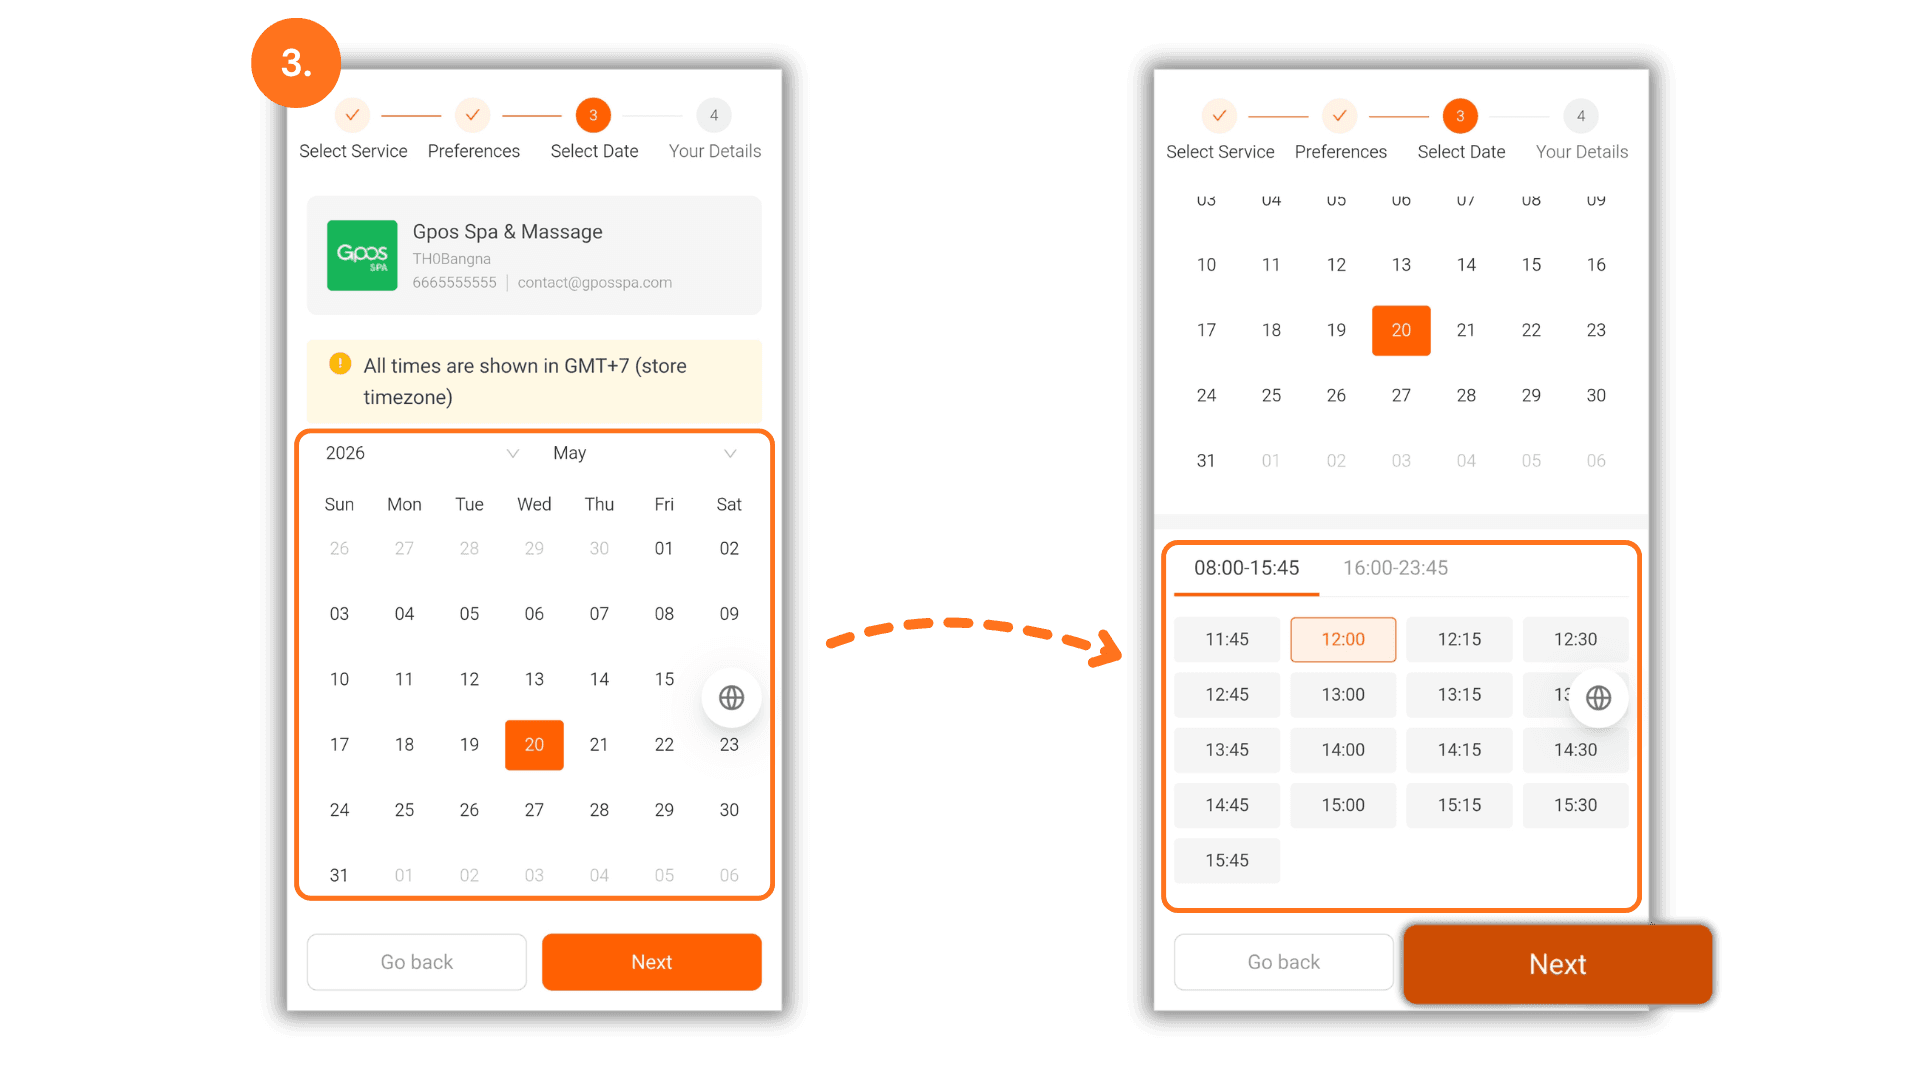
3. Choose Booking Date and Time
- Customers select their preferred appointment date on the interactive calendar, then click on any available time slot displayed by the system.
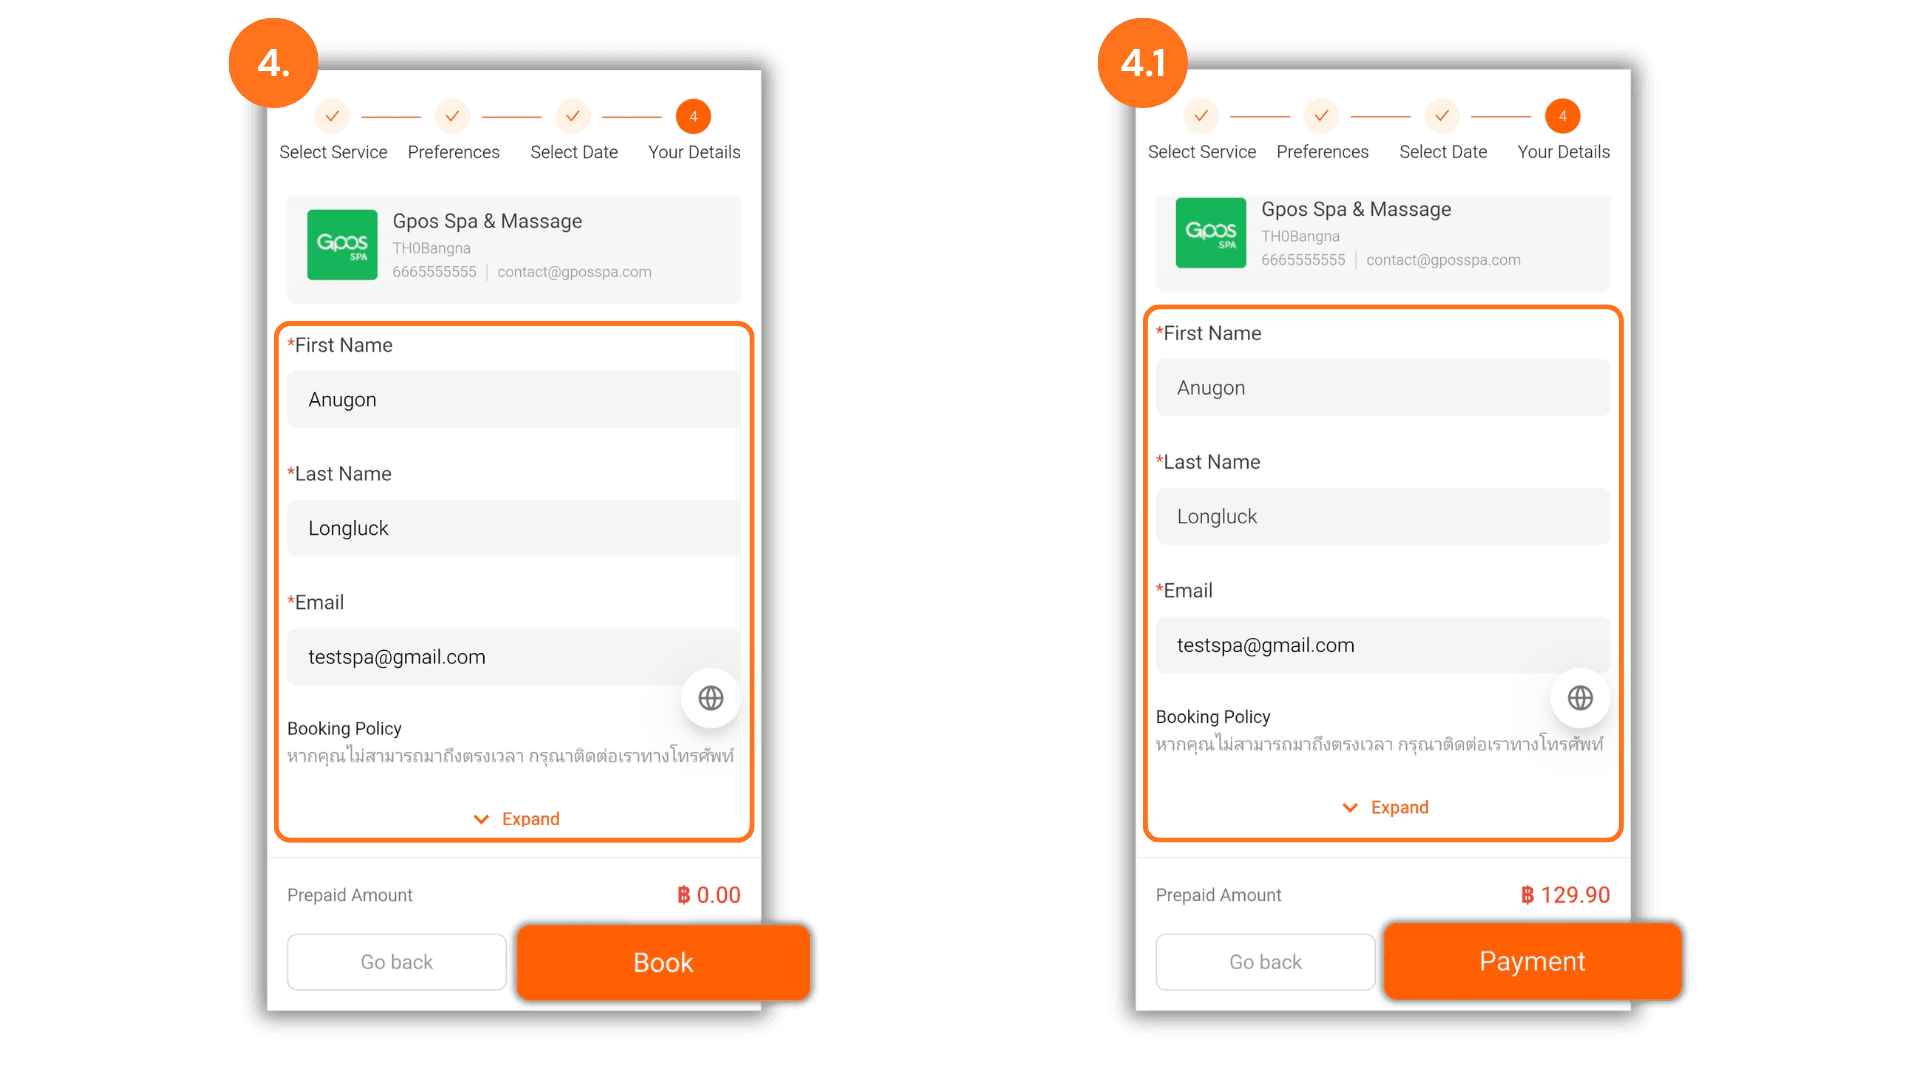
4. Enter Customer Information and Verify Deposit
- Fill in the basic contact details, including Name and Email, so the store can verify the booking slot, then click "Book" to submit.
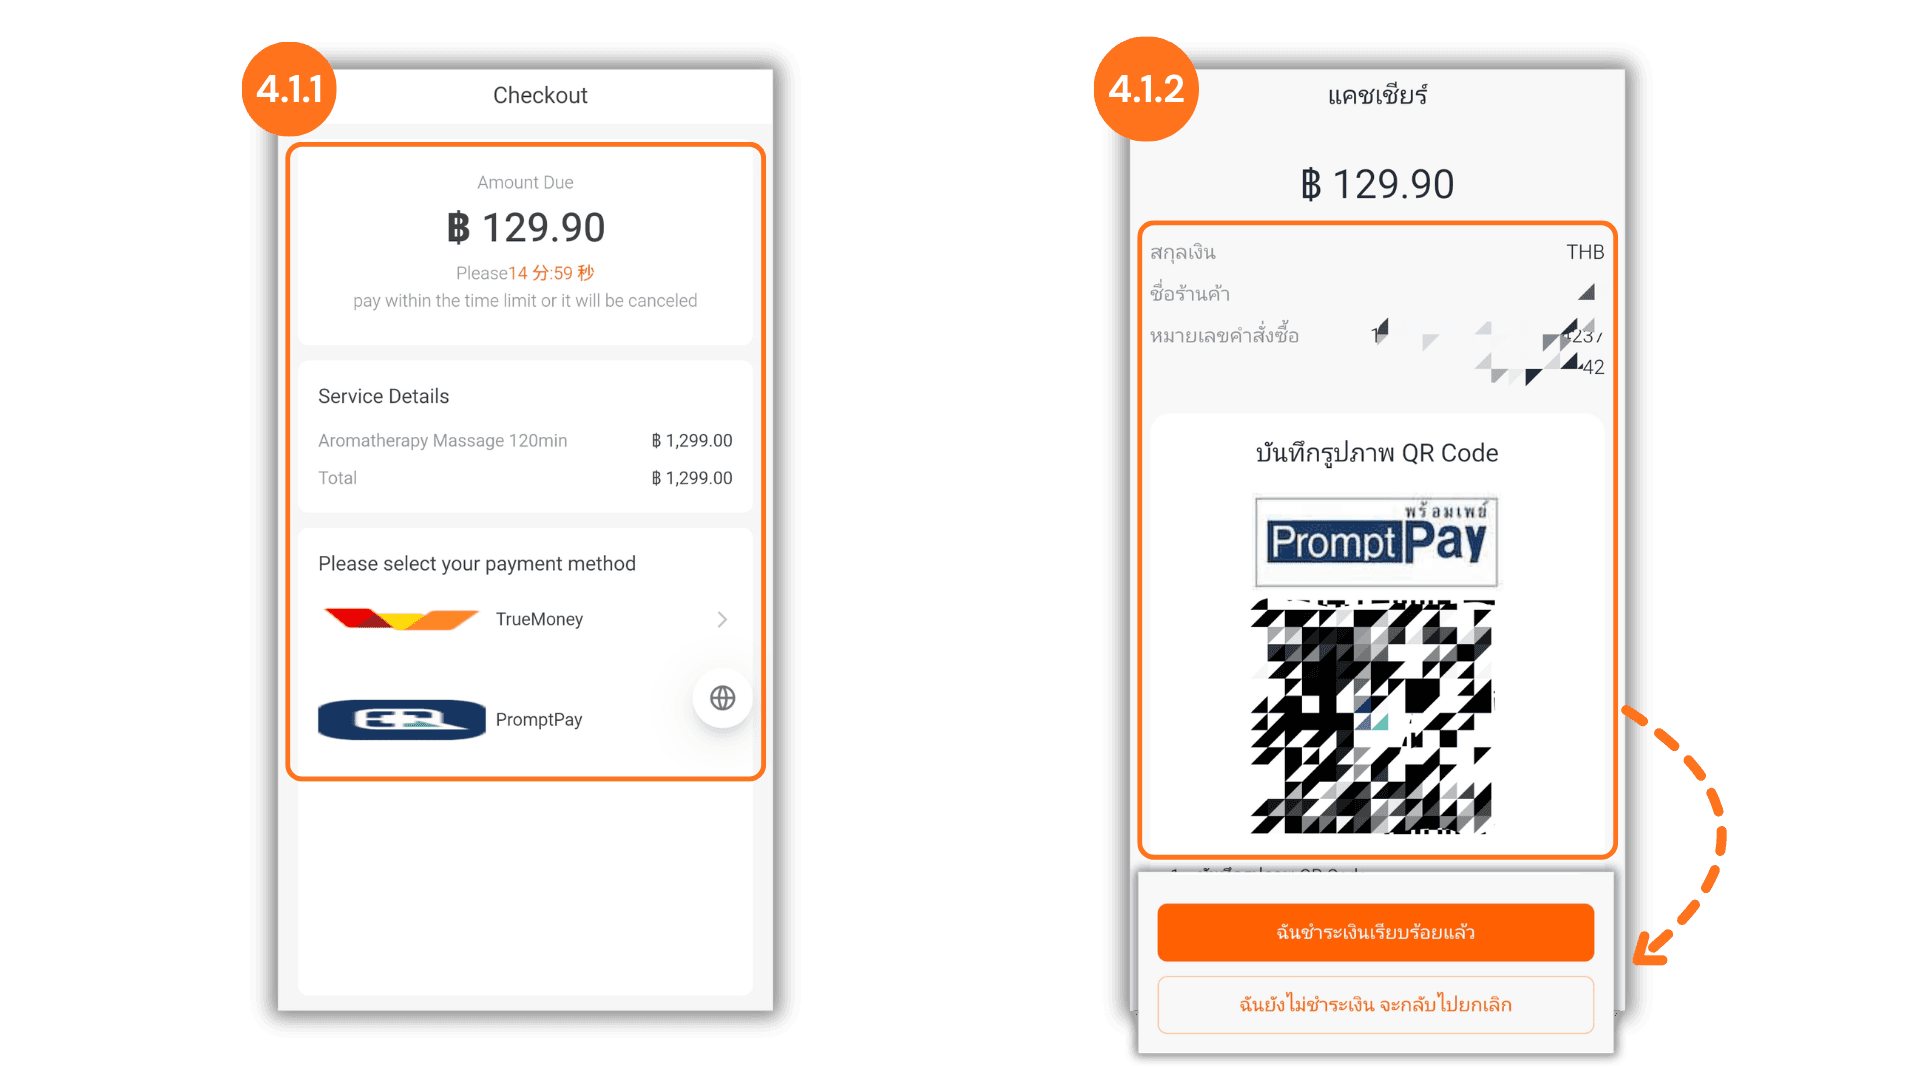
- Note: If the store has enabled a booking deposit system (Prepayment), customers can review the required advance payment amount on this screen before proceeding to the payment window.
- 4.1.1: Customers can select their preferred payment method or channel to generate the payment interface.
- 4.1.2: Scan the generated QR code using a mobile banking application to make the deposit. Once the transfer is complete, click "I have successfully paid" to securely save the reservation in the system.
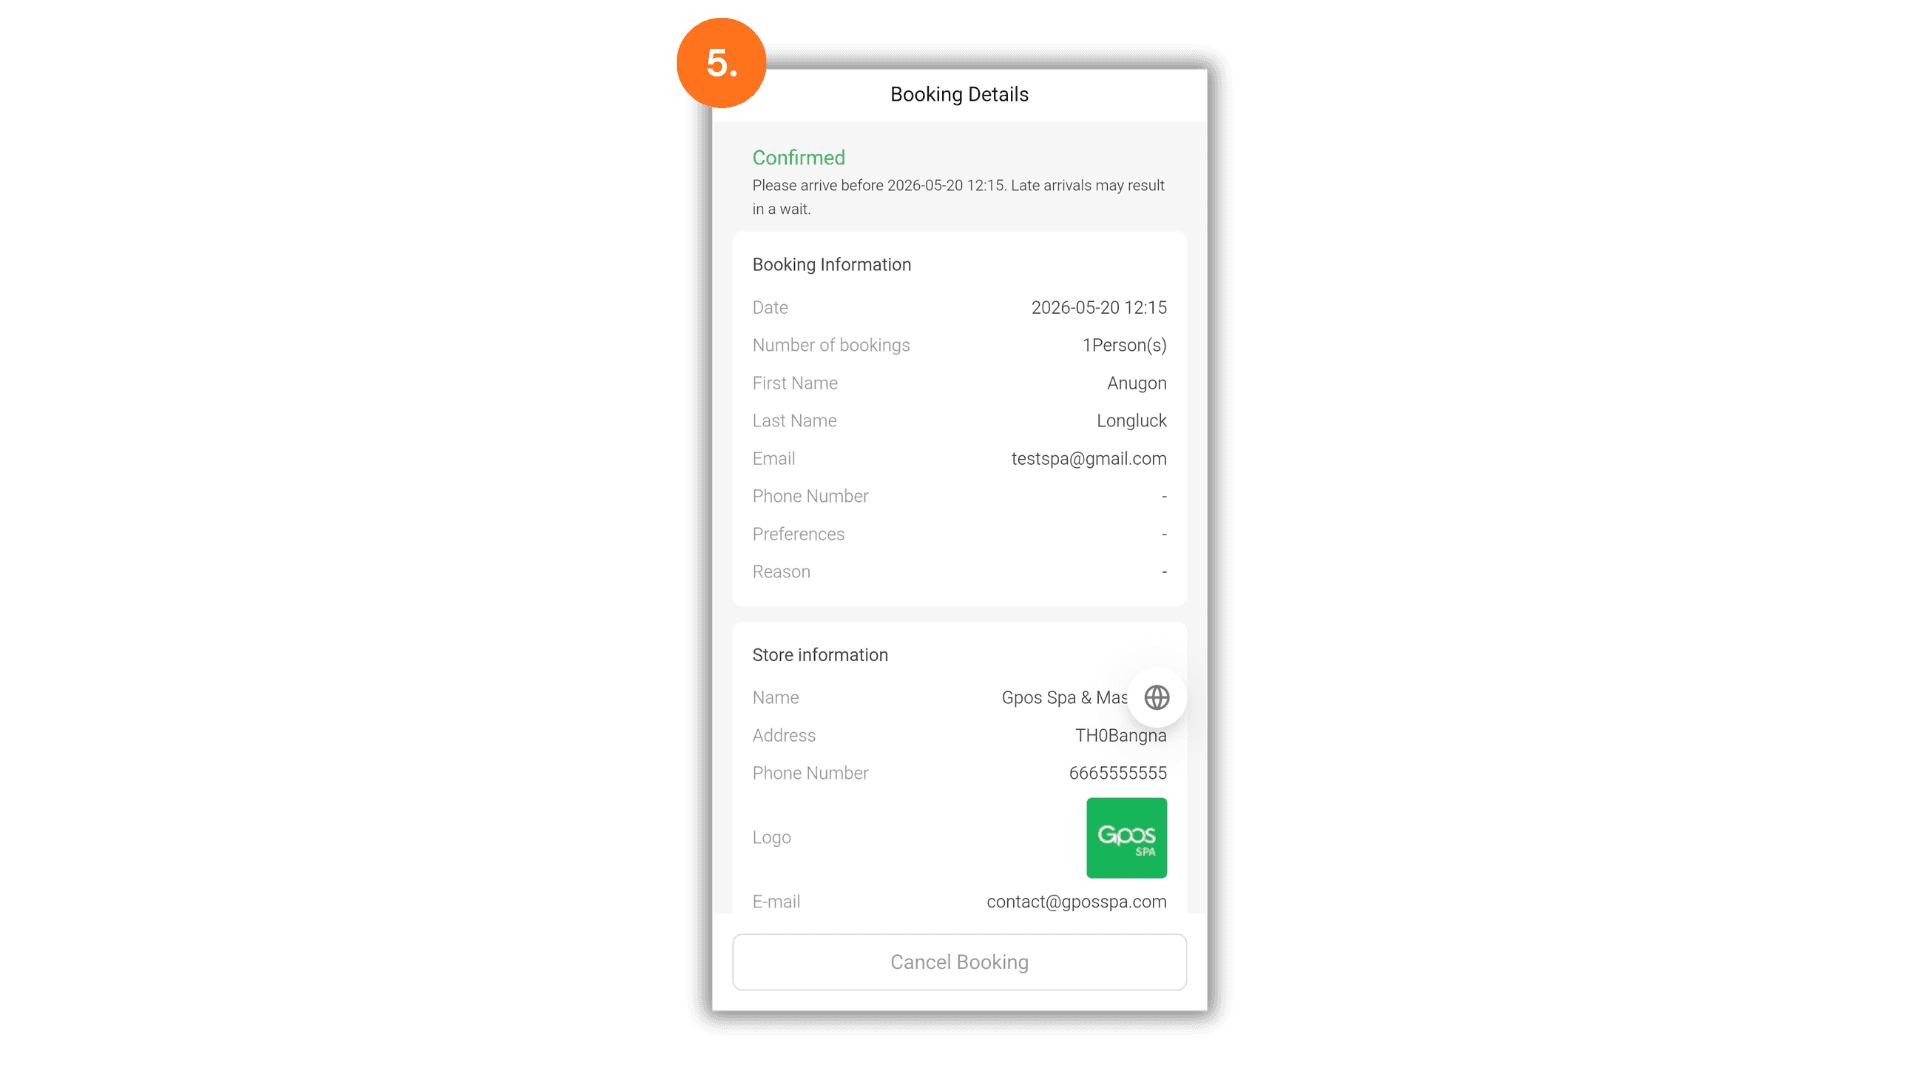
5. Present the Booking Summary to the Store
- Once the process is finished, a booking confirmation summary screen will appear. Customers can present this page to the store's staff to quickly verify their appointment details upon arrival.
6. Real-Time Store Notification
- After the customer completes the booking and payment process, all appointment details are immediately transmitted to the backend system, instantly flashing an alert on the store's computer or tablet screen so the team can prepare ahead of time.
